C.V.SmithARTWORKS
  • Home
  • Blog
  • Sculptures
    • Bronze
    • Clay / Apoxie Clay
    • Plaster
    • Wood
    • Stone
    • SLIDESHOW
  • Galleries
  • Contact
  • Book
  • River Arts
  • BRAF
  • Saltwater Artists
  • CMCA
  • Yarmouth Art Festival

Deep Sea Diver ... Driftwood Rescued, Rehabbed, and Reborn

4/29/2021

0 Comments

 
Picture
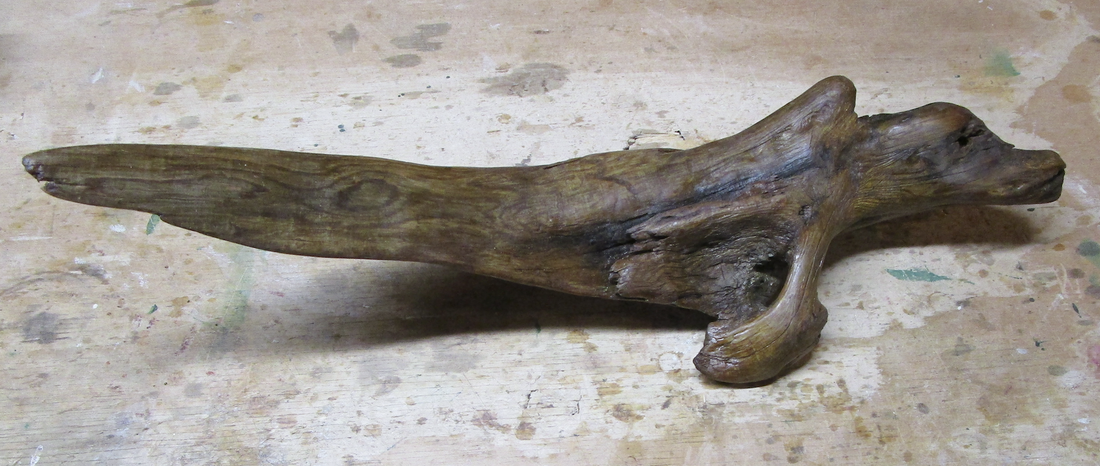
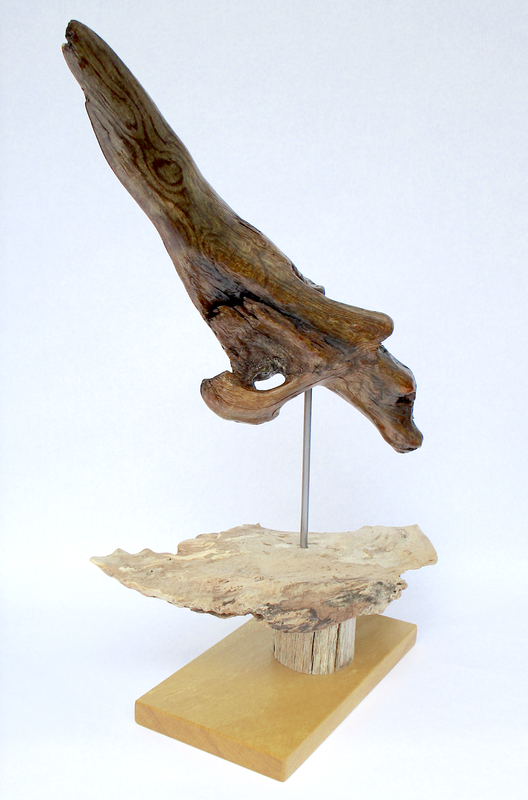
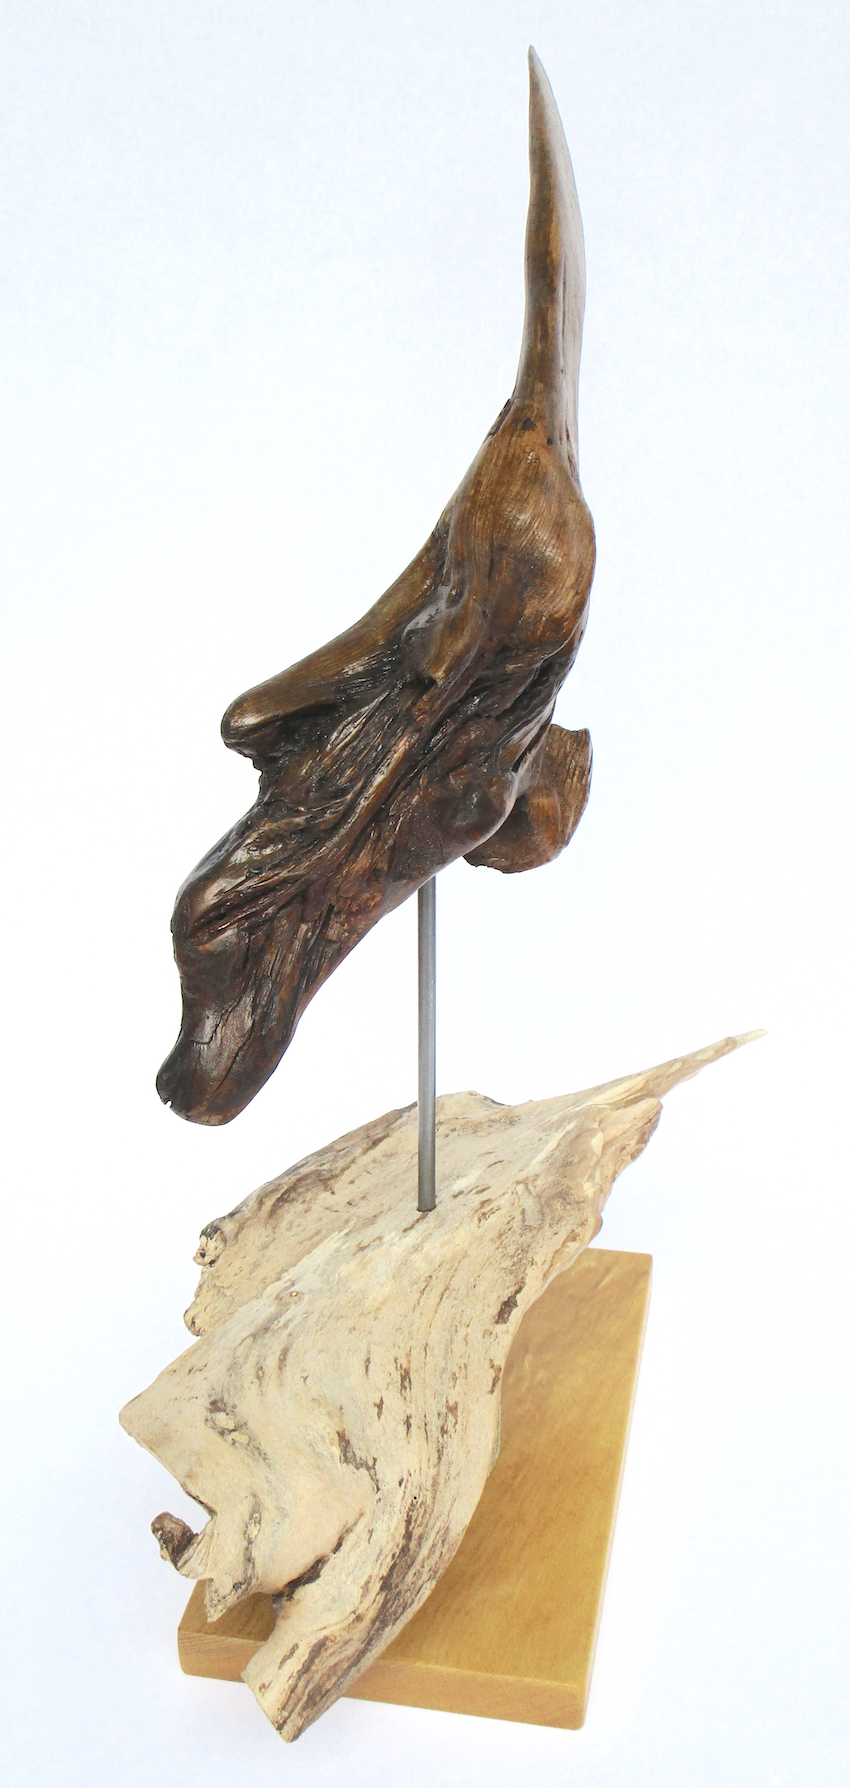
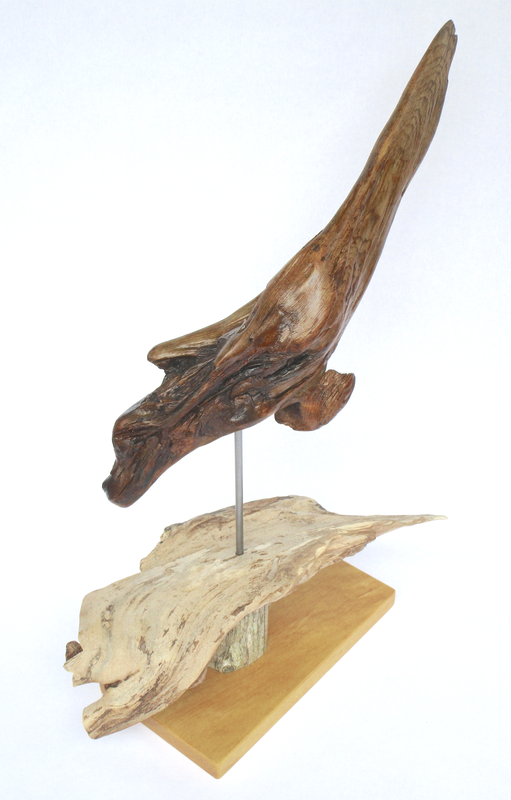
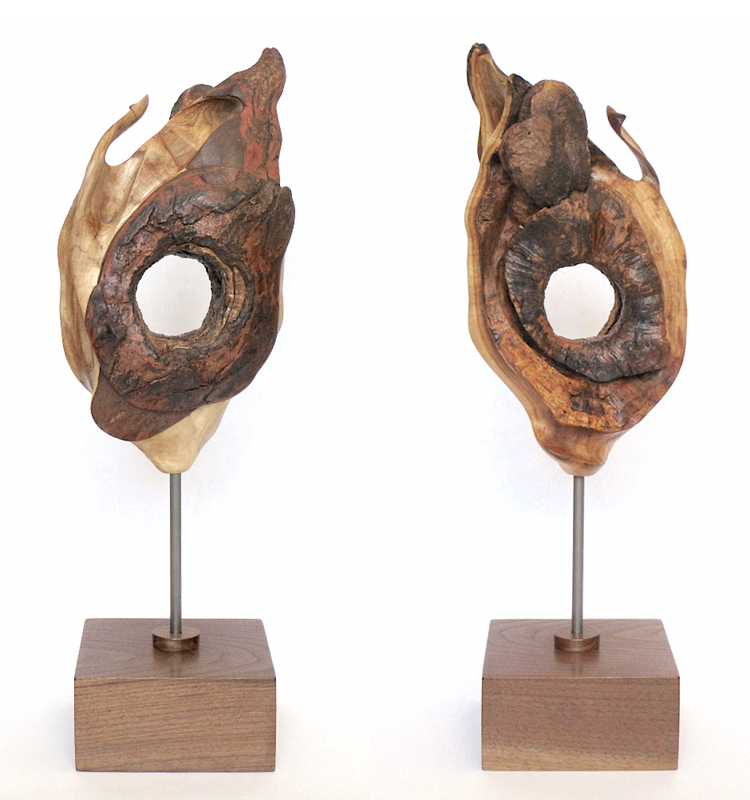
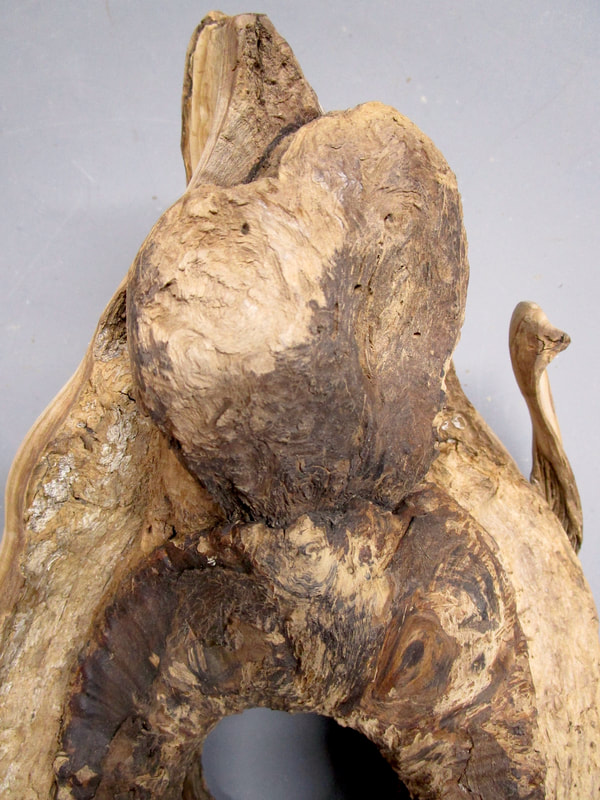
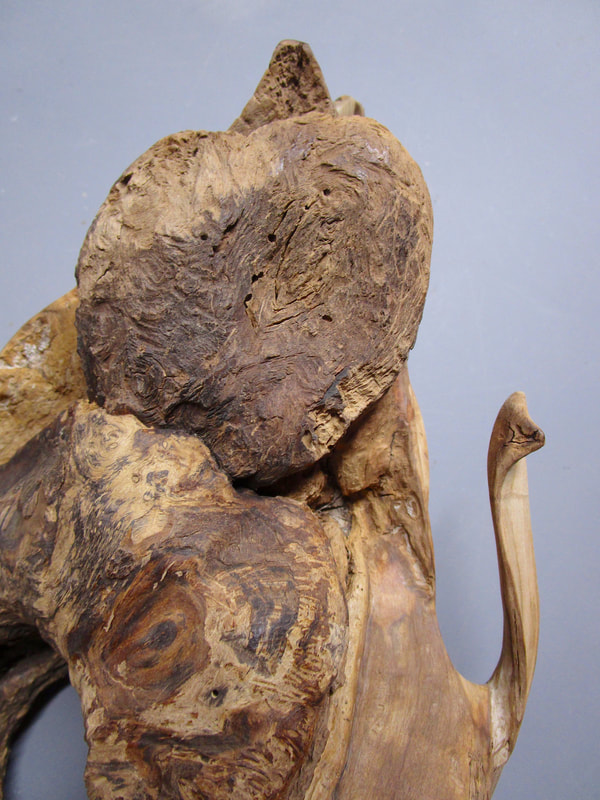
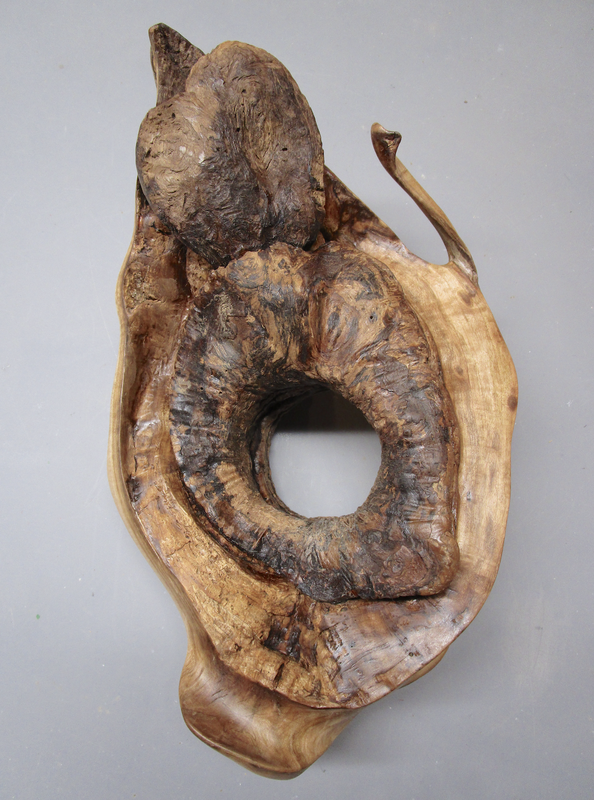
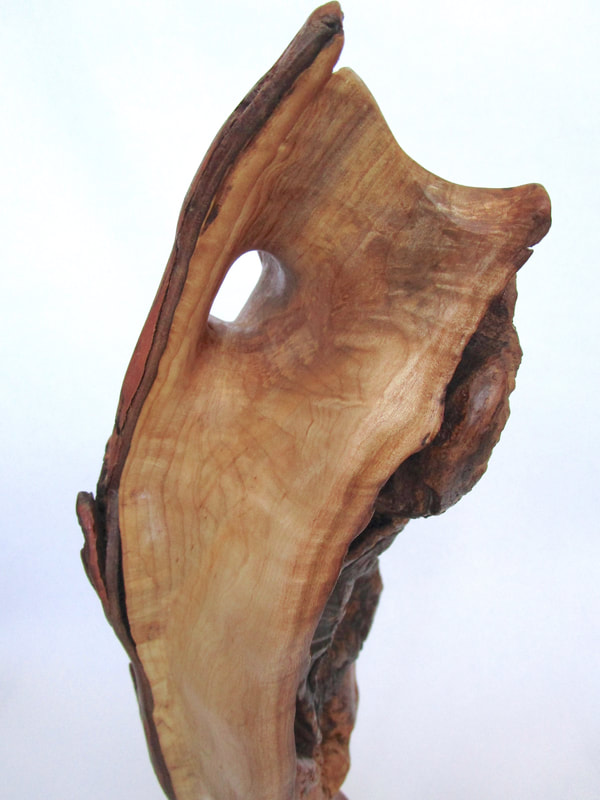
Driftwood "seal" - view 1
Picture
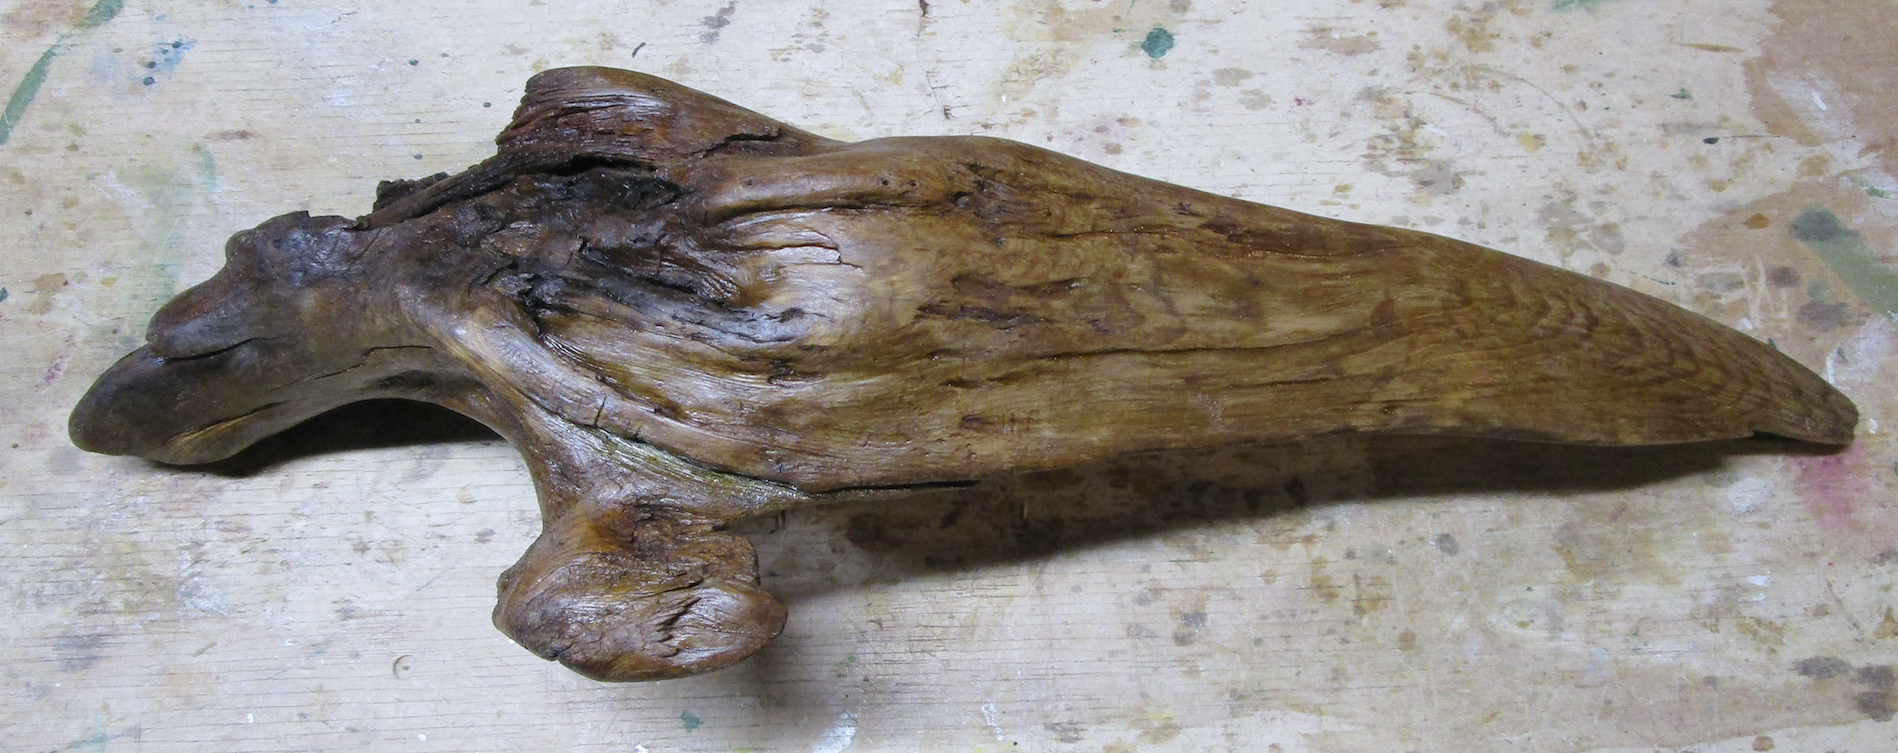
Driftwood "seal" - view 2
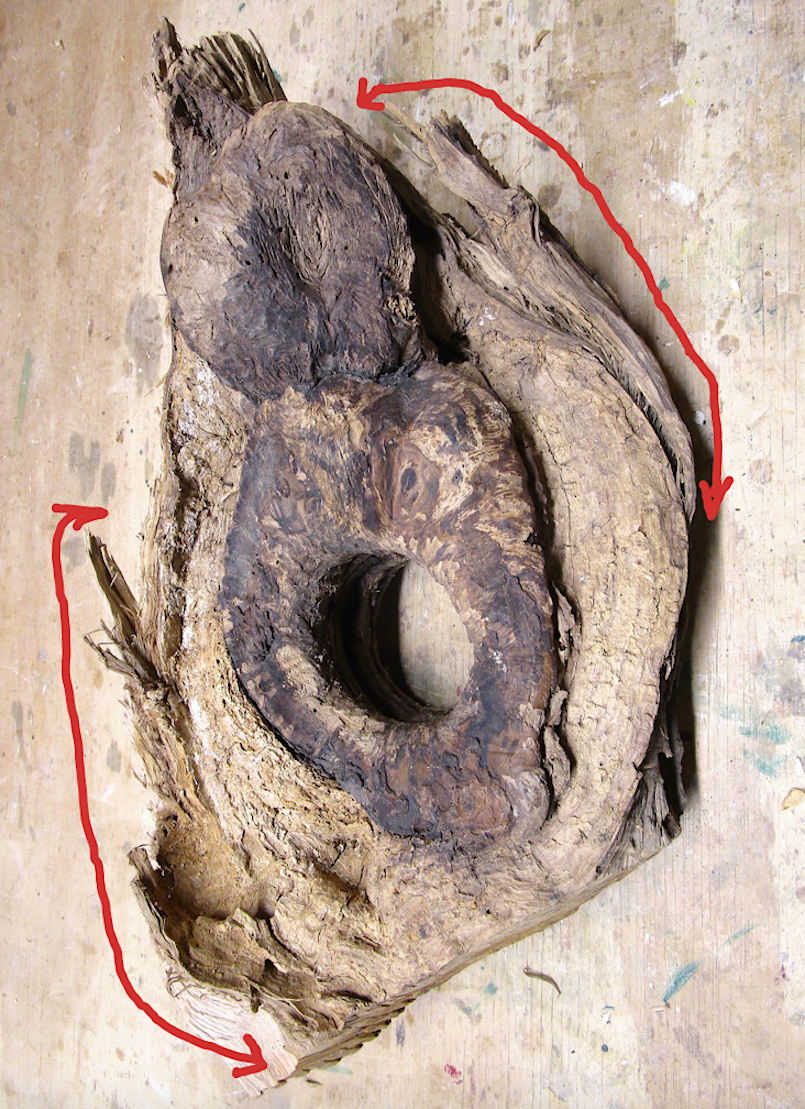
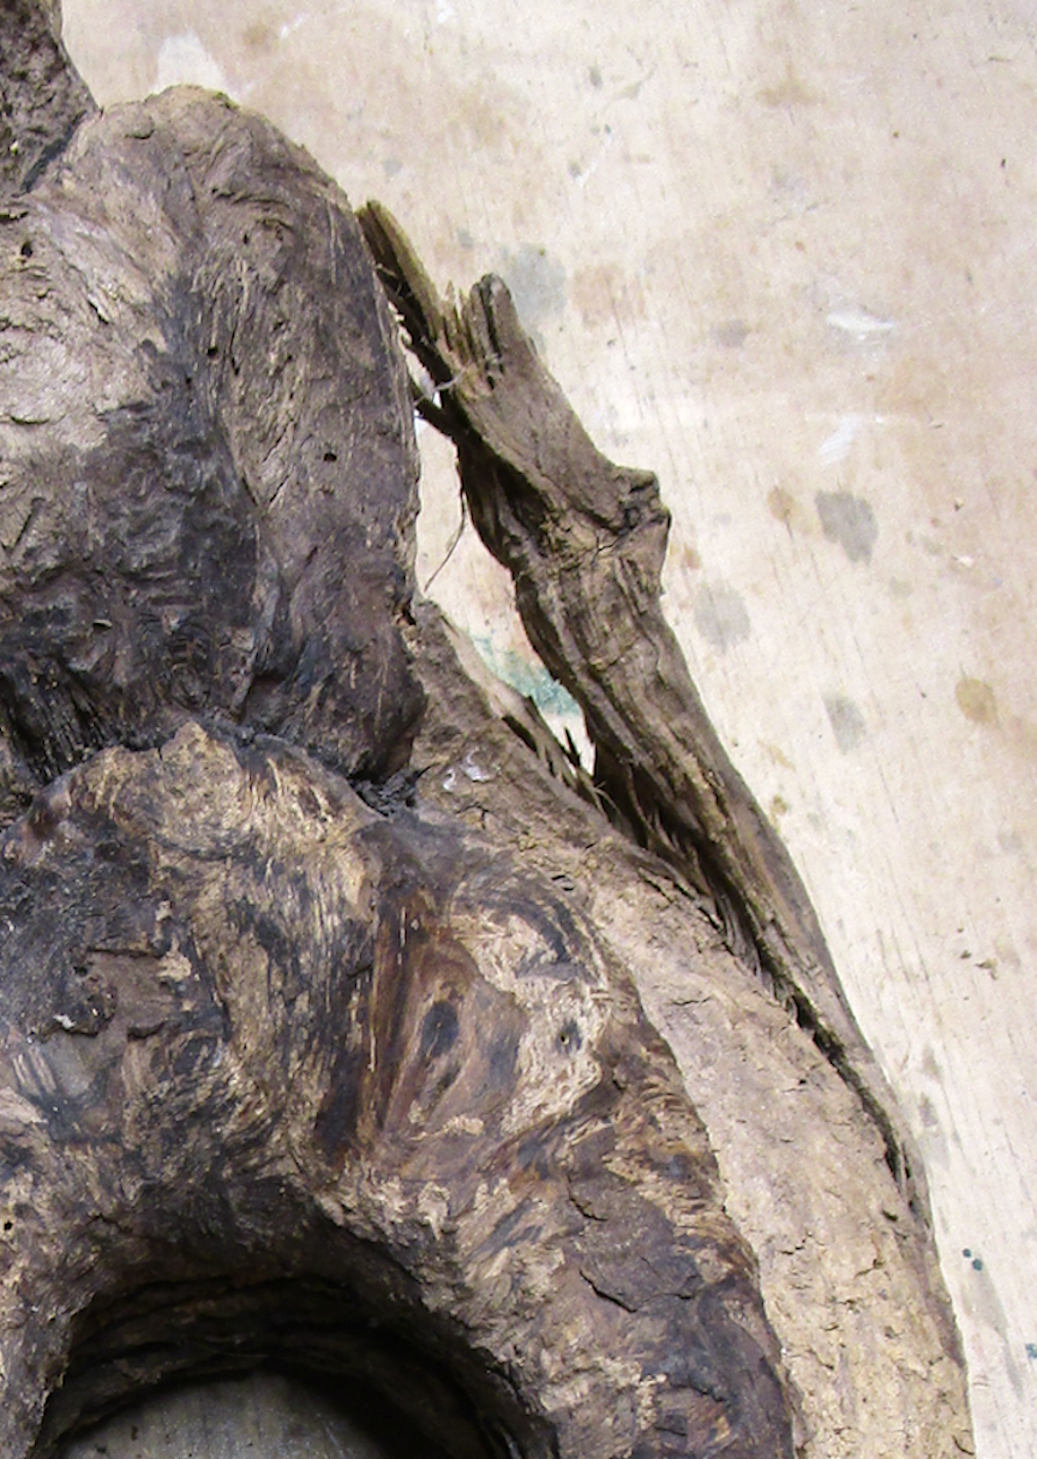
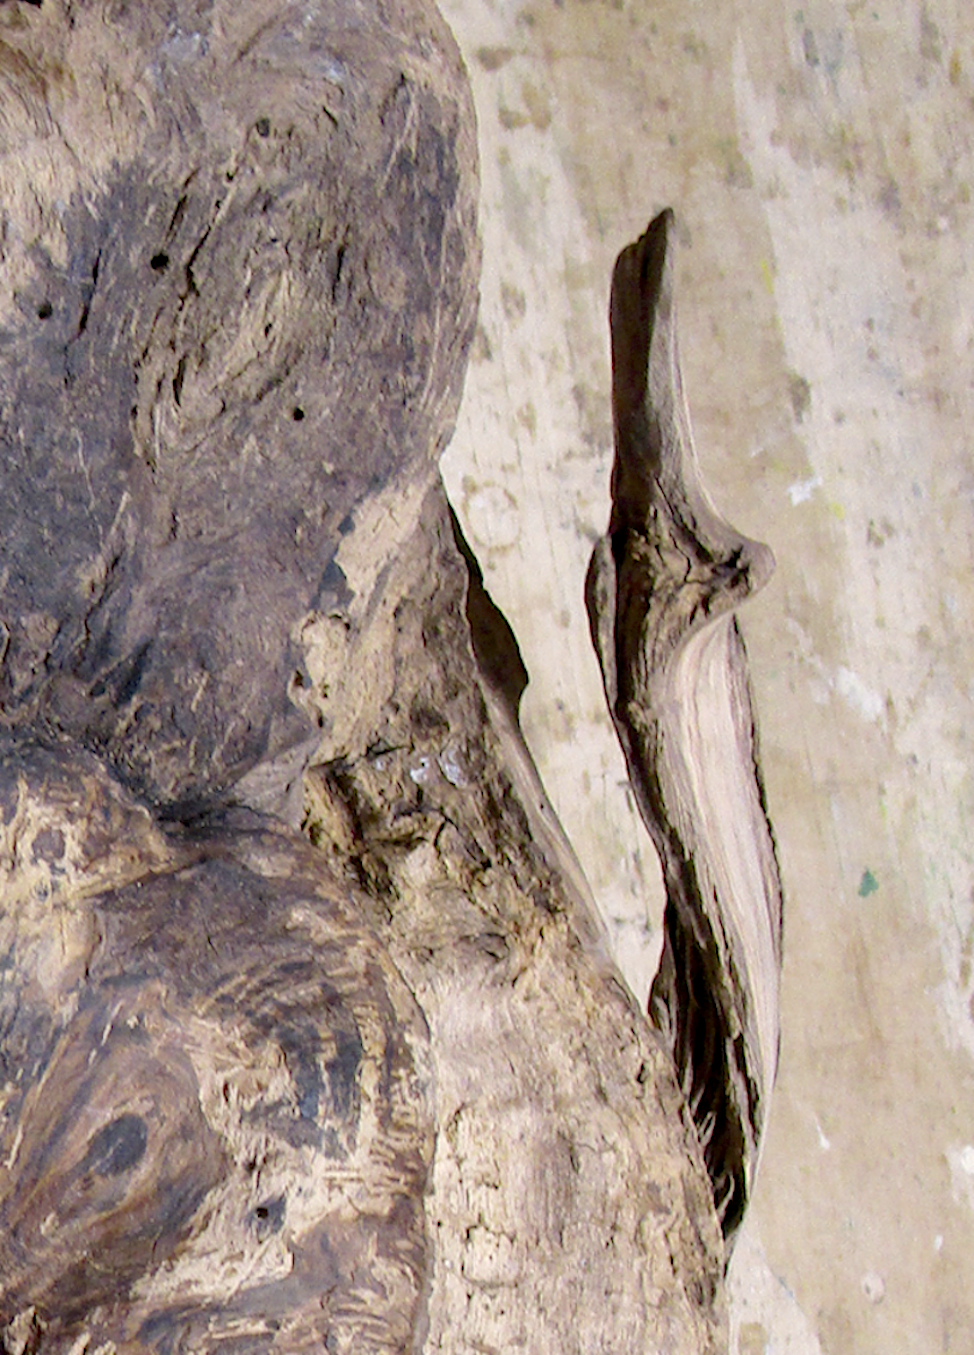
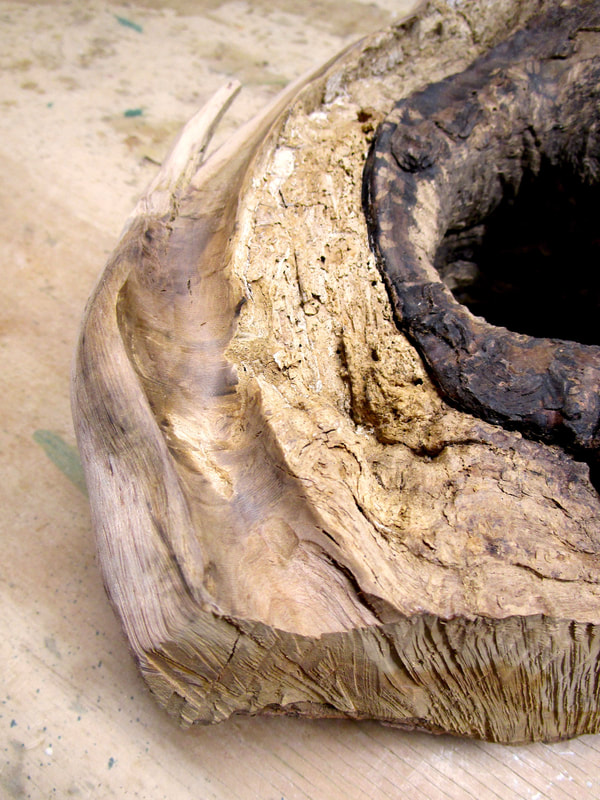
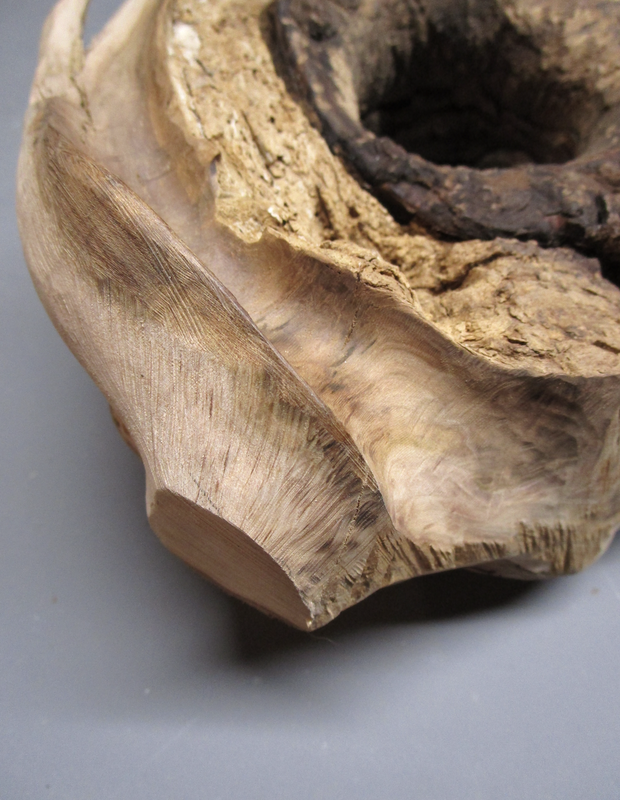
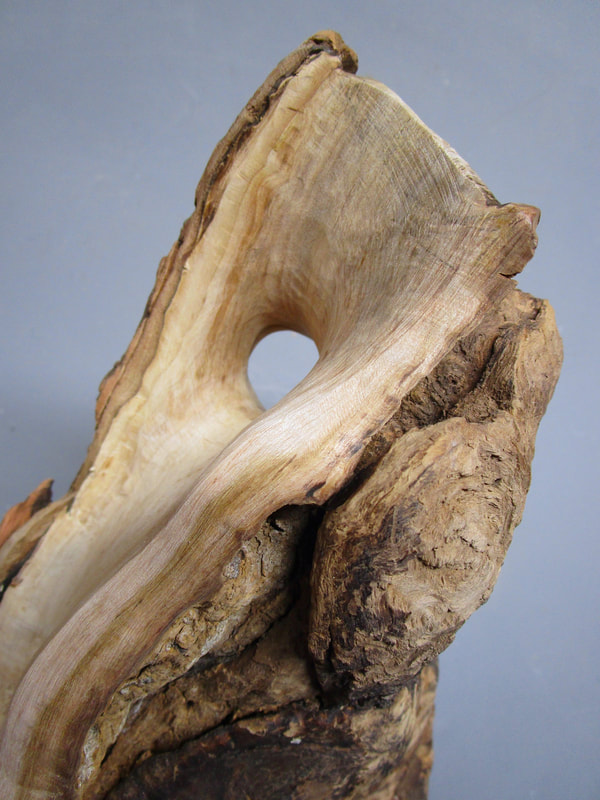
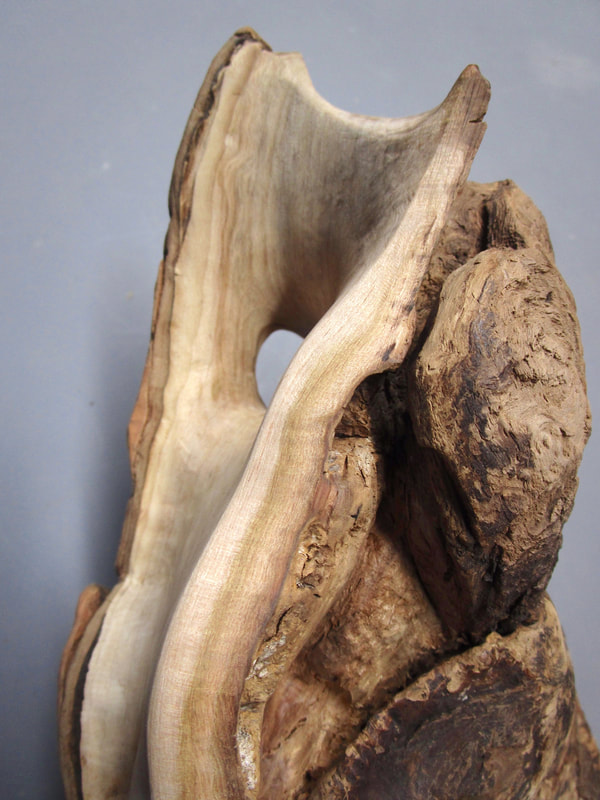
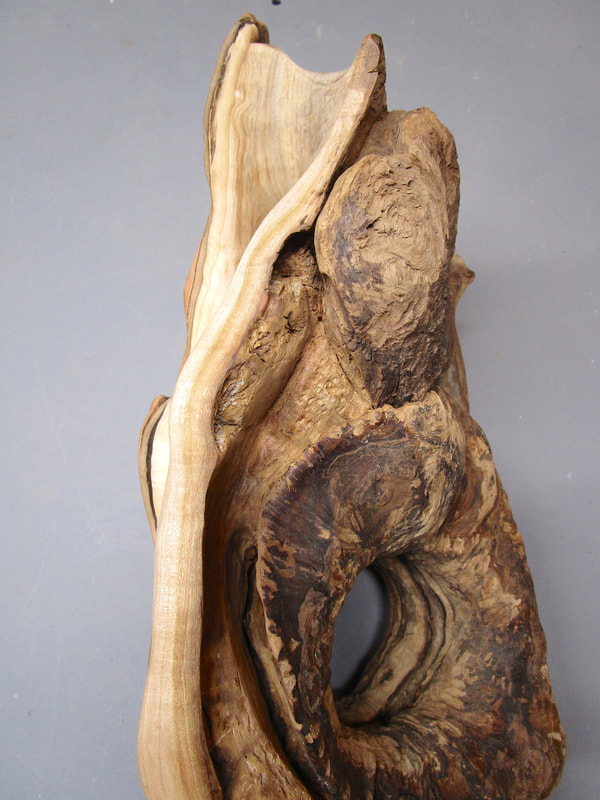
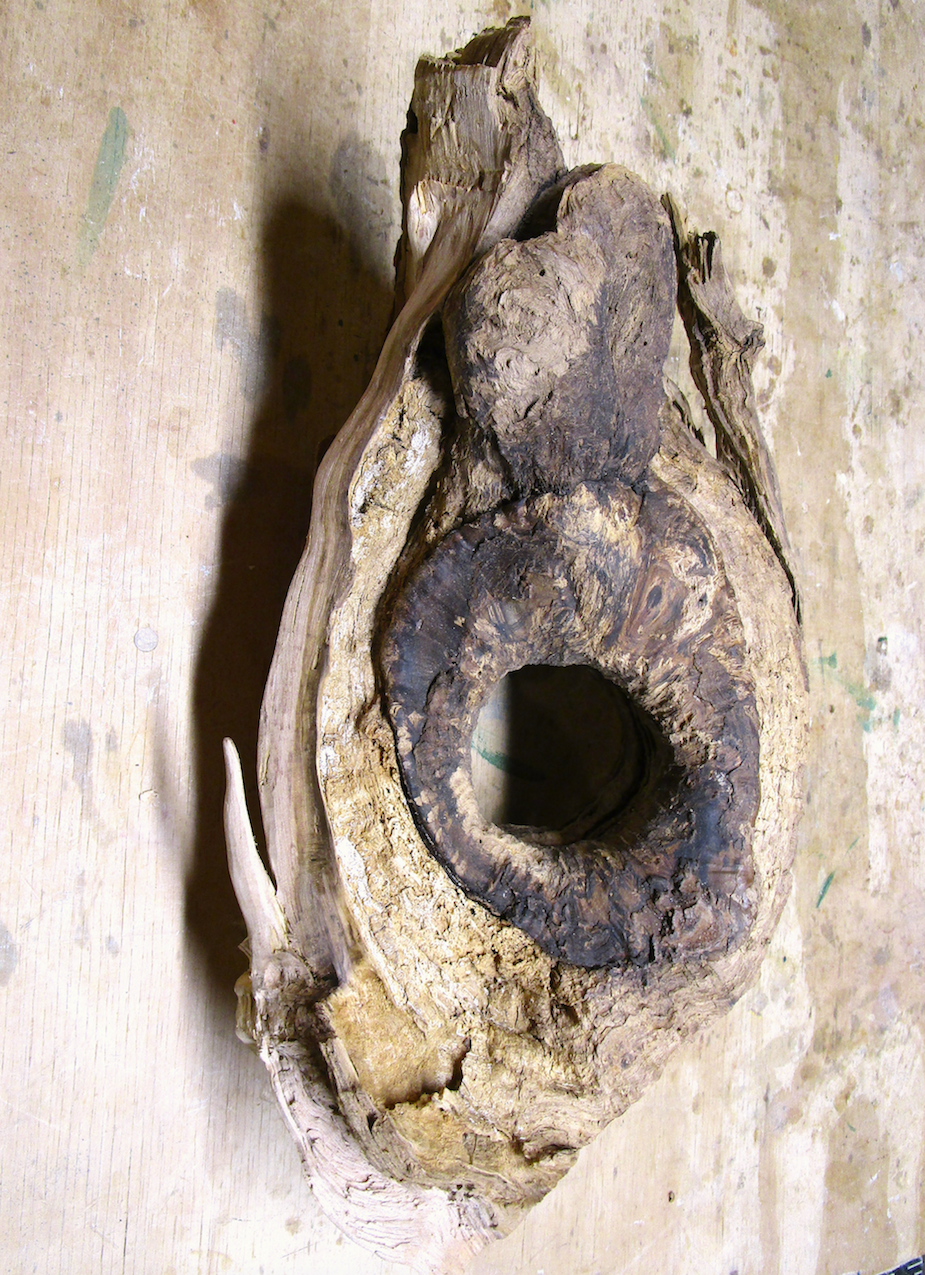
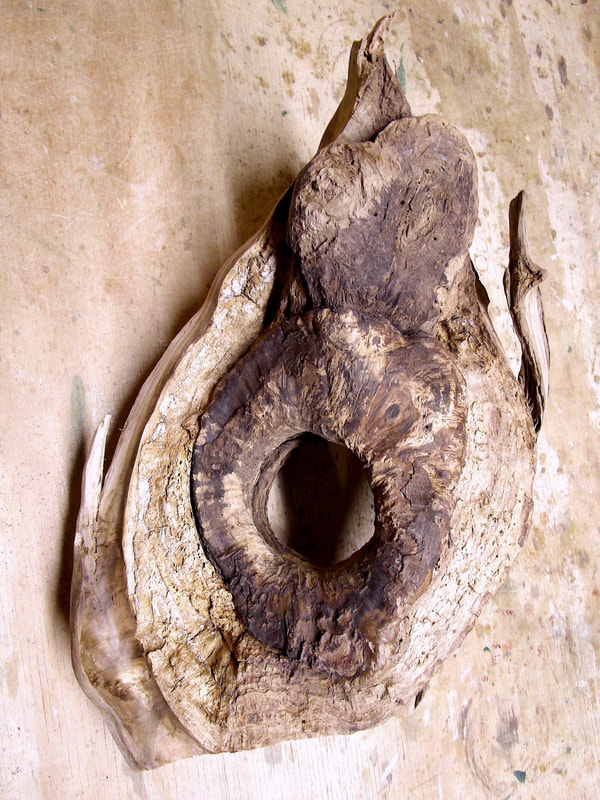
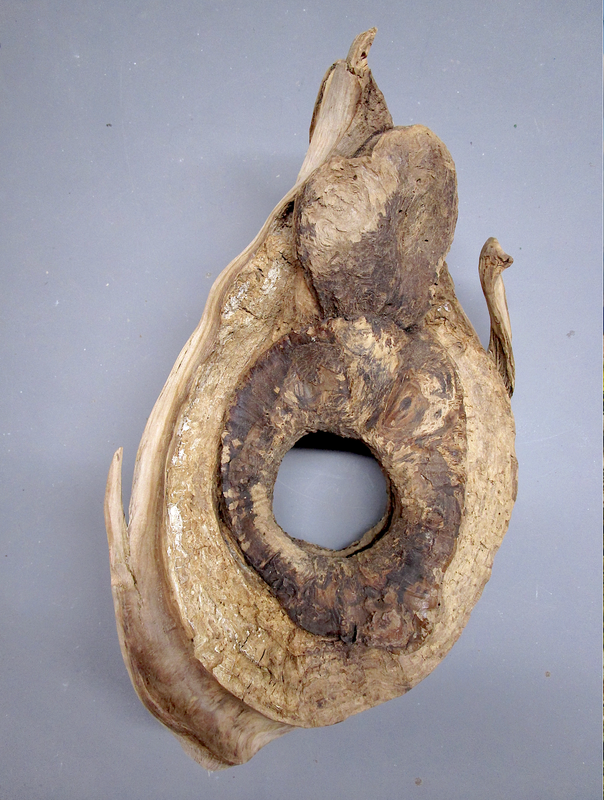
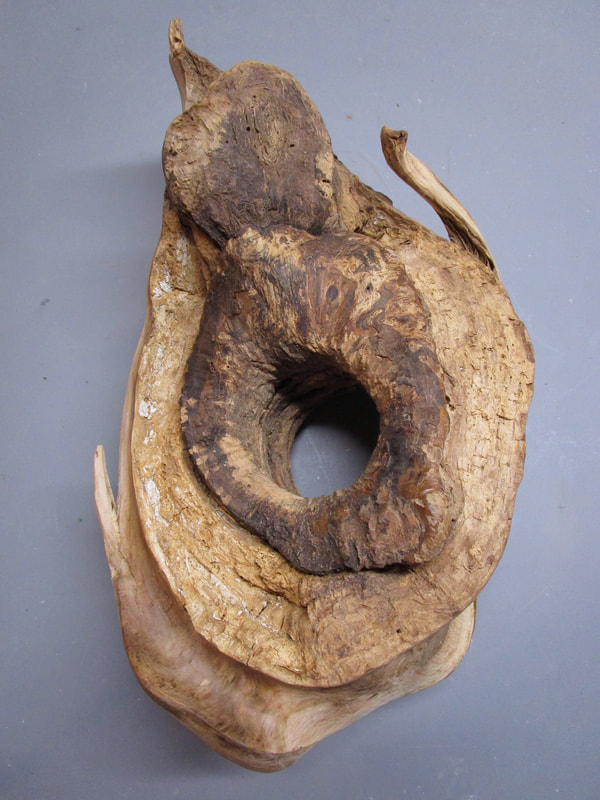
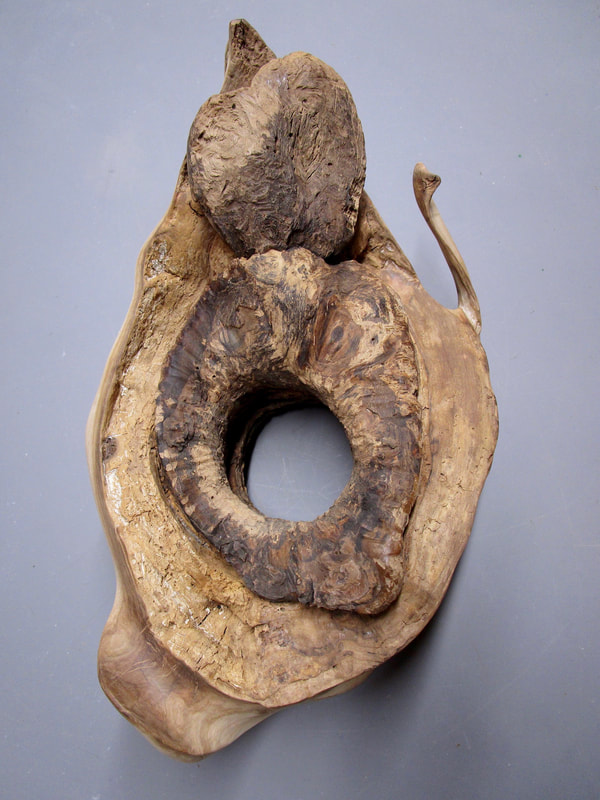
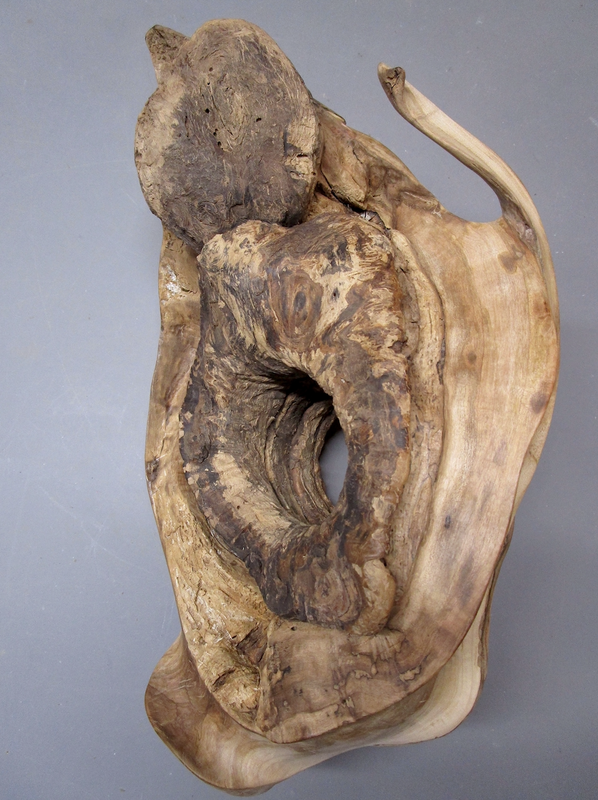
     My latest project was the rehabbing and rebirth of a piece of driftwood that I found a number of years ago at a coastal antique/collectible/junk shop. Someone had tapered it, sanded some areas smooth, given it a glossy coat of shellac or polyurethane and some kind of push pin eyes. How it eventually ended up at the shop I don't know, but it called out to be rescued. I wasn't sure what I was going to do with it, but I couldn't leave it behind. 
Picture
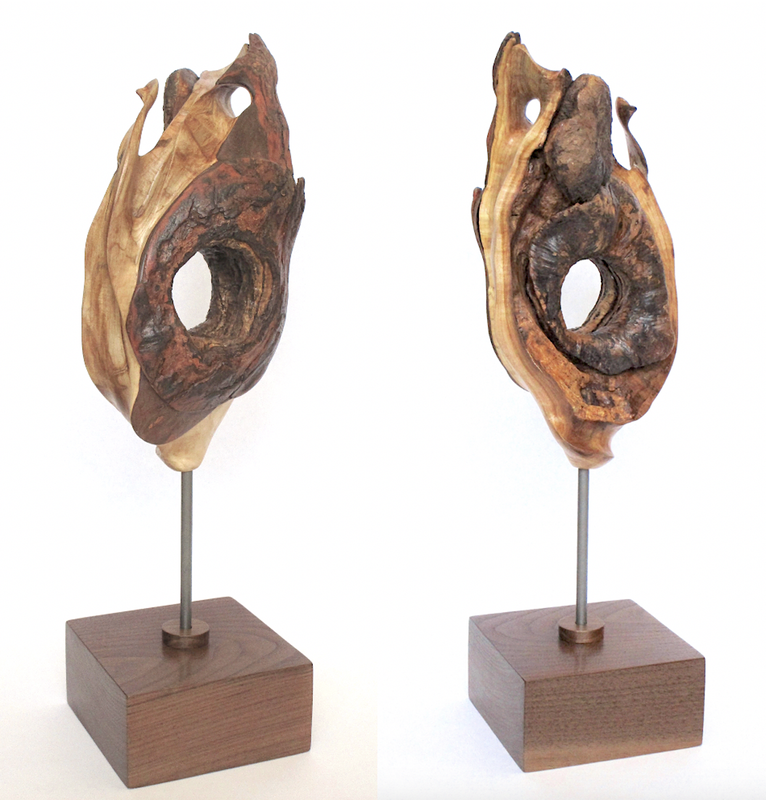
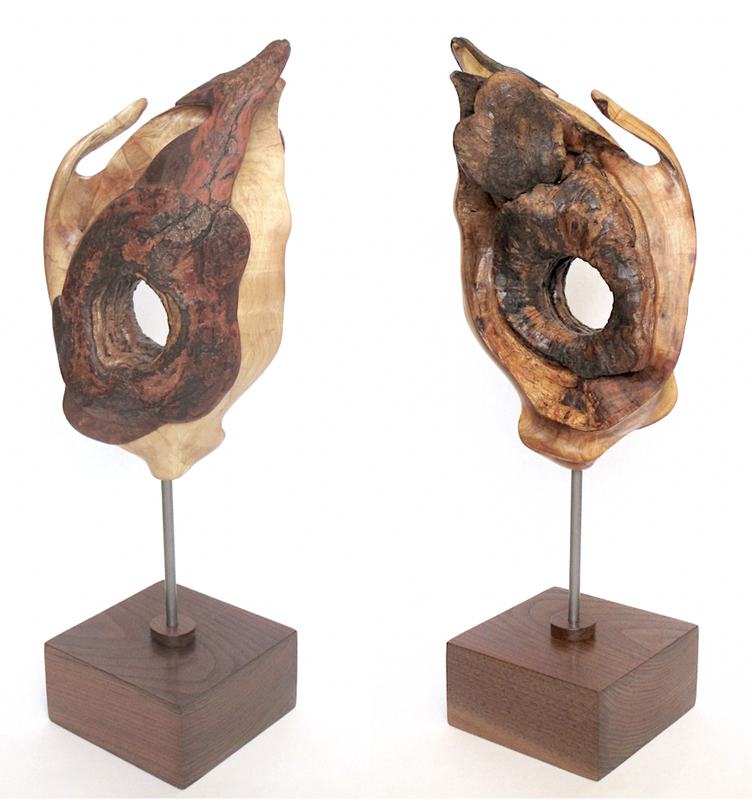
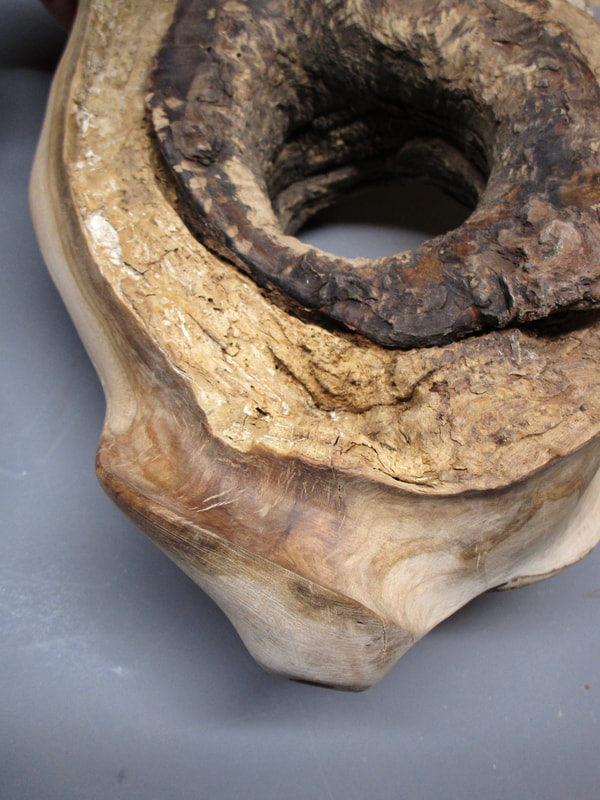
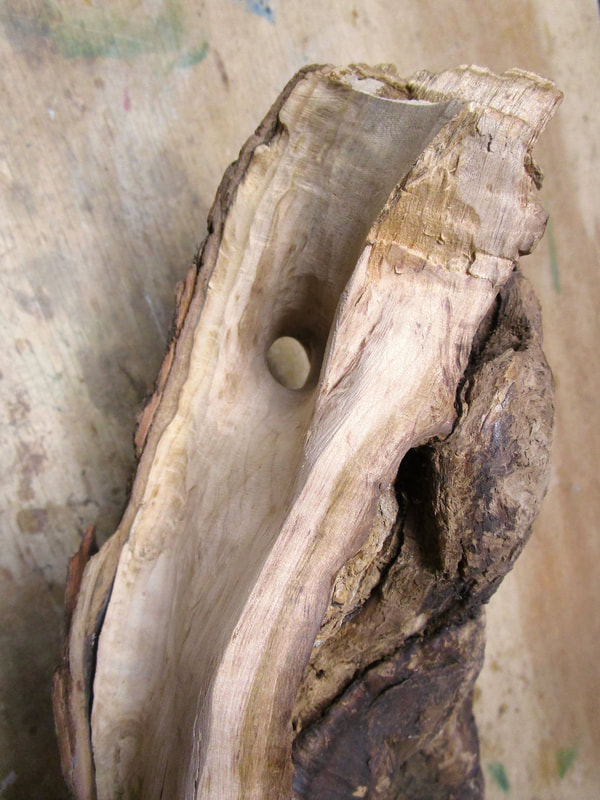
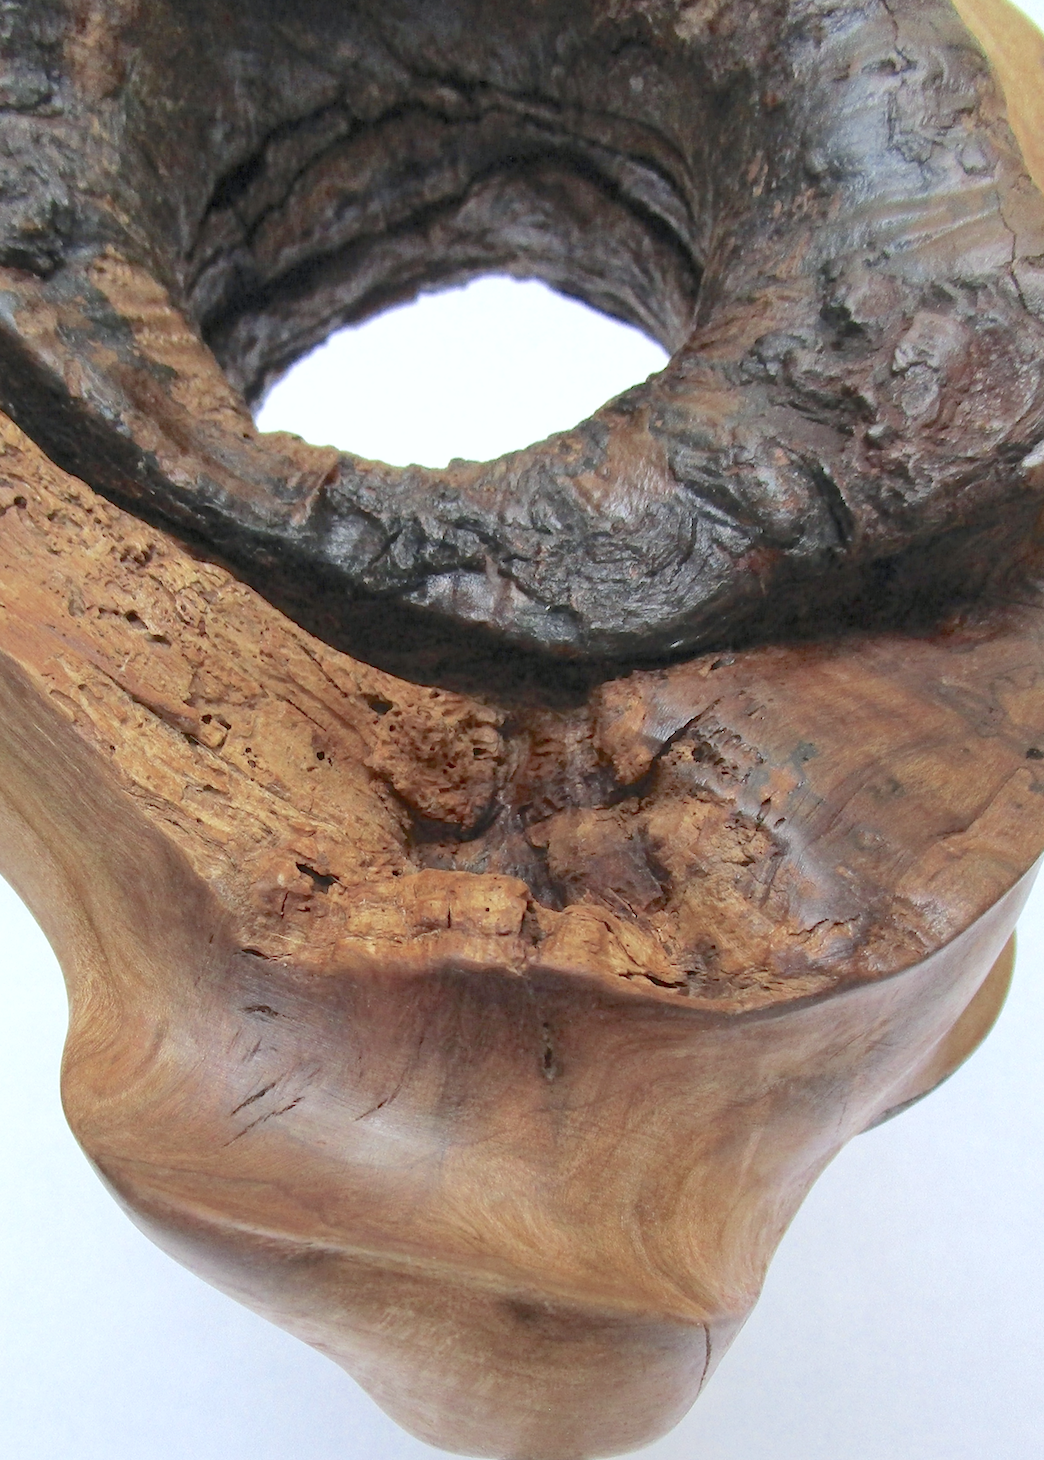
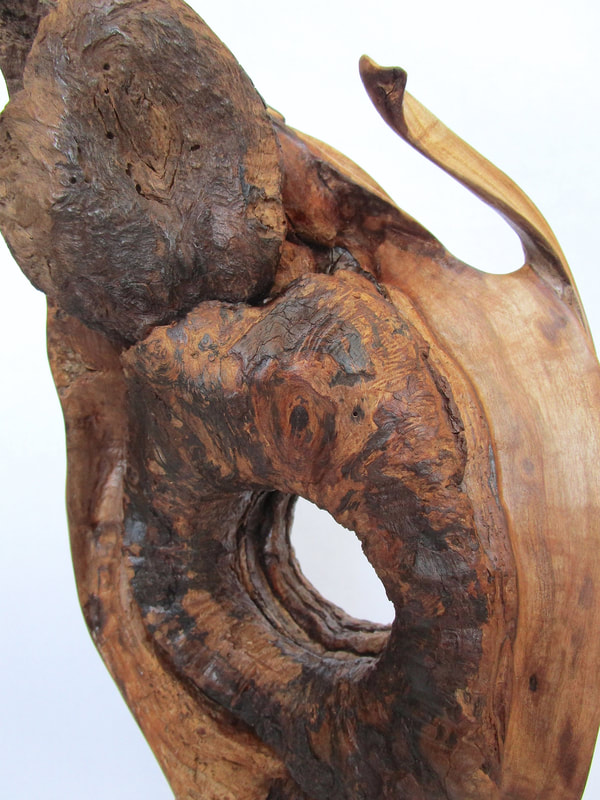
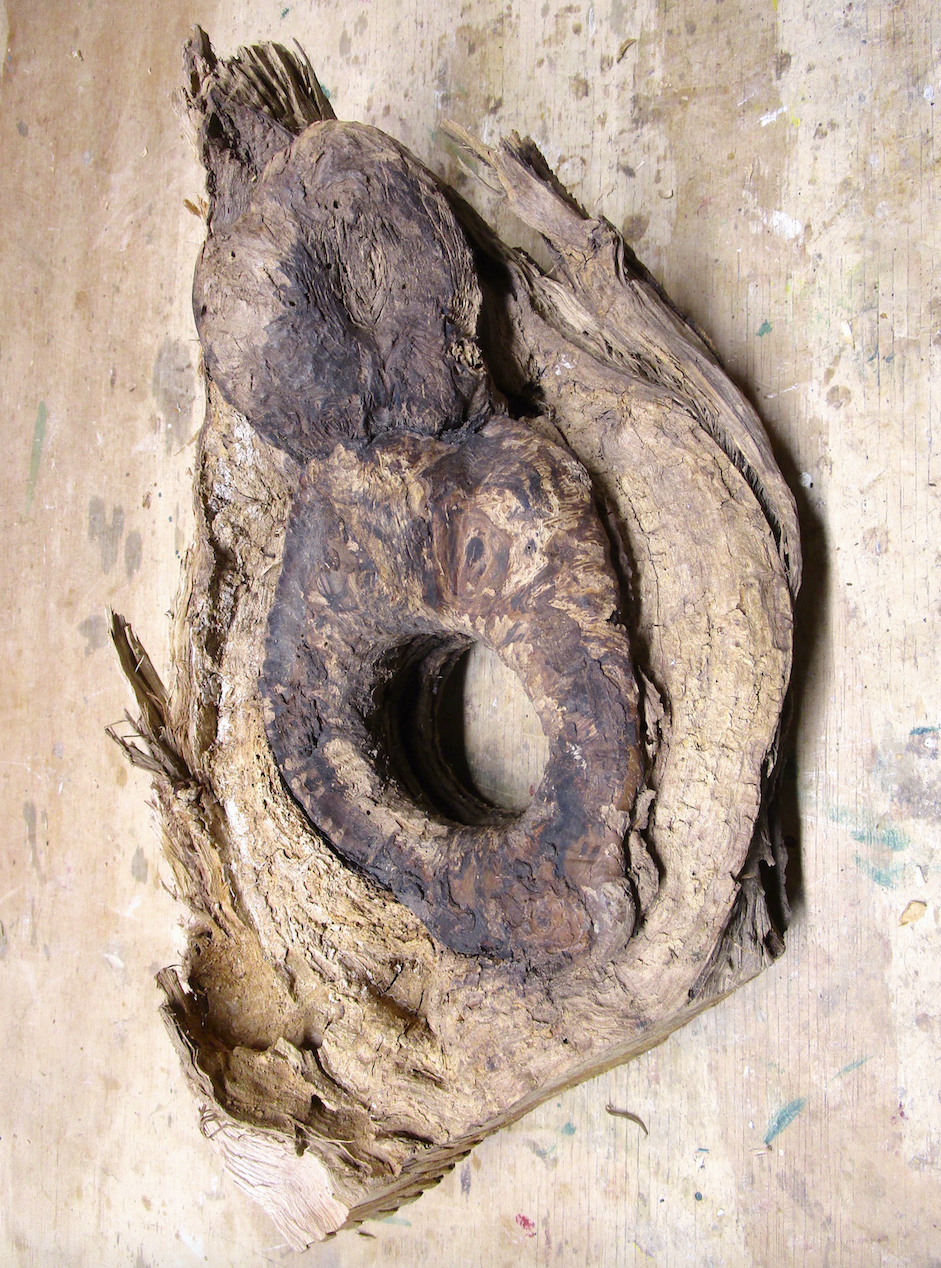
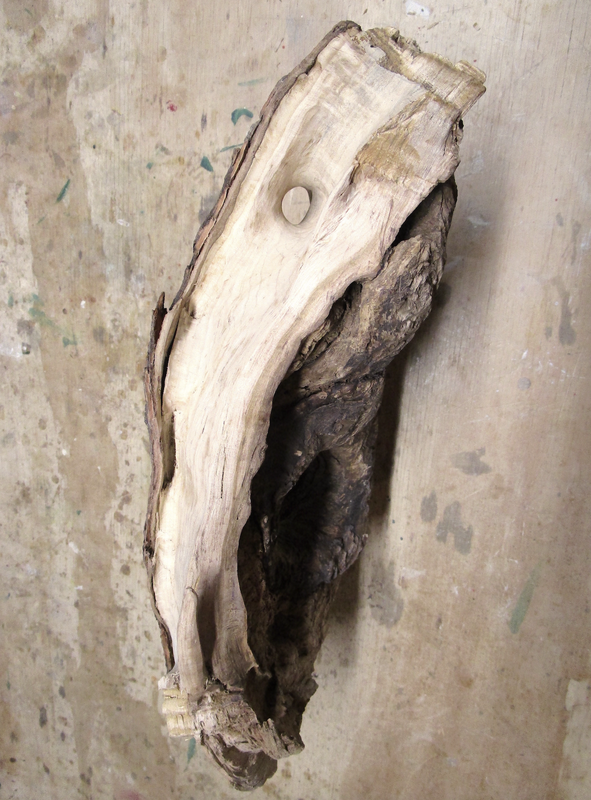
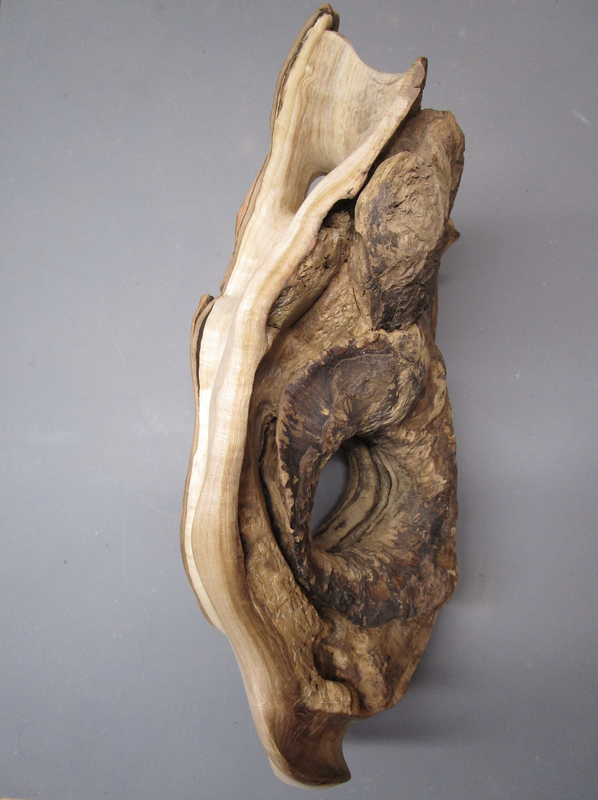
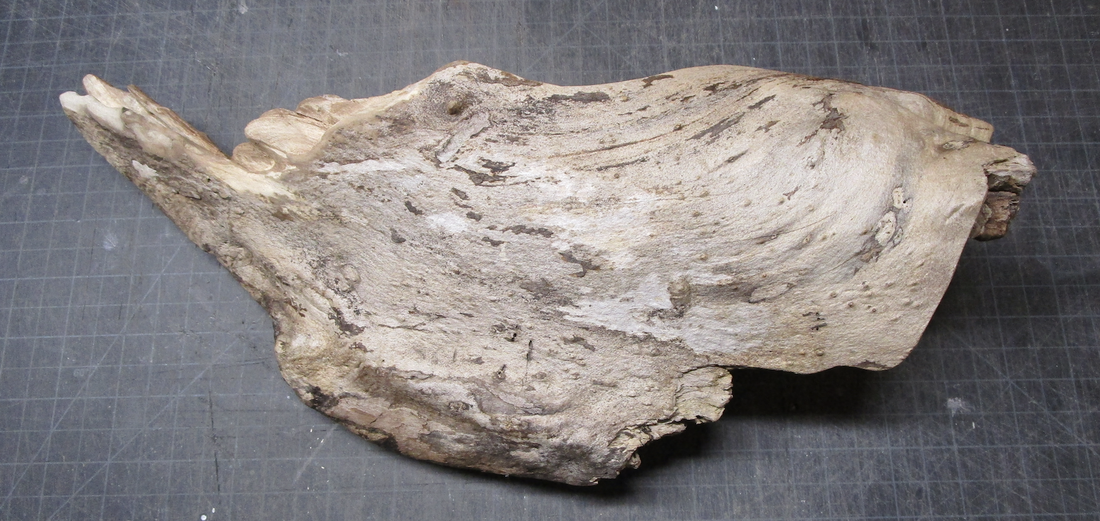
Driftwood "wave" top surface
Picture
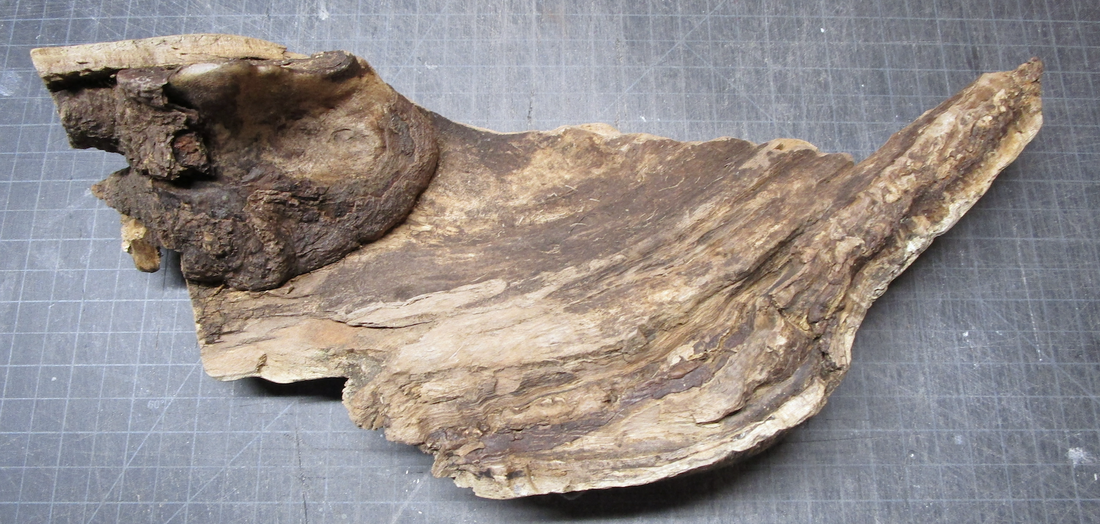
Underneath the "wave"
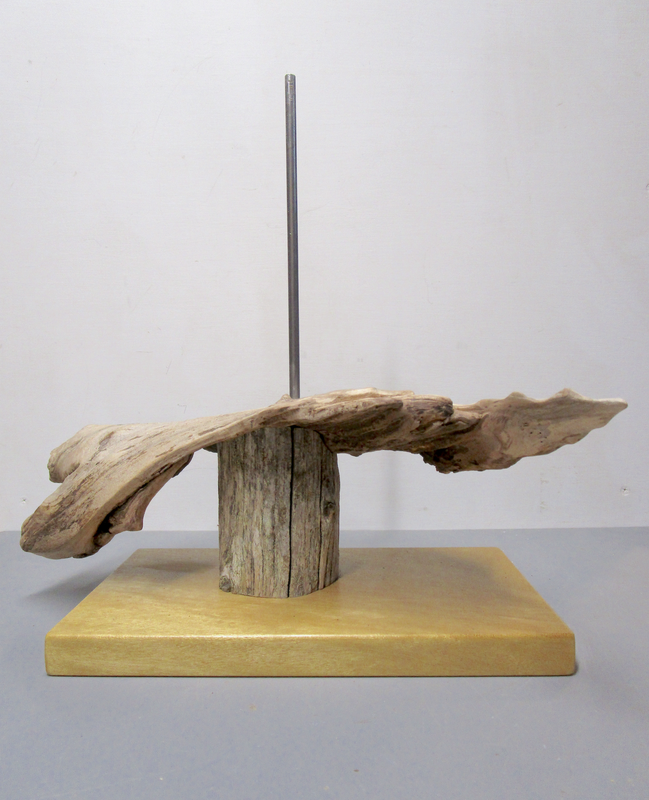
Picture
Assembled base with rod
    I knew the first thing I had to do was to try to remove or tone down the glossy exterior coating on the driftwood. I ended up using paint thinner then denatured alcohol, followed by some gentle elbow grease with 220 grit sandpaper. After removing some areas of "punky" wood, I proceeded to shape and sand various "protuberances" to enhance the seal-like form that I saw in the contours of the driftwood. Finally I gave it a coat of satin polyurethane.
​   The next step was to create a base and support on which to  mount the "seal". This would involve another piece of rescued driftwood, a short section of an old cedar post, and a metal rod. This second piece of nicely grayed driftwood had a wave-like shape that I thought would work well with the direction I was headed in with the piece. After cleaning up some pithy areas and shaping its edges a bit, I fitted and attached a 3 3/4" tall piece of an old cedar post to the underside of the "wave" to elevate it off of the yellowheart board that would act as the base of the sculpture.
   The first step in assembling the piece involved drilling a hole in the base to accept the 12" metal rod that would hold up the seal., That was the easy part. Next I had to drill a hole in the seal's chest to receive the other end of the rod. I had to figure 
out how I wanted to position the seal over the wave and then determine the angle the hole needed to be drilled in order to achieve that angle. The final step was to epoxy the rod into the base and then the seal onto the rod. The driftwood seal was finally where it was meant to be.
Picture
Picture
Picture
"​Deep Sea Diver"  ...  3 views
0 Comments

Branch Hole Sculpture ... Mounted & Complete

4/17/2021

0 Comments

 
Picture
           As I said in the first installment of this series...a picture is worth a thousand words.
Picture
Picture
 - and now on to my next adventure in sculptureland....
​
0 Comments

Branch Hole Back Side Details ... Maple Wonderland, Part 4

4/11/2021

0 Comments

 
Picture
Back side areas of concentration
​    The back side of the piece of maple that I have been writing about in my last 3 blog posts had a totally different character than its front side. I kept the central area containing the heart-like shape at the top and the callus material around the opening in their natural state, and concentrated my efforts on the surfaces surrounding them and the side edges shared with the front. 
​   The only way to address my concerns about the viability and visual value of the upper right side "tendril" was to asses and reassess it from all sides as I gradually carved, sanded and shaped it. Once I decided that the tendril needed to stay and had re-enforced the weak area it at its base, I was able to finish refining it.
Picture
Upper "tendril"
Picture
Reveal
Picture
Re-shape
Picture
Repair & refine
        I had identified an area at the bottom of the piece as the only place where I would be able to securely insert a rod to mount the piece to a base. I shaped and smoothed a "path" down the left side past the lower "tendril", continuing around and up along the right side, leaving a "nub of wood at the bottom. After drilling a hole to accommodate a 1/4" rod, I refined the area around the eventual insertion site. At this point I decided that the tendril needed to be removed  and, after doing so, I was able to further shape and refine the area.
Picture
Identify
Picture
Create "nub"
Picture
Refine & assess
Picture
Remove & refine
     I wanted the hole that I drilled from front side to the back side through the top behind the "heart" to serve as a visual connector between the two sides. I gradually opened the hole wider and curved the area around it on the back side, thinning the surrounding walls. Finally I changed the curve at the top from convex to concave, then refined and sanded the area. 
Picture
Rough out
Picture
Open & explore
Picture
Revise
Picture
Refine
      After adjusting the texture of the surfaces around the edge of the callus, making the right side smooth and creating a tradition from smooth to rough on the left side, the final step before mounting the piece on a base was to coat it with satin polyurethane. This process brought out a variety of color variations both in the natural surfaces and the sanded surfaces. The piece was ready for mounting with rod to base...tune in for Wonderland Part 5.
Picture
Poly
Picture
Opening detail
Picture
Base detail
Picture
Tendril detail
0 Comments

The Other Side of Branch Hole ... Maple Wonderland, Part 3

4/4/2021

0 Comments

 
Picture
Side 2
    The appearance of the back side of my piece of maple had nothing in common with the front side other than the shape of its perimeter. The callus that had formed to heal the absent branch had a very different character - it became wider and heavier in contrast with the tighter and slightly textured rings coming in from the front side. It was surrounded by light colored textured areas and topped with a natural formation that looked very much like a heart. This side's unique structural elements presented its own set of aesthetic decisions that had to be made, but the real challenge was to unify the shared perimeter elements and surfaces.  
Picture
Begin
Picture
Explore
Picture
Open
Picture
Extend
Picture
Continue
    The shared elements that I addressed first were the shared rough "tendrils" at the lower left and upper right sides. I had to access whether they were necessary elements to the form and, if they were, were they structurally sound enough to be retained. The second areas that needed assessment were the shared perimeter edges (the actual thickness of the wood that surrounded the the branch hole) - both were very rough and splintery. I had to decide if I wanted to smooth them, how much of each I wanted to smooth out, and what sort of shaping might be appropriate for the form, not to mention how to incorporate the tendrils! 
Picture
Drill
Picture
Remove
Picture
Reshape
Picture
Refine
Picture
Finish
    In addition to the previously mentioned decisions, there was  the question of how I would eventually mount the piece. I knew that I wanted the heart shape at the top and that the form, because of its natural shape, would not be able to stand on its own. Sometimes the material limits your options, but also presents you with a clear solution. In this case, it appeared that the only logical and effective way to display the piece would be to mount it on a rod in a wooden base...and the only spot on the piece of wood that was thick enough and in a place that would allow the desired positioning was at the bottom of the piece of wood opposite the heart. As long as the area could be shaped  appropriately and drilled correctly - problem solved! A closer look at the solutions in my next blog post... stay tuned!
0 Comments

    Author

    Cynthia Smith, Maine artist, originally from Connecticut. Taught art at secondary level for 35 years, retired in 2004. Sculpts in bronze, wood, stone, clay & plaster. Her work can be seen at several mid-coast Maine galleries and shows.

    Picture

    RSS Feed

    Archives

    October 2022
    May 2022
    December 2021
    October 2021
    June 2021
    May 2021
    April 2021
    March 2021
    October 2020
    August 2020
    July 2020
    June 2020
    January 2020
    October 2019
    September 2019
    August 2019
    July 2019
    June 2019
    May 2019
    April 2019
    February 2019
    January 2019
    November 2018
    October 2018
    September 2018
    August 2018
    July 2018
    June 2018
    May 2018
    April 2018
    March 2018
    February 2018
    January 2018
    November 2017
    September 2017
    August 2017
    July 2017
    June 2017
    May 2017
    March 2017
    January 2017
    September 2016
    August 2016
    July 2016
    June 2016
    May 2016
    April 2016
    March 2016
    February 2016
    January 2016
    December 2015
    November 2015
    October 2015
    September 2015
    August 2015
    June 2015
    April 2015
    March 2015
    February 2015
    January 2015
    December 2014
    November 2014
    October 2014
    September 2014
    August 2014
    July 2014
    June 2014
    May 2014
    April 2014
    March 2014
    February 2014
    January 2014
    December 2013
    November 2013
    October 2013
    September 2013
    August 2013
    July 2013
    June 2013
    May 2013
    April 2013
    March 2013
    February 2013
    January 2013
    December 2012
    November 2012
    October 2012
    September 2012
    August 2012

Powered by Create your own unique website with customizable templates.