C.V.SmithARTWORKS
  • Home
  • Blog
  • Sculptures
    • Bronze
    • Clay / Apoxie Clay
    • Plaster
    • Wood
    • Stone
    • SLIDESHOW
  • Galleries
  • Contact
  • Book
  • River Arts
  • BRAF
  • Saltwater Artists
  • CMCA
  • Yarmouth Art Festival

Menage a Trois ... Clay, Plaster, & Bronze

9/26/2012

0 Comments


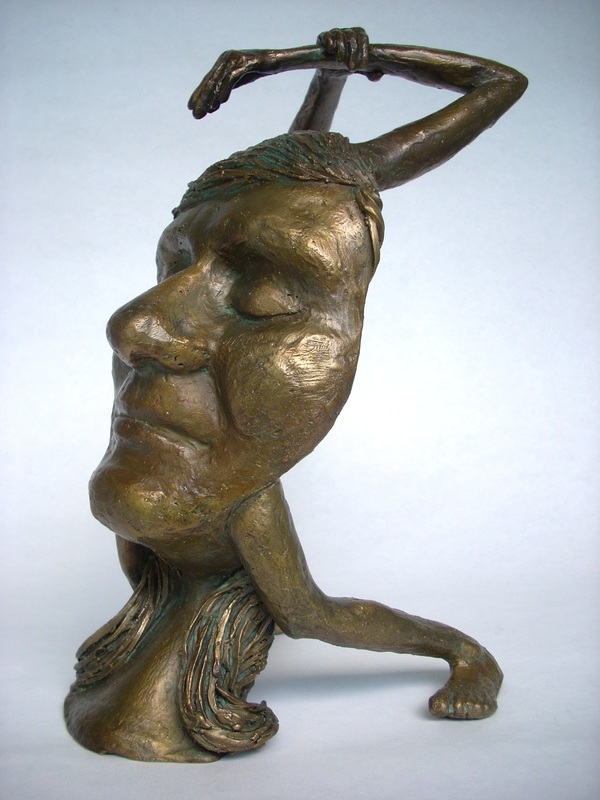
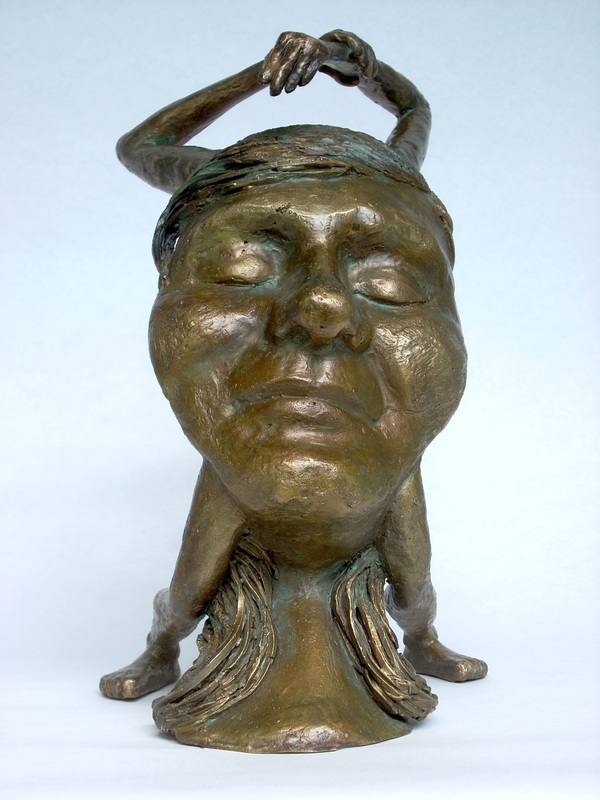
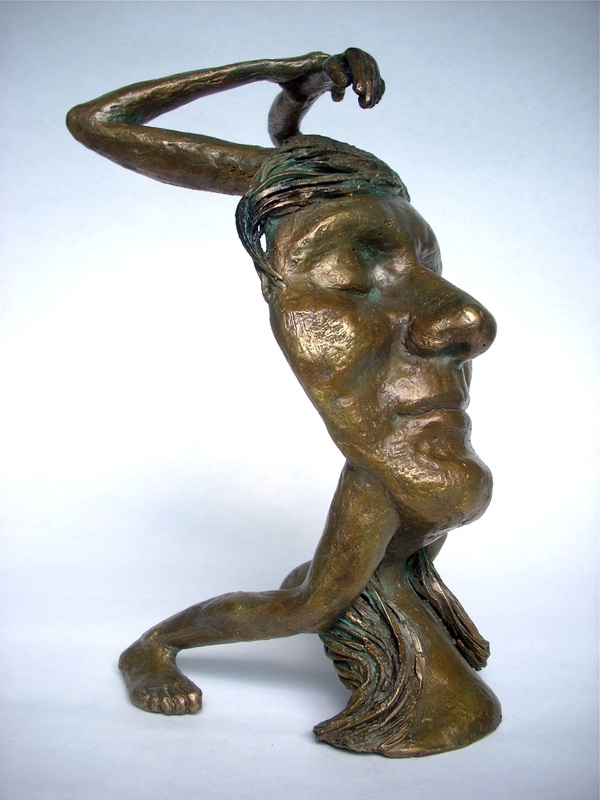
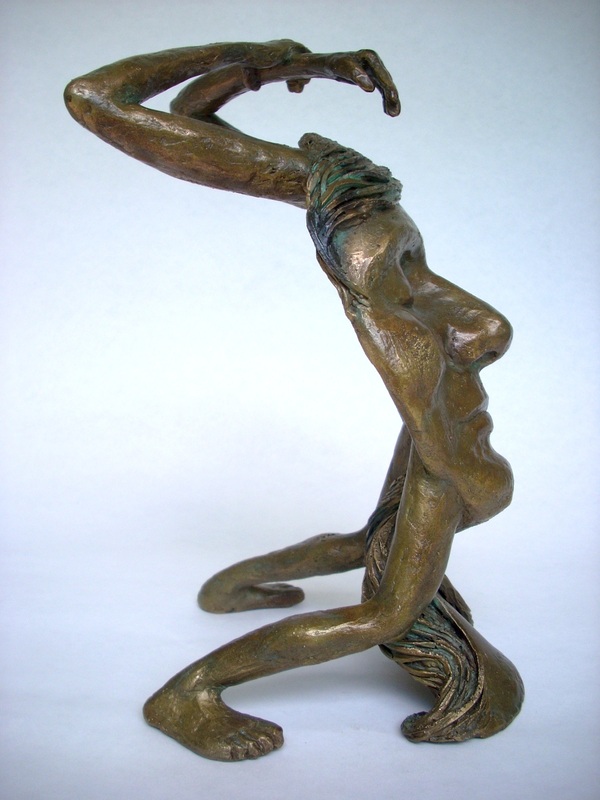
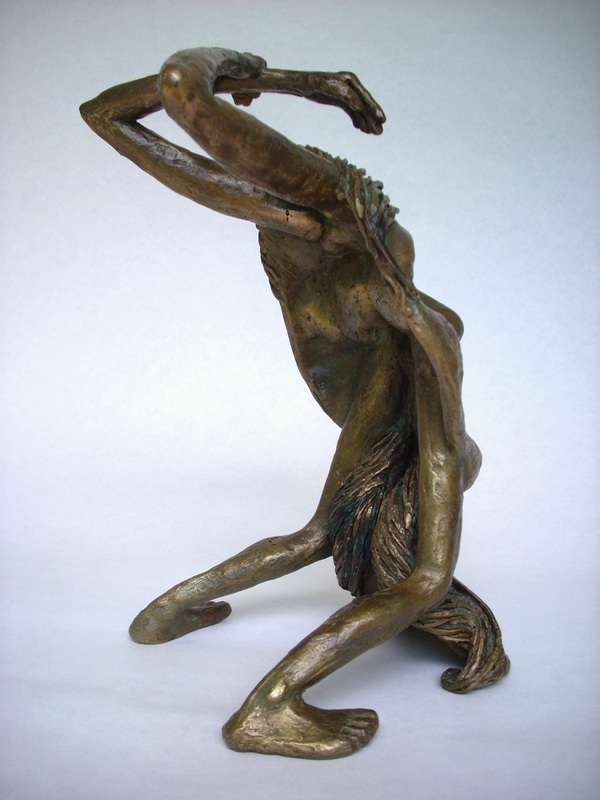
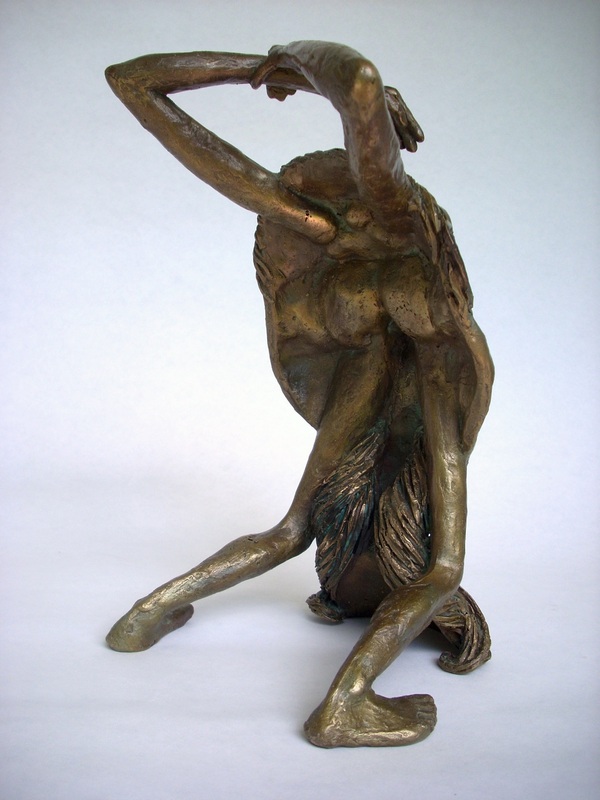
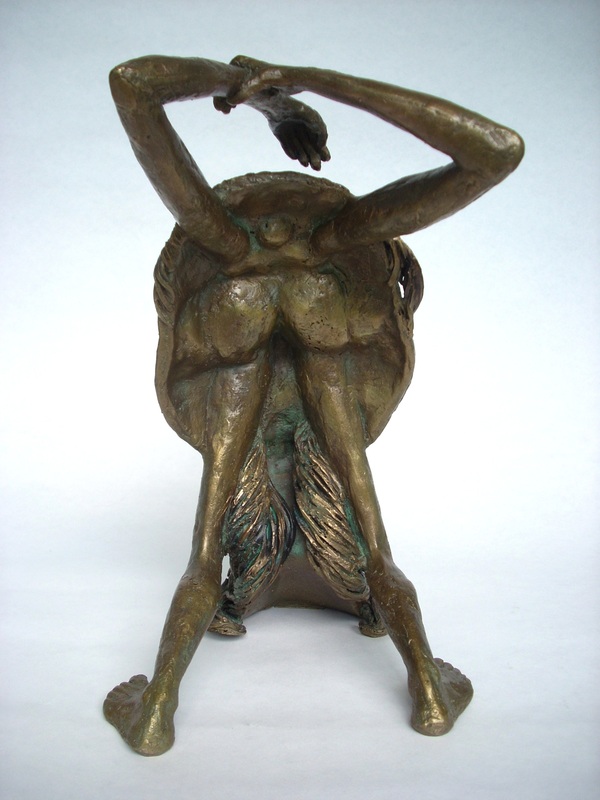
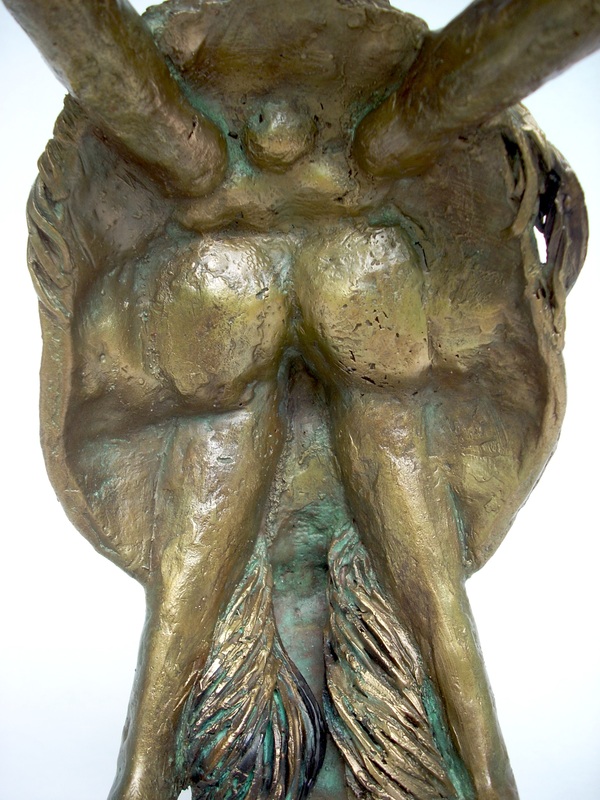
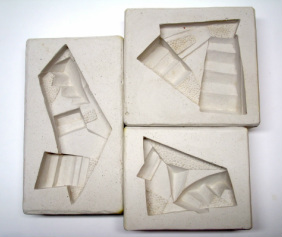
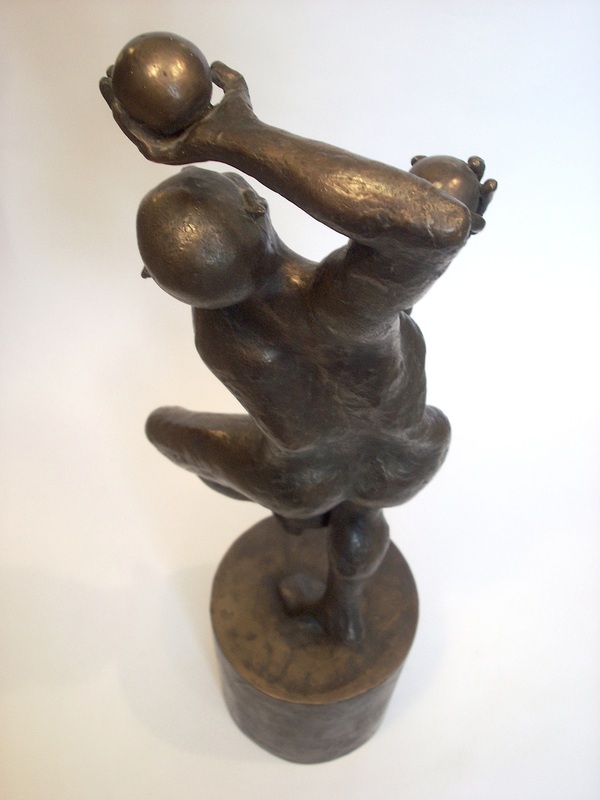
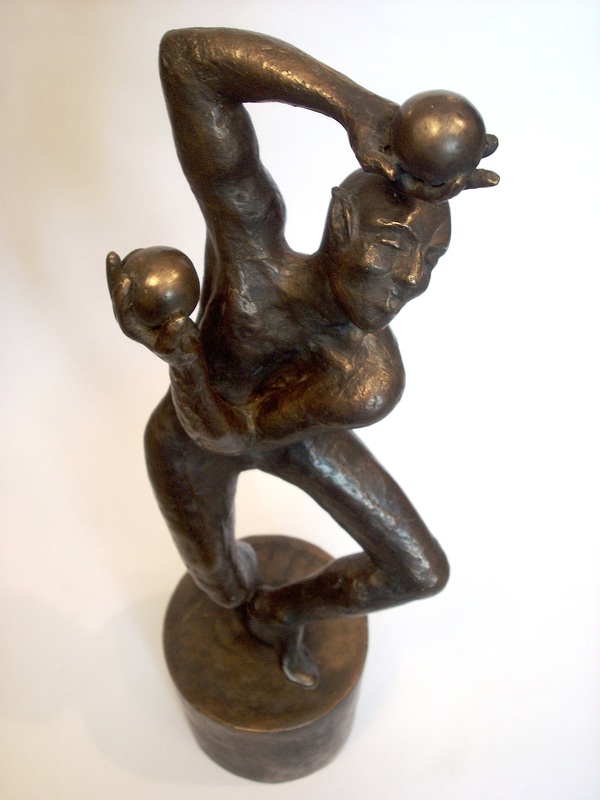
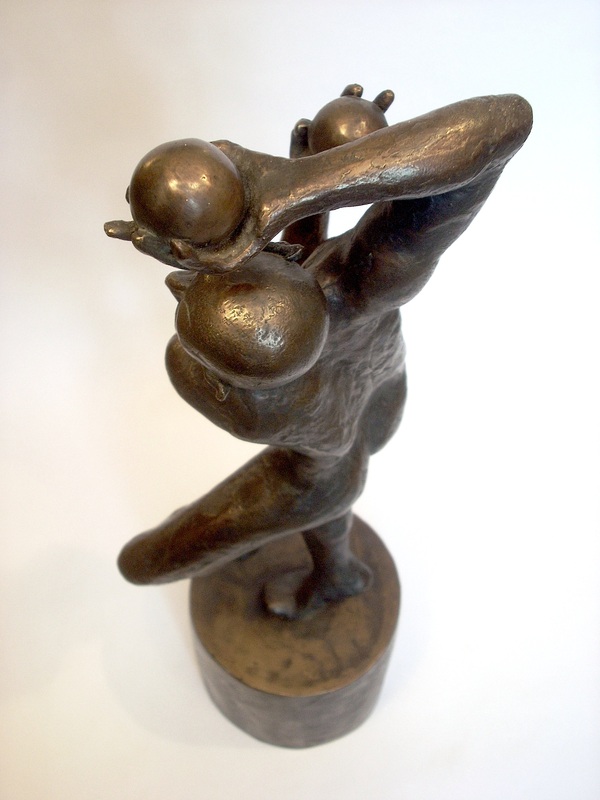
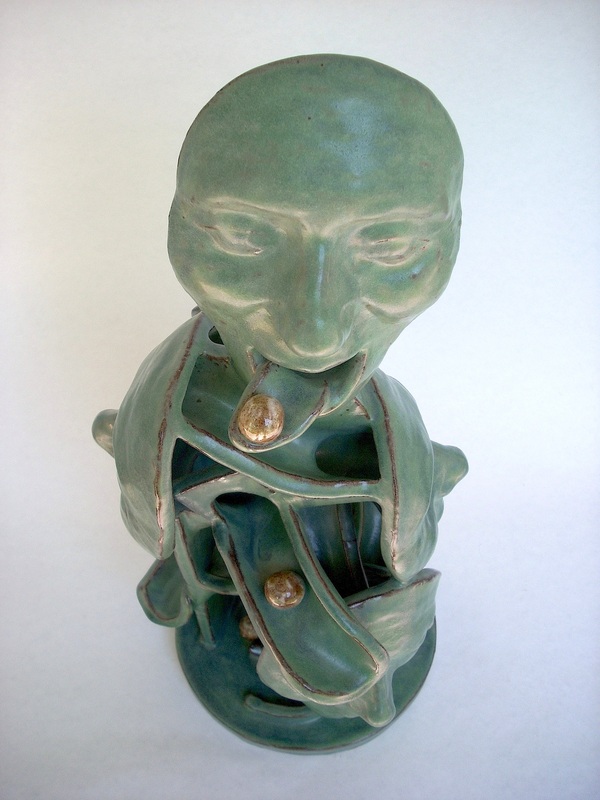
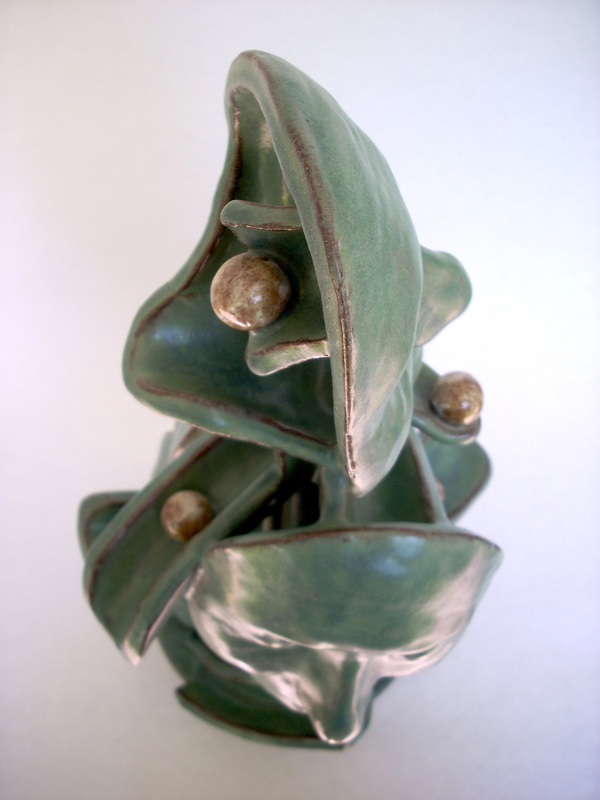
 A number of years go I went to a teachers' workshop hosted by the Portland Museum of Art in Portland. One of the activities that we participated in was an experience in working with self-hardening clay. We were given a small handful of the material, and asked to make something. I started out forming a face that, after I played with the structure of the mouth, then morphed into some sort of split personality. As I looked at the clay, I felt the challenge to take it a step further - to create the faces of 3 different characters within the structure of the original face that would reveal themselves as the piece was rotated in front of the viewer's eye. I really enjoy a challenge, so I did end up with a face with 'multiple personalities'.
     I later took a mold making class and used the original clay piece to make a rubber mold with Brush-On 35 ( from the Smooth-On Company)  to make a plaster cast. I was never one to let a good mold stand idle, so I eventually used it to cast the piece in bronze. I liked the result, but upon reflection, I must say it may have been misnamed... perhaps 'Menage a Quate', or perhaps even 'Cinq' !
Picture
Picture
Picture
Picture
Picture
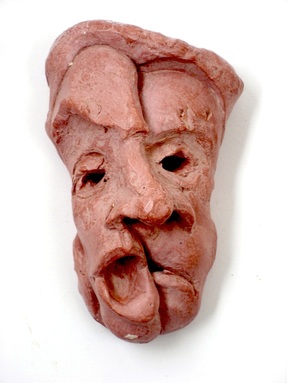
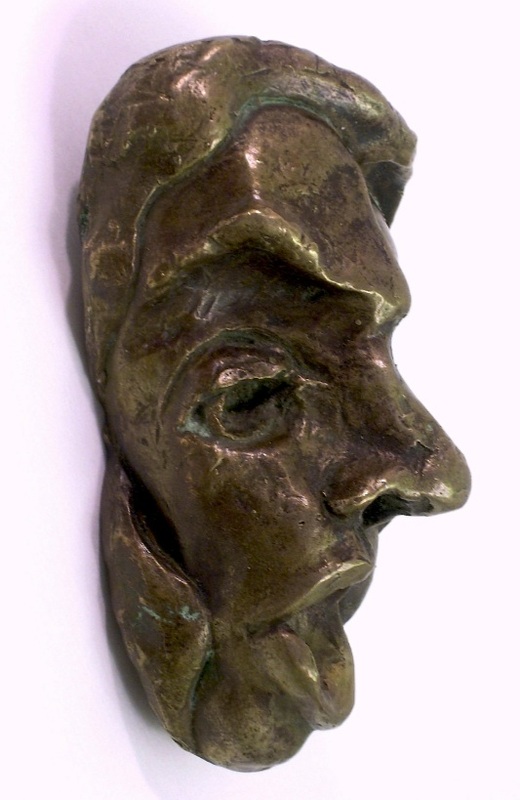
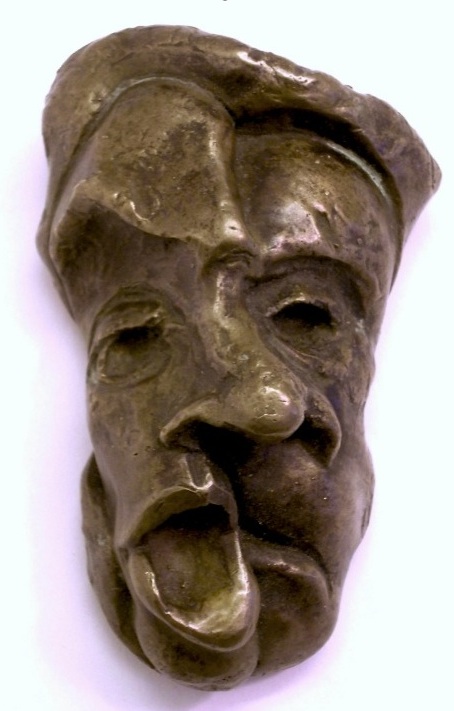
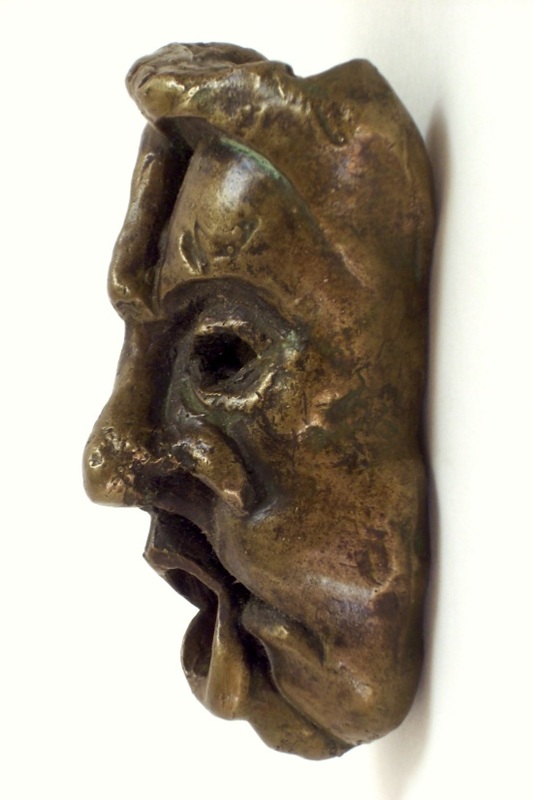
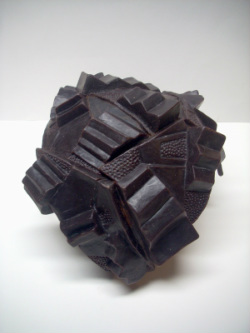
                                                           'Menage a Trois'.... 3 views... 4"h   
0 Comments

Evolution of an Idea ... the 'backstory'

9/21/2012

0 Comments


     The idea for this portrait in bronze started simply - I made a wax cast of my face from a *mold that I had taken from a plaster life mask of myself.  I wasn't sure what I was going to do with it, but knew that it would have to be supported it in some way. Extending the neck was a start to solving the support problem, but I also needed to find a way to finish the back side of the face in order to bring the composition full circle.
Picture
Picture
Picture
Picture
    As I looked to the wax mask for answers, an image slowly started to emerge from the back side of the mask - the natural contours of the inside surface of the wax cast seemed to contain the vague suggestion of a human figure. As I added wax to bring out the form, the prominence of the sizable buttocks and the extreme bend of the back immediately appealed to my sense of humor. I saw the figure back-bending behind the face and my mind was off and running... I would shrink the figure's head and elongate the the limbs to emphasize the illusion of depth in the space behind the face. Support and composition problems solved ... with the added bonus of a surprise 'ending'. I have my own explanations and interpretations of the piece, I leave viewers to come up with their own.
Picture
Picture
Picture
Picture

* Note: The mold for this face mask was also used multiple times to create my clay 'Portrait of the Artist'. Image can be viewed in the Ceramic page of the Sculpture section of my website, as well as in the Slideshow section.
0 Comments

Pod Cast Update... Fumed & Finished

9/16/2012

0 Comments


      The "pod bugs" cast in bronze that I discussed in my September 1st  blog entry have now been completed. I created a blue-green surface patina by fuming the pieces with a combination of ammonia, vinegar, and salt. 
     I began by drilling holes in the tops of 8 small blocks of wood. I would use these to keep the pieces above the level of the fuming liquid by inserting the small bronze extension that I left under the foot of each bug leg into the hole of each of the wooden blocks. After setting the elevated bugs in the bottom of a tall plastic lidded container, I then poured equal portions of ammonia and vinegar, and a tablespoon of salt into the bottom of the container to a level of about 1/2 inch. The lid was then snapped on tightly and the pieces were fumed for 10 days. (I did add additional ammonia and vinegar after 5 days to "perk up" the fuming process.)
     When the desired color was achieved, I removed the pieces from the container. After allowing them to dry thoroughly, I coated them with a coat of clear satin polyurethane to seal the patina. The final step was to attach the pieces to the wooden base that I had prepared. I put 5 minute epoxy into each of the 4 holes that I had drilled into the wood for the smaller bug, inserted the extension under each foot into the appropriate hole, and held it in place until the epoxy set. Then I repeated the process for the larger bug. The  piece is now complete and headed to The Maine Art Gallery in Wiscassett.

Picture
Picture
0 Comments

Modification and Reconfiguration ... the Plaster Mold

9/11/2012

0 Comments

 
Picture
     I am currently working on a wax that will eventually be cast in bronze. The idea for this piece came from working with plaster molds on 3 earlier pieces. The first was a *ceramic piece, 'Stair Triptych'. It consisted of 3 separate sections that incorporated a combination of Escher-like stairs and doorways that were juxtaposed at various angles. This led me to the thought of making a bronze piece that combined a series of similar units. I modified the design of the 3 stair modules and cast 3 new molds to use for making multiple waxes. The result was my *bronze, 'Relief '. The molds were utilzed again in making the base for my *bronze piece 'Stilt Walker '. Even as I completed these earlier works, the concept for this current piece was formulating in the back of my mind....bend these modules into a sphere.

Picture
Picture
     I am now about halfway through the construction of the wax sphere. The wax modules are hollow and have flat bottomed sides when they come out of the mold. I bend them gently around a basketball while they are still warm and cut the bottom edges into gentle curves to improve the fit. I also trim the edges so that each piece on the sphere will be at a slightly different angle. Then comes the very slow process of attaching the modules to each other. Now that I am halfway through this process, I will not be able to use the basketball as a framework to work on, and the attachment process will get a bit trickier. The final challenge will come when I finish the sphere and have to start gating it... multiple angles and overhangs - yikesI 

   *Images of the above mentioned artworks can be found in the Clay & Bronze Sculpture sections of this website.
0 Comments

Art Appreciation ... the Artist's Perspective

9/6/2012

0 Comments

 
Picture
Picture
Picture
Picture
     Long ago I started the habit of documenting my artwork with photographs. I  originally just took a photo of the finished piece, but then started to record the steps I took to create each piece as a reference for future work. Eventually I
added multiple views from 
multiple angles, trying to
capture the essence of  the work, as well as the image.
Picture
Picture
     The photographs that I take from unusual angles best reflect my creative process and my vision of the work ... how I see the piece as I work on it, and how I
hope it will be seen by
others. I want the viewer to experience the interaction   
of the rhythms in the form, as well as in the spaces in and around the form. If the image in the photograph mirrors the image in my eye, I have
achieved my goal.
Picture
0 Comments

Pod Cast ... Getting the Bugs Out

9/1/2012

0 Comments

 
Picture
Pod, seeds, & twigs
      Although I generally work in wax when creating a piece that is going to be cast in 
bronze, I also like to explore a variety of combustible found objects and materials. 
I find they can provide both familiar and unusual textures and forms, as well as having the potential be transformed into something totally new and unique.
     I found some interesting pods among
the dried flowers at an arts & crafts store. They were 5 sided and had a woody exterior that had a variety of textures. One end of the pod was pointed and the other had an extended  'collar' where the pod would have been attached to a stem. I also found some lotus flower seed pods that each held many oval seeds. By adding four bent twigs from 
an old  lilac bush, I ended up constructing a long legged, pop-eyed, snout-nosed bug.

Picture
Pod Bug
        I  liked the creature I had created, but  knew that it wouldn't last unless it was cast. The attachment locations for the legs on the underside of the 
bug were not very secure because the interior of the pod was very 'pithy'. The resulting bronze cast of the piece was successful in capturing the details on the surface of the pod and the legs - and the legs were firmly attached. This initial 'test bug', combined with a sizable bronze frog and two antique wooden croquet stakes, then became my sculpture 'After Dark' (see photo on bronze sculpture page of website). The success of the first pod bug led me 
to make and cast two additional bugs. After I patina them, I will mount them on a piece of weathered wood (see
image below) to become the sculpture 'Guardian'.   
             
P.S. There  may also be a few pod 'birds' in my future...     

Picture
                               Bronze Pod Bug                                                                                  Guardian...11"h
0 Comments

    Author

    Cynthia Smith, Maine artist, originally from Connecticut. Taught art at secondary level for 35 years, retired in 2004. Sculpts in bronze, wood, stone, clay & plaster. Her work can be seen at several mid-coast Maine galleries and shows.

    Picture

    RSS Feed

    Archives

    February 2023
    October 2022
    May 2022
    December 2021
    October 2021
    June 2021
    May 2021
    April 2021
    March 2021
    October 2020
    August 2020
    July 2020
    June 2020
    January 2020
    October 2019
    September 2019
    August 2019
    July 2019
    June 2019
    May 2019
    April 2019
    February 2019
    January 2019
    November 2018
    October 2018
    September 2018
    August 2018
    July 2018
    June 2018
    May 2018
    April 2018
    March 2018
    February 2018
    January 2018
    November 2017
    September 2017
    August 2017
    July 2017
    June 2017
    May 2017
    March 2017
    January 2017
    September 2016
    August 2016
    July 2016
    June 2016
    May 2016
    April 2016
    March 2016
    February 2016
    January 2016
    December 2015
    November 2015
    October 2015
    September 2015
    August 2015
    June 2015
    April 2015
    March 2015
    February 2015
    January 2015
    December 2014
    November 2014
    October 2014
    September 2014
    August 2014
    July 2014
    June 2014
    May 2014
    April 2014
    March 2014
    February 2014
    January 2014
    December 2013
    November 2013
    October 2013
    September 2013
    August 2013
    July 2013
    June 2013
    May 2013
    April 2013
    March 2013
    February 2013
    January 2013
    December 2012
    November 2012
    October 2012
    September 2012
    August 2012

Powered by Create your own unique website with customizable templates.