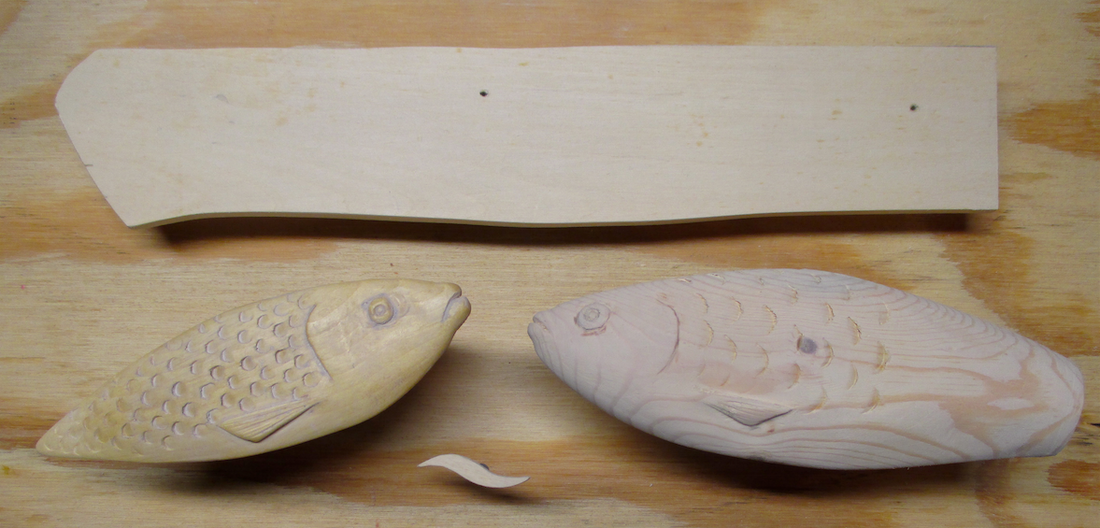
C.V.SmithARTWORKS
  • Home
  • Blog
  • Sculptures
    • Bronze
    • Clay / Apoxie Clay
    • Plaster
    • Wood
    • Stone
    • SLIDESHOW
  • Galleries
  • Contact
  • Book
  • River Arts
  • BRAF
  • Saltwater Artists
  • CMCA
  • Yarmouth Art Festival

Silicone Moldmaking ... Into the Pressure Pot

10/30/2015

 
Picture
Introduction to materials
   This Fall I had intended to take another bronzecasting class at Maine College of Art, but when that class was canceled, I opted to take a class in Silicone Moldmaking. This class included the use of a technique that was new to me ... the utilization of a  "pressure pot" to cure and "de-bubble" both the silicone mold itself, and the polyurethane resin that would be used to make the casting. 
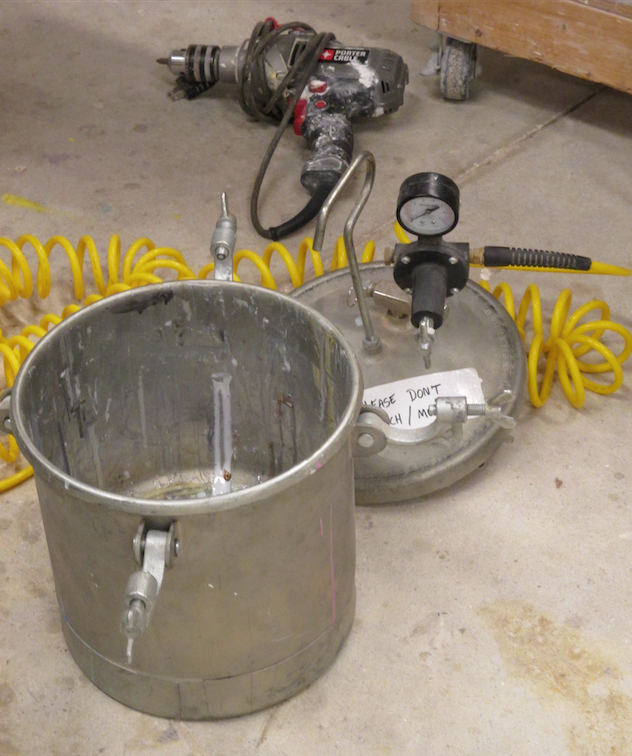
Picture
The pressure pot
    After presenting a general overview of materials, our instructor, Ben Asselin, explained and demonstrated the mold process that we would be using in our first project - creating a one part silicone mold....1) attach object to be cast to a cardboard base (hot glue) & add wax gates to vent any areas that might trap be prone to trapping air pockets; 2) use a piece of clear acetate sheeting to make a cylindrical mold box (leaving 1/2" clearance around the sides and top of the object), scotch tape the seams inside and out, attach box to the cardboard base with hot glue; 3) make lines with marker on cardboard inside cylinder to indicate where mold will be cut in order to remove object after curing; 4) determine the approximate volume of the container by filling it with rice and then pouring the rice out into a measuring cup; 5) mix equal parts of the 2 part silicone material and pour into mold box (we used *Moldstar 16 Fast - it has be mixed, poured into mold box, and put into pressure pot within 6 minutes of combining the parts!) ; 6) put filled mold into pressure pot, set at 55-60 PSI, for 30 minutes; 7) demold by cutting marked sides down just far enough to allow the original object to be extracted.
Picture
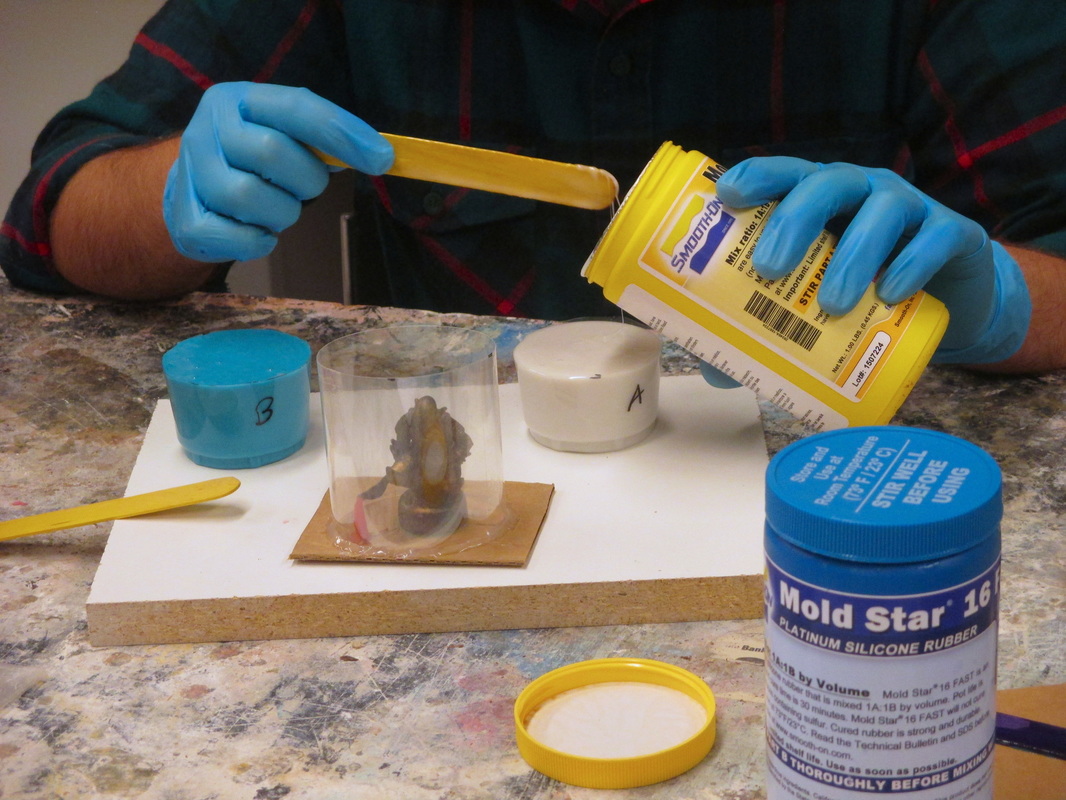
Demo - Mold setup & mixing silicone
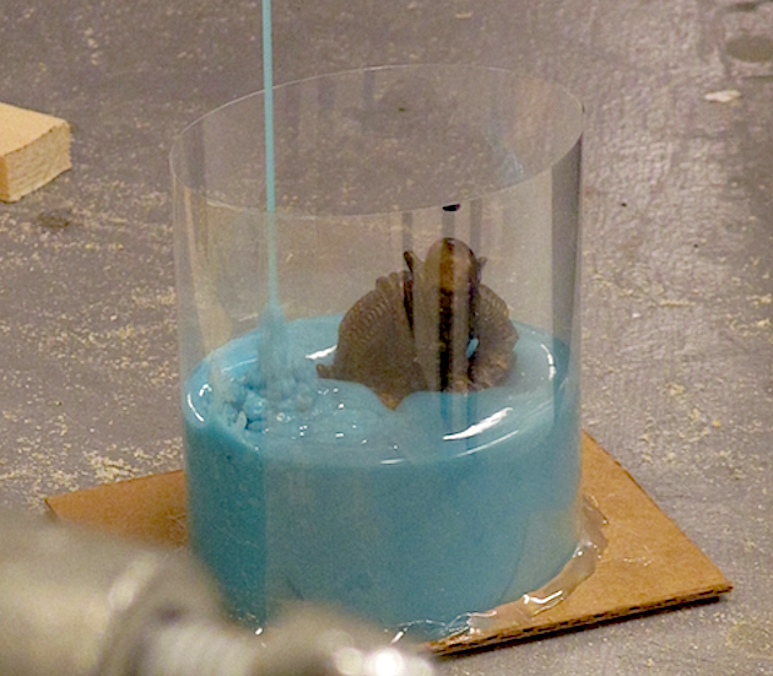
Picture
Filling mold box
Picture
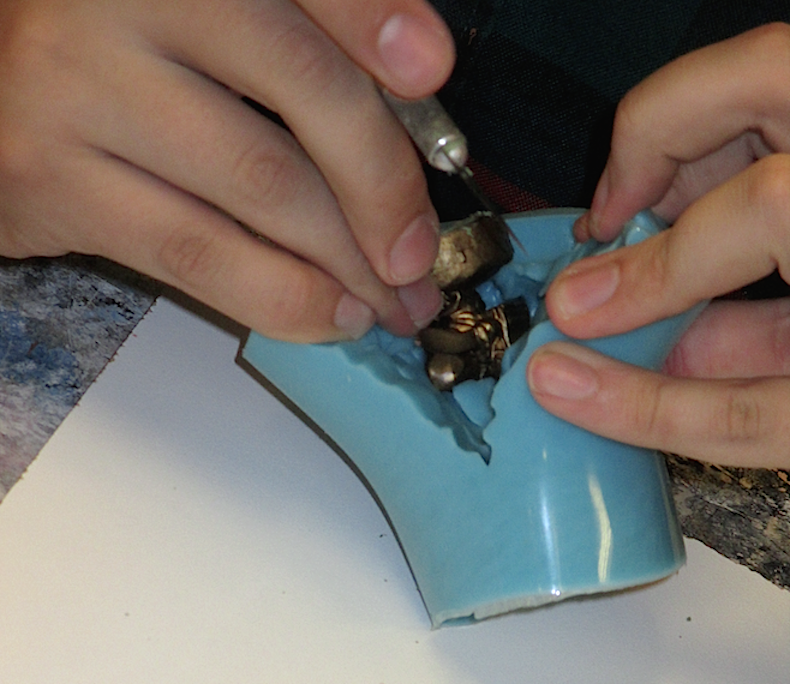
Demolding after curing
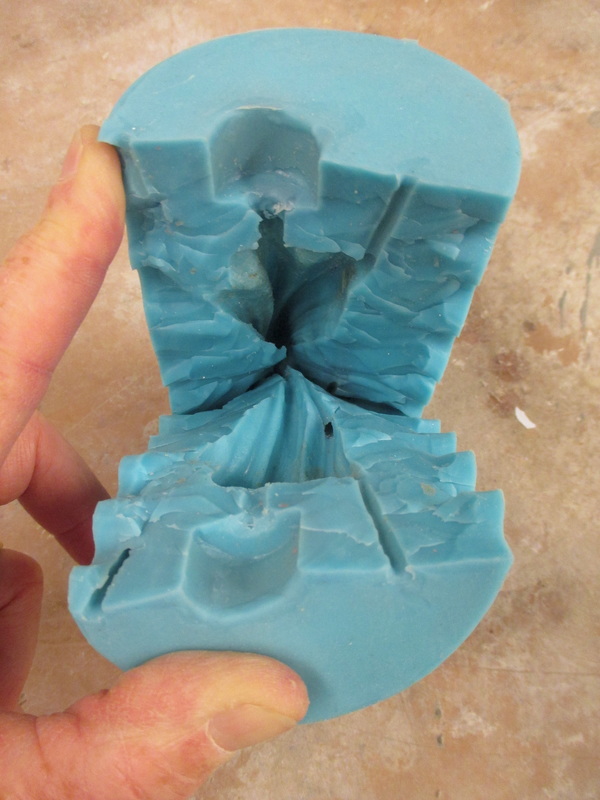
     I chose to cast a dried pumpkin stem that had an interesting twist. Before setting the stem up for molding, I had to seal its surface with polyurethane to insure that the Moldstar wouldn't adhere to the porous textured surface. I needed to set the stem at an angle in order to get the most efficient flow of material going through the mold. Hot glue wouldn't hold it at the needed angle, so instead I inserted a 1" wood screw through the cardboard and into the bottom corner of the stem. I also created a small wax pour cup at the base of the screw and coated the screw threads to provide a smooth main gate. After adding 2 thin wax vent gates to the areas that might  trap air, I mixed my silicone, poured the mold and placed it in the pressure pot to cure. The next step was to cut 1/4" deep wavy lines part way down the marked sides of the cured mold (this would serve to align the two sides when casting), and then cut straight in until the pumpkin stem and gating were revealed and could be removed. 
Picture
My mold after curing - pumpkin stem removed
Picture
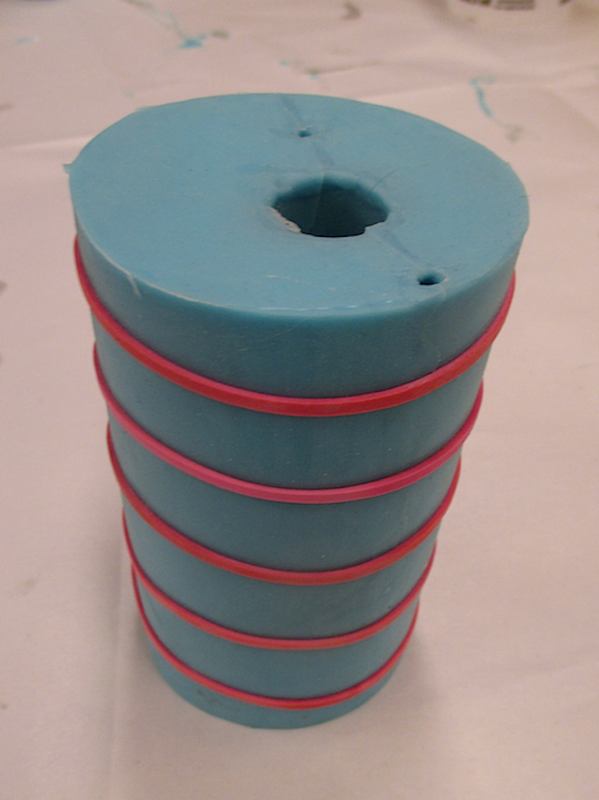
My mold secured - ready to receive the casting resin
Picture
Original pumpkin stem & casting with gating still attached
     After I secured the mold with several rubber bands, I was ready to mix and pour the casting resin (*Smooth-Cast 305). This is a 2 part mixture that is mixed in equal parts by volume. It has a 7 minute pot life, so you have to make efficient use of time to mix, pour and get the mold into the pressure pot. I used a syringe to load the 305 into the mold. This method forces air out of the mold more efficiently and allows the material to fill in all the details of the internal mold space. Once filled, the mold was placed in the pressure pot for 30 minutes. After 30 minutes, I removed the mold from the pot and extracted the casting of the pumpkin stem. The casting was accurate and free of surface imperfections - no unwanted air bubbles! The pressure pot had done its job - now I just have to come up with a project for the pumpkin stem!

*Note:  Moldstar 16 Fast & Smooth-Cast 305 are both products of the Smooth-On Company.

A New Angle to an Old Fish Tale ... Plastered Again

10/15/2015

0 Comments

 
    I had no idea when I began my initial foray into the world of fish in August that I would still be rolling out clay slabs and pouring plaster for fish relief sculptures in mid-October. As the entry deadline for entering the annual Boothbay Region Art Foundation's ArtinME show loomed, I decided to continue my underwater explorations. An idea for a new approach had occurred to me as I peeled the clay slab off the casting I had done for the Sheepscot Watershed show at River Arts Gallery in Damariscotta (seem my previous blog entry). I had noticed an interesting pattern in the clay residue on the plaster that led me to think that I might be able to add some kind of "water effect" to the fish designs by impressing wavy vertical lines over the fish imprint. My first attempt involved simply pressing the edge of a board into a clay fish relief at regular intervals. The effect was interesting but I wanted to be able to show more variation in the composition.    
    I decided to give the edge of the board a slight curve and to expand my design options by adding a second wooden fish template (I finished the original one described in my blog entry for 8/10/15). I also decided to work on a larger slab of clay. The earlier reliefs were about 6"x6", the new piece would be 9"x11". I liked the visual effect that I was able to achieve by imprinting the 2 different fish going in opposite directions. I added impressions of the edge of the curved board, varying the distance between the marks and varying the height of the curves. It didn't read to me as "water", but I liked the effect. I thought it looked more like underwater vegetation. In order to emphasize that idea, I made a small wooden simple "leaf" and made impressions in various spots along the plant stems. I was very happy with the result! I painted it with Graphite Gray acrylic, framed it, named it and drove to Boothbay Harbor to deliver it. Deadline met!  
Picture
Clay residue pattern on plaster casting
Picture
First attempt
Picture
Wavy board, 2 wooden fish templates & wooden "leaf" stamp
Picture
Plaster casting
Picture
Painted plaster casting
Picture
Ships That Pass in the Night
0 Comments

    Author

    Cynthia Smith, Maine artist, originally from Connecticut. Taught art at secondary level for 35 years, retired in 2004. Sculpts in bronze, wood, stone, clay & plaster. Her work can be seen at several mid-coast Maine galleries and shows.

    Picture

    RSS Feed

    Archives

    October 2022
    May 2022
    December 2021
    October 2021
    June 2021
    May 2021
    April 2021
    March 2021
    October 2020
    August 2020
    July 2020
    June 2020
    January 2020
    October 2019
    September 2019
    August 2019
    July 2019
    June 2019
    May 2019
    April 2019
    February 2019
    January 2019
    November 2018
    October 2018
    September 2018
    August 2018
    July 2018
    June 2018
    May 2018
    April 2018
    March 2018
    February 2018
    January 2018
    November 2017
    September 2017
    August 2017
    July 2017
    June 2017
    May 2017
    March 2017
    January 2017
    September 2016
    August 2016
    July 2016
    June 2016
    May 2016
    April 2016
    March 2016
    February 2016
    January 2016
    December 2015
    November 2015
    October 2015
    September 2015
    August 2015
    June 2015
    April 2015
    March 2015
    February 2015
    January 2015
    December 2014
    November 2014
    October 2014
    September 2014
    August 2014
    July 2014
    June 2014
    May 2014
    April 2014
    March 2014
    February 2014
    January 2014
    December 2013
    November 2013
    October 2013
    September 2013
    August 2013
    July 2013
    June 2013
    May 2013
    April 2013
    March 2013
    February 2013
    January 2013
    December 2012
    November 2012
    October 2012
    September 2012
    August 2012

Powered by Create your own unique website with customizable templates.