| After finishing up "Tic Tac Tic Tac" (see my last blog post) I was still in "relief mode", so I rolled out another slab of clay and dug through my trove of "impressionables" for some different potential design elements. I tested out a wide variety of found objects and eventually narrowed my focus to a 5 1/2" wide flat wooden disc and an assortment of plastic container lids, nuts, knobs, and a wooden peg. As I experimented with various design ideas, the wooden disc became the obvious backdrop for the patterns that I was creating. | 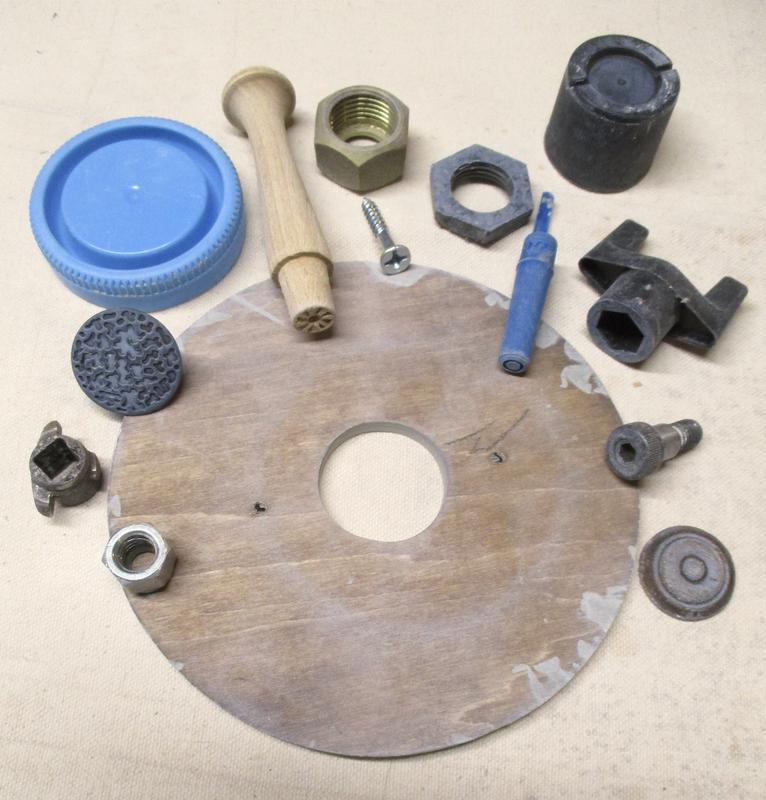 The "Impressionables" |
I began my work on the 6 1/4" x 10 5/8" slab by making four impressions of an edge of the disc in the clay, and then pressing a tin can into the centers of each of these partial circular impressions to create a smaller circle. I used a plastic container cap that had two raised arcs on its top to make a sequence of shapes in the space outside the centers, and then used several of the smaller found objects to make varying impressions within those shapes. The designs within the discs were fairly symmetrical at this point, and I knew that I wanted to add a subtle variation to slightly disturb that symmetry. I used a plastic jar lid that had a textured edge to make another circle within the central area that I had created with the tin can. Each new inmpression was placed just a bit off center. I also added a different impressed design in the center of each of them. The final step in the relief design process was to use a piece of window screening to create a lightly textured surface in the spaces surrounding the large discs. I was then ready to cast.
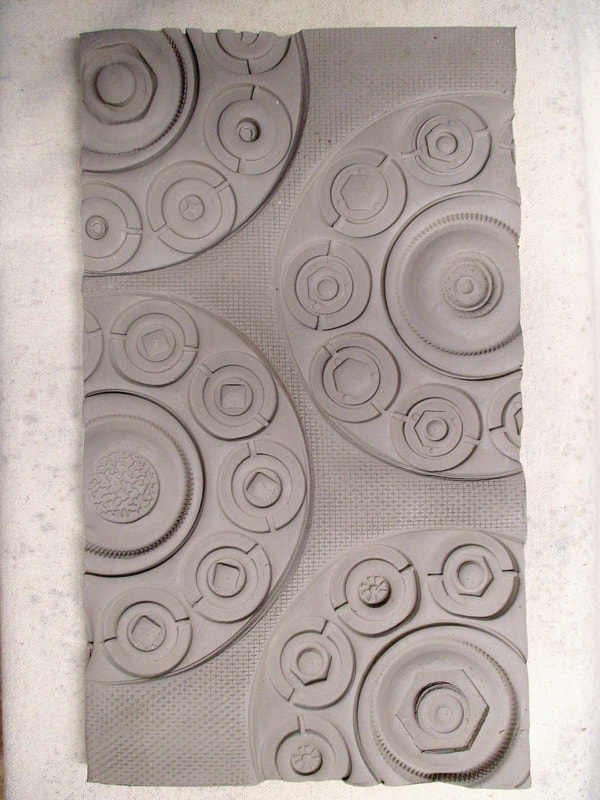 Clay slab | 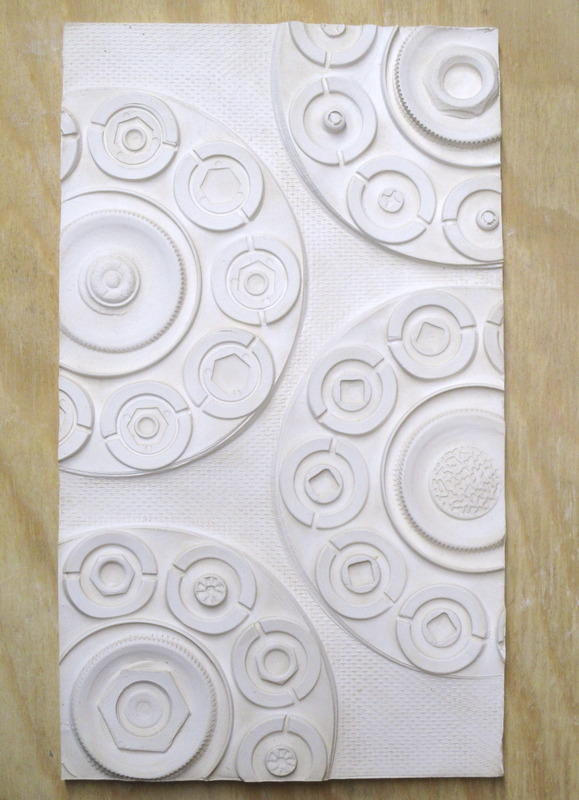 Plaster casting | 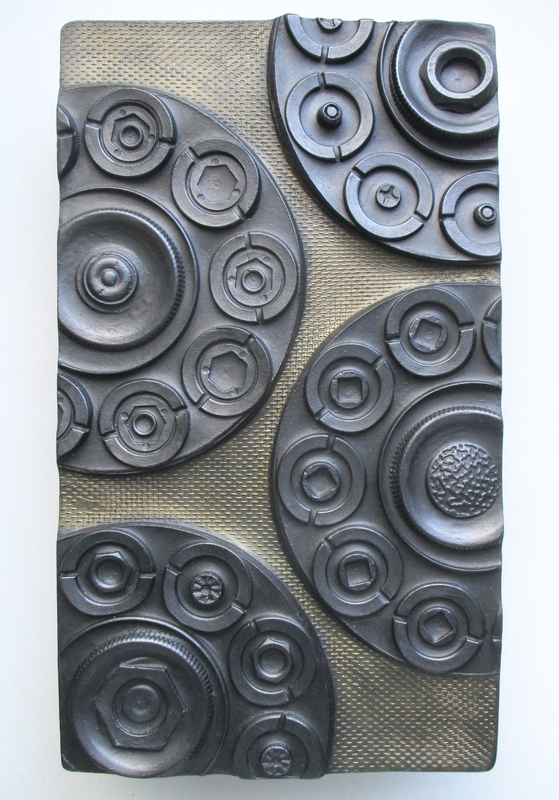 Painted casting |
| After framing in the slab, I mixed up a batch of hydrocal plaster and poured in enough to cover the clay slab by about 1/2". I disassembled the framing once the plaster had hardened, removed the clay slab from the casting, and washed off the clay residue. The plaster casting was then dried in the oven at low heat. I painted the casting with Graphite Gray acrylic paint and, once the paint dried, I buffed it with a soft cloth to bring out the metallic quality. At this point I determined that I wanted to do something to emphasize the discs and so I put a thin coating of Iridescent Bronze (fine) acrylic on the areas surrounding them. It not only brought out the discs, but it enhanced the screen pattern in the spaces. The final step was to mat and frame the piece. C'est fini ! ....and on to the next! | 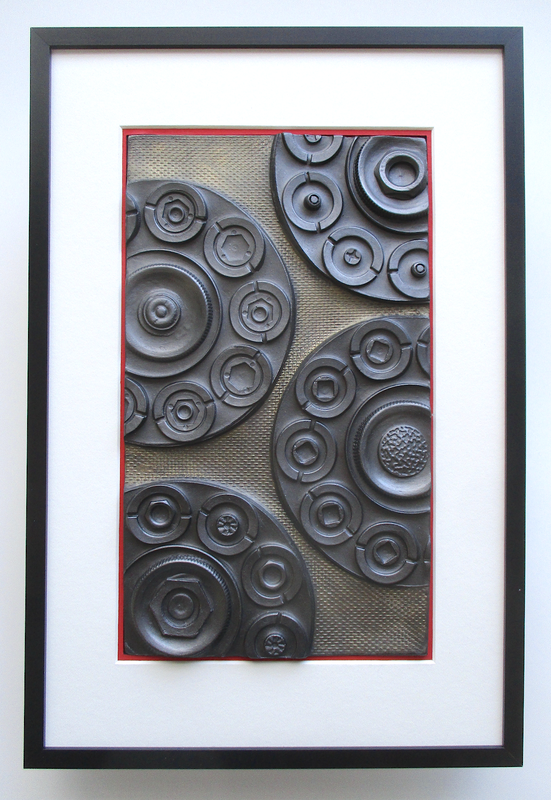 Matted & framed |

 RSS Feed