C.V.SmithARTWORKS
  • Home
  • Blog
  • Sculptures
    • Bronze
    • Clay / Apoxie Clay
    • Plaster
    • Wood
    • Stone
    • SLIDESHOW
  • Galleries
  • Contact
  • Book
  • River Arts
  • BRAF
  • Saltwater Artists
  • CMCA
  • Yarmouth Art Festival

Some Like It Hot ... the Bronze Pour

3/27/2014

0 Comments

 
Picture
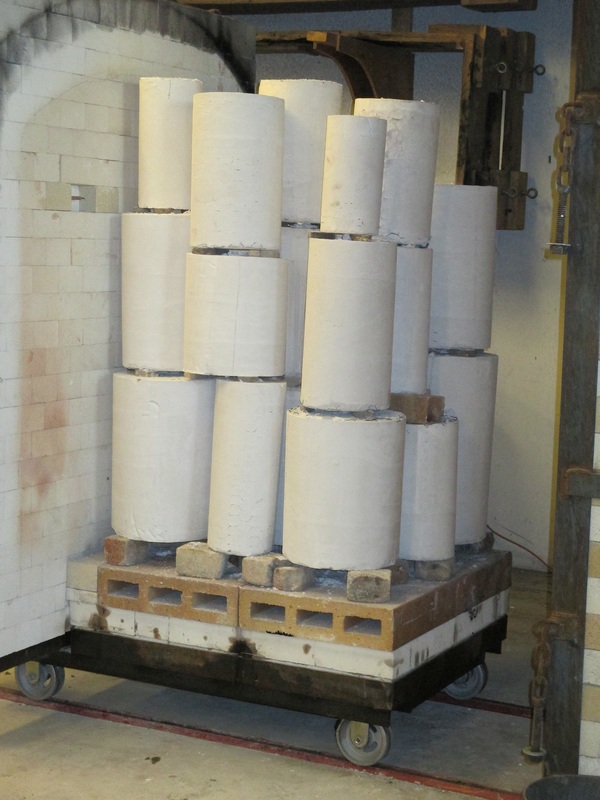
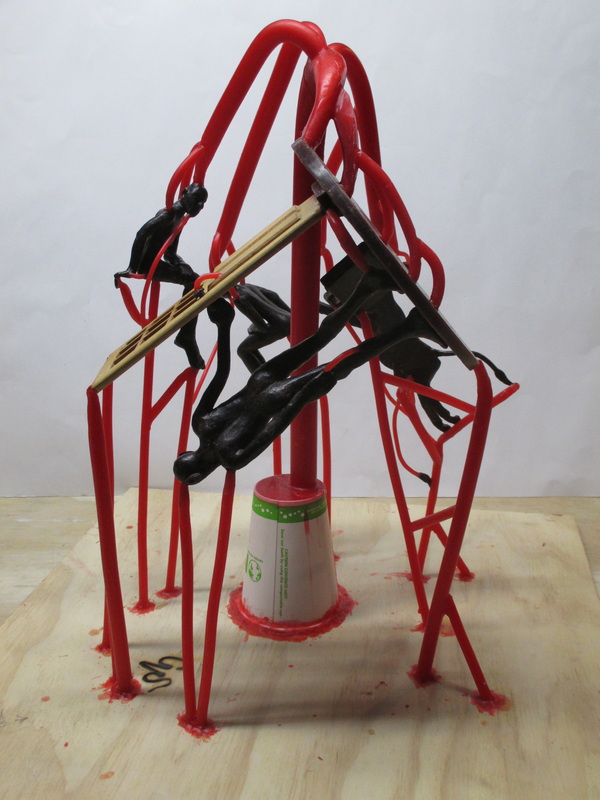
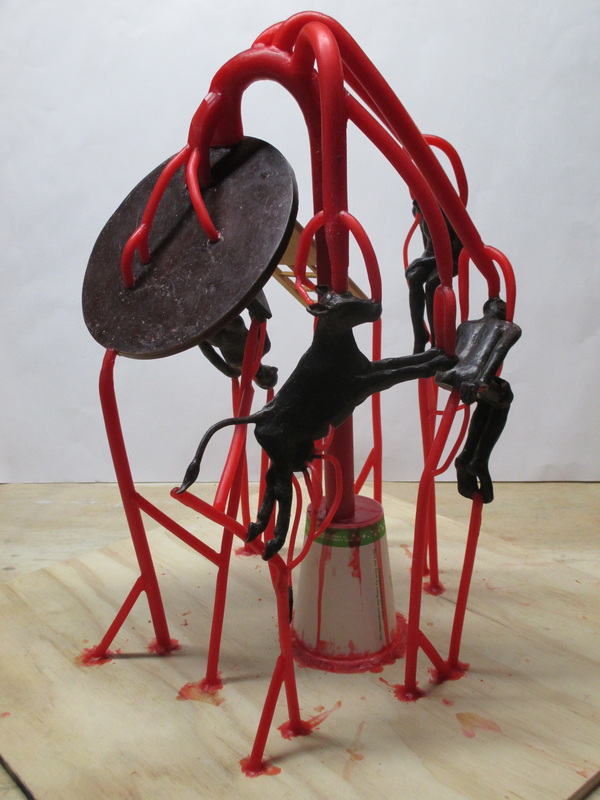
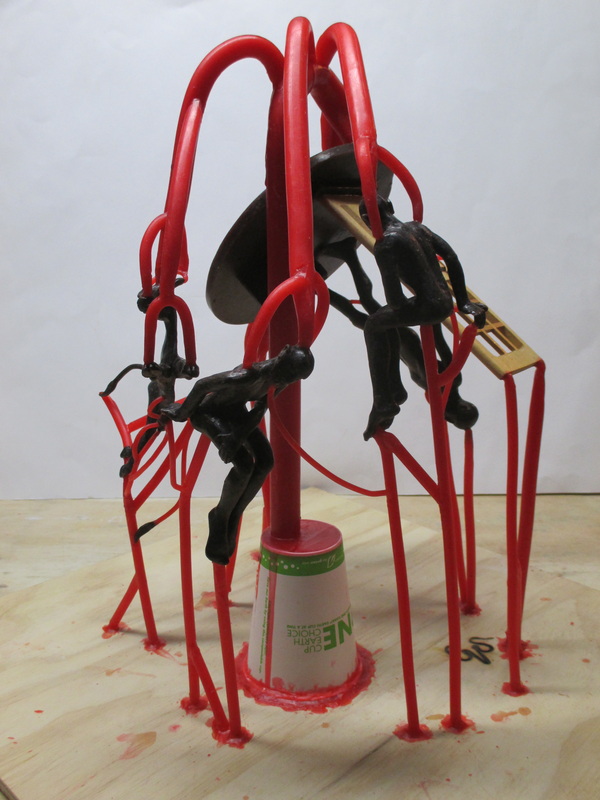
Molds ready to be removed from kiln after burnout
Picture
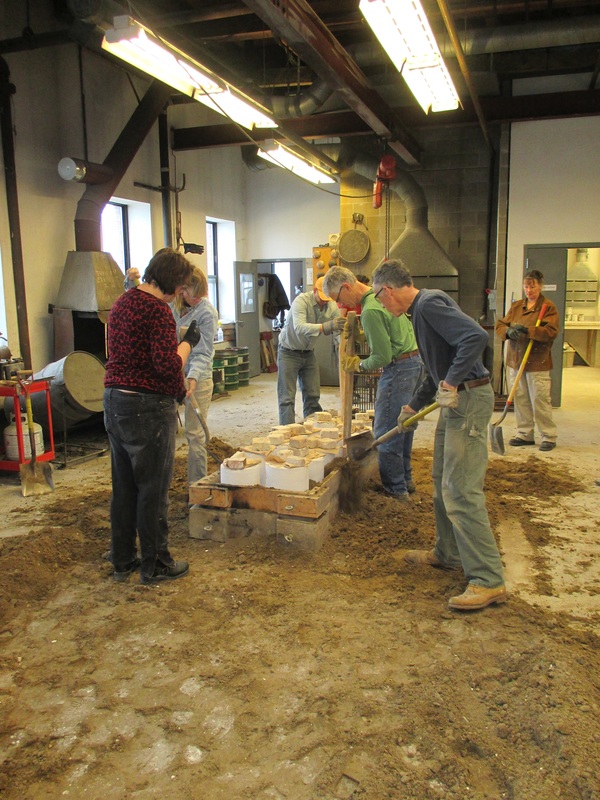
Filling wooden flasks with damp sand
Picture
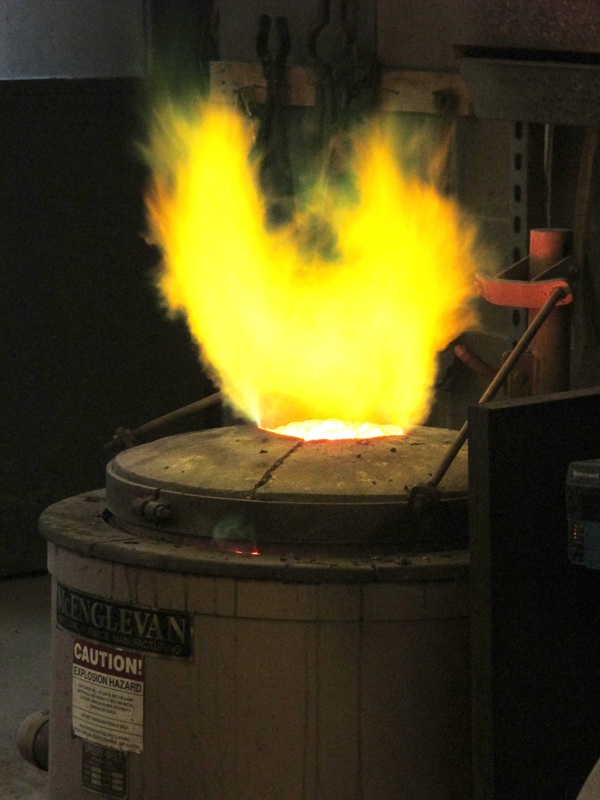
Flames emitted from furnace in which bronze is being melted
    The wax maquettes that were encased in investment molds last week (see blog entry for 3/15/14) were loaded into the kiln and subjected to a burnout temperature of approximately 1,250 degrees for 30+ hours. This process removes all of the wax from the molds and dries out the investment. After the kiln cooled to a manageable temperature, the still warm molds were removed and lined up on a shallow bed of dampened sand. Long wooden flasks (frames) were placed around the molds and dampened sand was tamped in around them to within a couple of inches of the top of the molds. The sand serves to contain any spilled bronze and to insulate the molds. While we readied the molds, bronze ingots were melted in a crucible in the furnace at a temperature of about 2000 degrees. The crucible can hold over 200 pounds of melted bronze.
     When we finished packing the wooden flasks with sand and the bronze was hot, the pour team suited up in their protective garments (face shields, leather jackets, and flame resistant chaps). The furnace was shut down and the hot crucible of bronze was removed using crucible tongs and an overhead hoist system. The crucible was then locked into a pouring shank attached to the hoist, moved along the overhead support beam, and lowered into position over the first of the molds. The hot bronze was poured into the mold until it was full and then the pour team moved down the line of molds and repeating the process. After the first 8 molds were poured the bronze had to be returned to the furnace for reheating to insure that the remaining molds would be effectively filled. (If the bronze is too cool it can solidify before the mold is completely filled.) A second pour teamed filled the remaining molds with the second crucible of bronze.
     Once the bronze in the molds cools, the real work will begin. The gated bronze will have be broken out of the investment molds and any remaining investment will have to be cleaned off the surface of the bronze. Next the gating and fill cup will be cut away from the sculpture casts. The removal points will have to be chased and resurfaced, as will any areas with surface imperfections. This part of the process takes time and a lot of "elbow grease" Stay tuned!
Picture
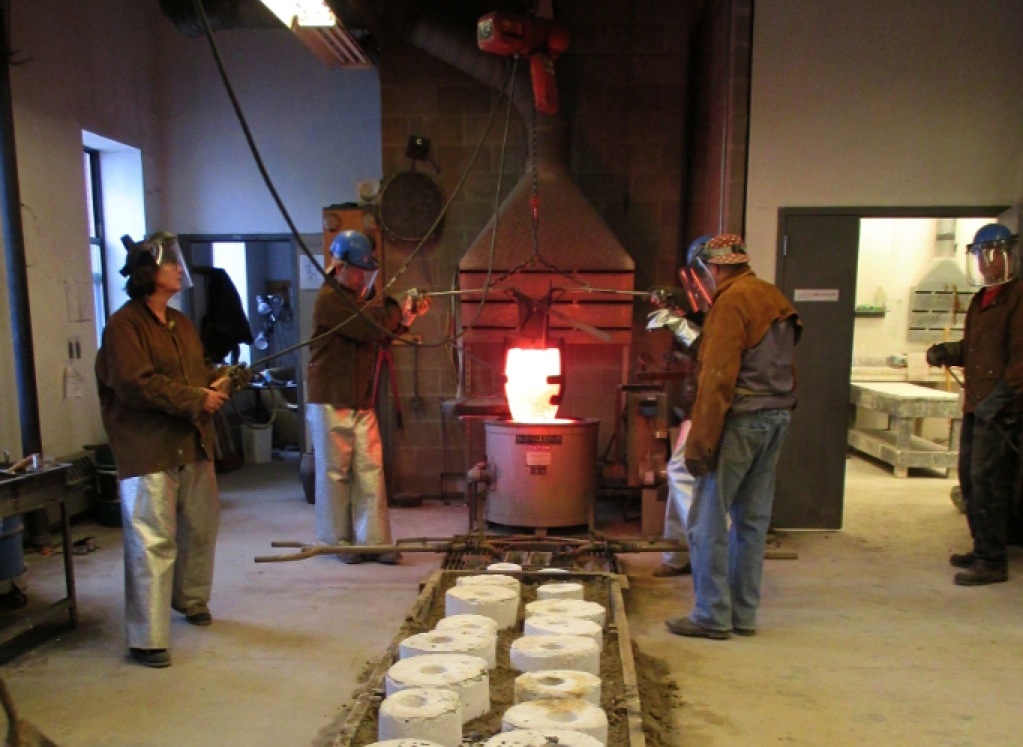
Removing the hot crucible of bronze from the furnace with tongs and overhead hoist
Picture
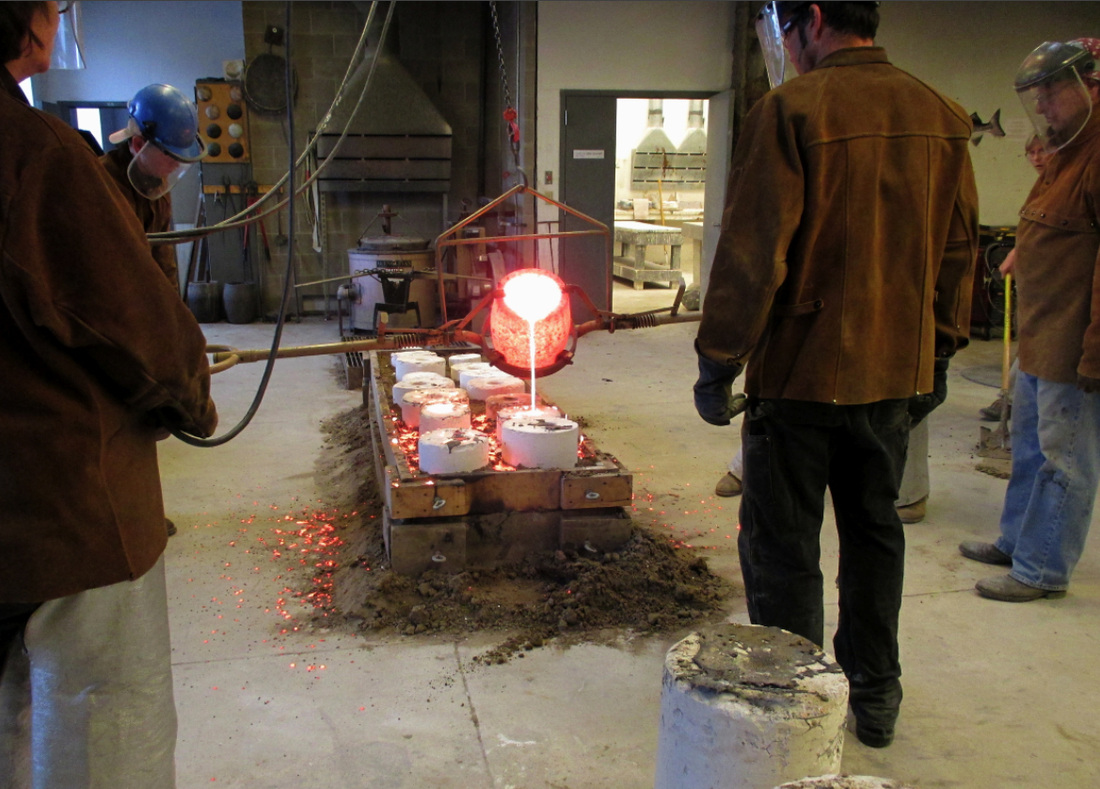
Pouring the hot bronze from crucible held in pouring shank into the molds
0 Comments

Gating Wax Sculptures ... A Balancing Act

3/15/2014

0 Comments

 
      Well... the pieces that I wrote about in my last bog post (3/3/14) have been gated and are safely sealed away in their investment molds. Lest anyone think that this process is a "walk in the park"...think again!  Each wax maquette presents its own individual set of issues when it comes to gating... thickness, projections, details, and unusual angles. All of this comes in to play when trying to determine the most efficient direction of flow for the bronze through the piece. If you are gating multiple forms with varying shapes and thicknesses, not to mention odd angled appendages, the process is obviously further complicated. This was the case for the 3 men, a cow and a door that I just completed.
Picture
      The trickiest sculpture to gate, because I wanted to cast it in one piece instead of doing each part separately and then attaching them later, was going to be the man on the round base with his hand on the door. I decided that the best way to get the most bronze quickly into the piece would be to bottom feed it into the base and vent it out the top of the man's head and the top of the door. I was able to use a vise to hold the main gate while I attached the base at an angle that would allow space for the door and man to be added above the sprue cup. After attaching the sprue cup to the end of the main gate, I set it up in the vise so that the surface of the base was flat. I was then able to attach the door, the man, and his case to the base, and then turn the whole thing upside down and attach the cup to the wooden baseboard. Finally I connected the piece to the baseboard by adding vents from the top of the man's head, his lower shoulder and the ends of the door and the lowest point of the round base. Next!
Picture
Picture
Picture
      The second maquette that I added was the cow. The challenges for this piece were the delicacy and thinness of some of its parts (the tail, the teats, the ears and legs) and its variety of angles. I decided to vent out through the tail and back legs and to feed the bronze in through the head, ears, and front legs. By the time I finishd gating the teats, it looked as though I had attached the udder to a milking machine. I also made a 'just in case' spare tail and attached it to the gating. The next step was to add the 2 separate seated figures to the gating system. I positioned them so that I could have the bronze enter though sprues placed on top of their heads and shoulders and flow smoothly through the bodies. I vented them out the lowest point of the feet. Additionally, I vented out of the fingers on the right arms, as well as from the chins. The final step was to add additional diagonal braces to the venting to insure that the pieces were securely supported and would not be dislodged either in the journey over potholed and frost heaved roads into Portland or when the investment was poured into the mold. 
Picture
Picture
Picture
       As the first sentence of the blog indicated, the gated maquettes survived both the trip to Portland and the investing process. The actual bronze pour will take place next Saturday and the pieces will be broken out of their molds the following week. Fingers crossed ... stay tuned!
0 Comments

Works in Progress .... Creating Waxes to be Cast in Bronze

3/3/2014

2 Comments

 
    For the past month I have been very busy getting some work ready to be cast in bronze later this month. I will at long last be casting the "stair ball" that I have written about in several of my blog entries (9/11/12, 11/28/12, 10/27/13). In addition, I have made several smaller figural (human and animal) pieces to be cast. The creation of each of the figural pieces involved a common thread in that each piece is paired with a wooden object unearthed from my treasure trove of "it could be used for something someday" items.
Picture
Walnut appetizer dish
Picture
Wax cow
Picture
Test set up for final piece
     While cleaning out a closet I came across an old shallow walnut appetizer serving tray, and it occurred to me that it might be just what I needed as a mounting surface for a relief sandcast bronze moon that I had done some time ago. It turned out to be a perfect fit, but it also inspired a new direction for the piece. I immediately decided to create a bronze cow to jump over the moon, a` la "Hey Diddle Diddle". To complete the piece, I will place a small wooden nob top just below the moon and will paint it to look like the earth. 
Picture
Wax figures ... view 1
Picture
Wooden clamp
Picture
Wax figures ... view 2
    The cow jumping over the moon project inspired me to find other objects that might be coupled with small bronze sculptures. This thought led me to an old wooden clamp that had been languishing away in the cellar. I immediately saw it as an effective jungle gym for small human figures... sitting on it, climbing on it, hanging from it, etc. I found myself with multiple ways of setting it up, with multiple arrangements of figures. In the end, I decided to start simple ...two figures seated atop the flat ends of the clamp looking over their shoulders at each other. The clamp itself with eventually be attached by the narrow ends to a base of yellowheart. (I will be looking for more clamps for future variations! )
Picture
Door man ... view 1
Picture
Door man ... view2
Picture
Door man ... view 3
    The final piece that I will be casting resulted from the discovery of a wooden dollhouse door that I had acquired for a project 40+ years ago and never used. Being in a figural frame of mind, I decided that I would make a figure that was either coming or going through the door. The door itself will also be cast in bronze. I have also made a small suitcase or briefcase that will be on the floor to the left of the figure. The fact that the figure is unclothed and he has a suitcase suits my sense of whimsy. The next step will be to get all of these waxes gated and ready to invest... yet another challenge!! Stay tuned!
2 Comments

    Author

    Cynthia Smith, Maine artist, originally from Connecticut. Taught art at secondary level for 35 years, retired in 2004. Sculpts in bronze, wood, stone, clay & plaster. Her work can be seen at several mid-coast Maine galleries and shows.

    Picture

    RSS Feed

    Archives

    February 2023
    October 2022
    May 2022
    December 2021
    October 2021
    June 2021
    May 2021
    April 2021
    March 2021
    October 2020
    August 2020
    July 2020
    June 2020
    January 2020
    October 2019
    September 2019
    August 2019
    July 2019
    June 2019
    May 2019
    April 2019
    February 2019
    January 2019
    November 2018
    October 2018
    September 2018
    August 2018
    July 2018
    June 2018
    May 2018
    April 2018
    March 2018
    February 2018
    January 2018
    November 2017
    September 2017
    August 2017
    July 2017
    June 2017
    May 2017
    March 2017
    January 2017
    September 2016
    August 2016
    July 2016
    June 2016
    May 2016
    April 2016
    March 2016
    February 2016
    January 2016
    December 2015
    November 2015
    October 2015
    September 2015
    August 2015
    June 2015
    April 2015
    March 2015
    February 2015
    January 2015
    December 2014
    November 2014
    October 2014
    September 2014
    August 2014
    July 2014
    June 2014
    May 2014
    April 2014
    March 2014
    February 2014
    January 2014
    December 2013
    November 2013
    October 2013
    September 2013
    August 2013
    July 2013
    June 2013
    May 2013
    April 2013
    March 2013
    February 2013
    January 2013
    December 2012
    November 2012
    October 2012
    September 2012
    August 2012

Powered by Create your own unique website with customizable templates.