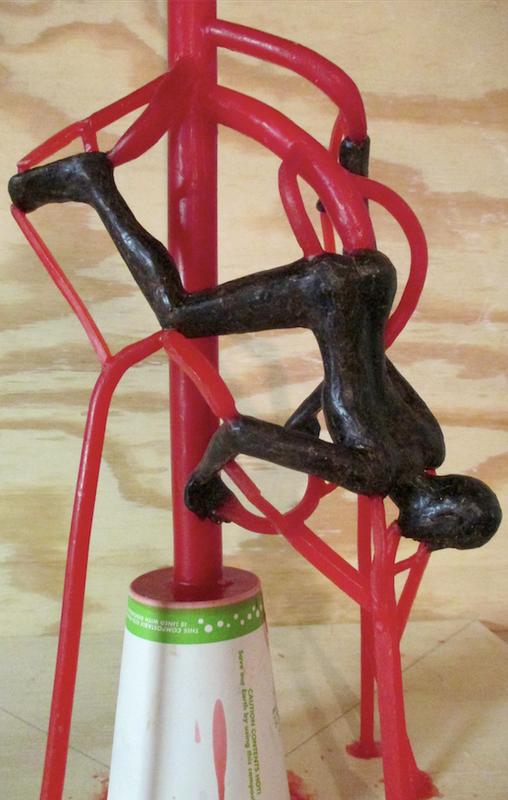
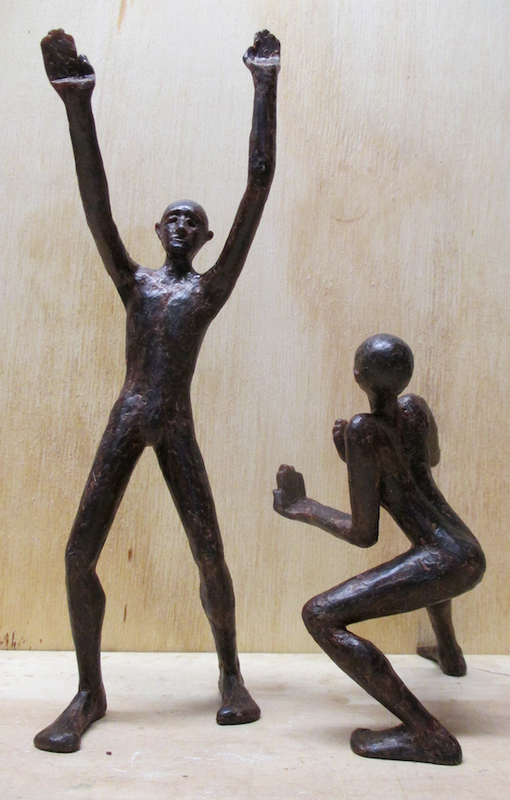
 Arm posts & venting 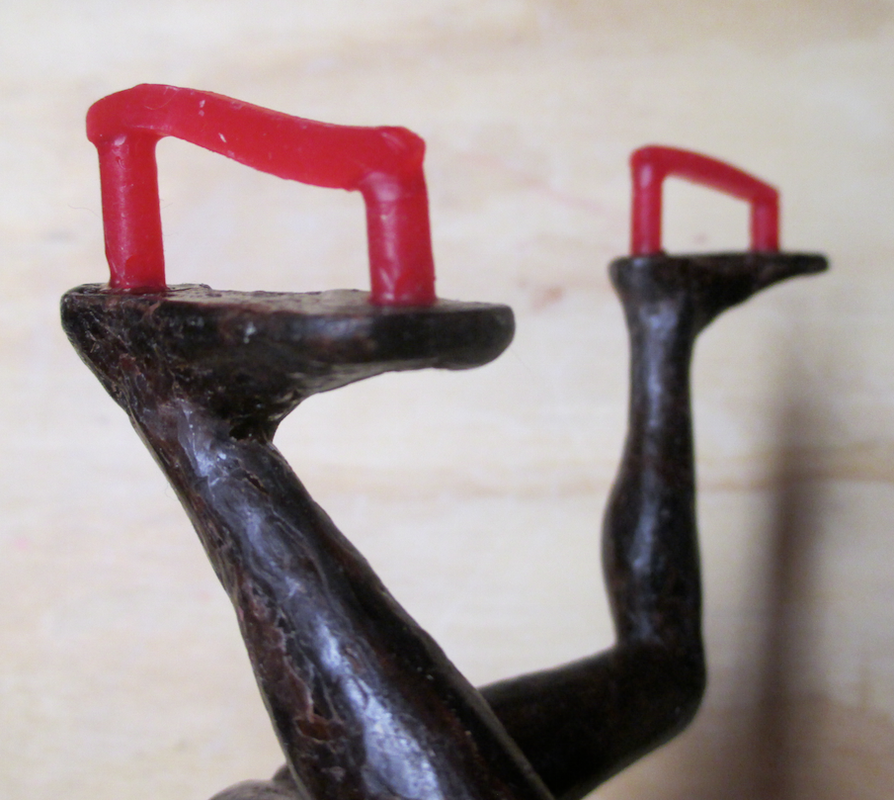 Foot posts & gate connections 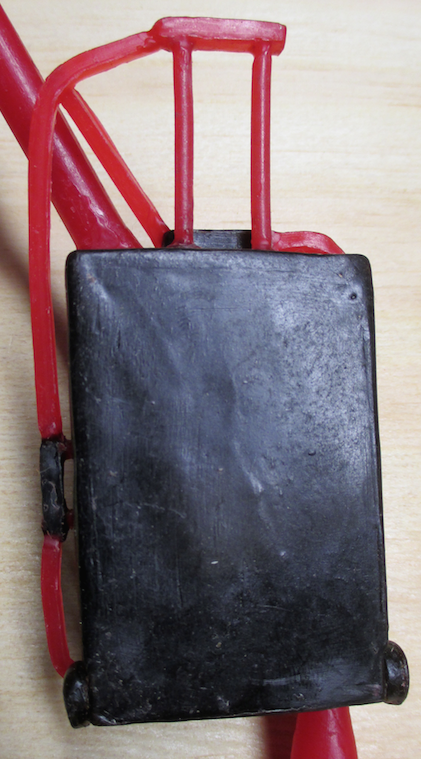 Rolling case gating | The process of setting up a single gating system for multiple wax forms can be challenging. You want to create a path that will allow allow the molten bronze to flow smoothly and efficiently through the system, filling the gates and forms while allowing the air to escape through the vents. You must identify angles and "deadends" where air might be trapped and block the flow of bronze, and then construct additional gates or vents to eliminate these potential blockages. On top of these considerations, you also want to create a gating setup that is compact, so that your investment mold is not unnecessarily large. Oh, and did I mention that this intricate balancing act is constructed with the pour cup down - the inverse position of how it will be poured? The figures and pieces of baggage described in my previous three blog postings each presented their own unique gating challenges. I added short wax posts on the bottom of the feet both figures, as well as on the hands of the standing figure and on the forearms of the crouching figure. These will eventually be used to attach the figures to the base and the wooden clamp. The foot posts needed to be gated and the hand posts needed to be vented. I also had to vent the chins of both of the figures, and the nose of the crouched figure so they wouldn't create air pockets. A steady hand and a light touch is needed when welding to an area as small as the tip of the nose! |
 Crouched figure gated | 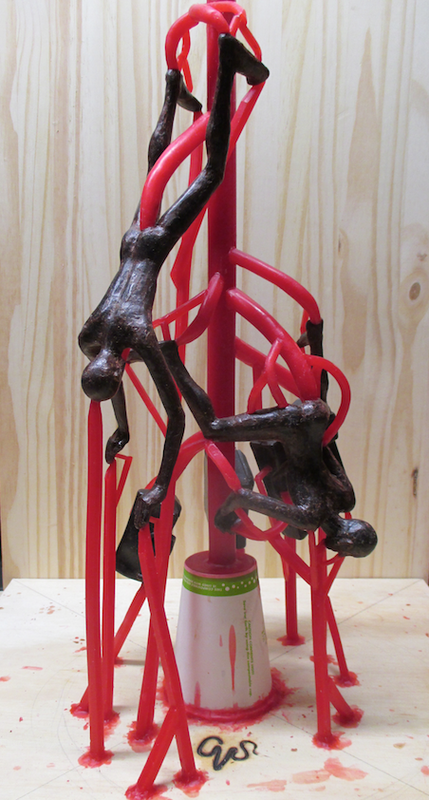 2nd figure gated | 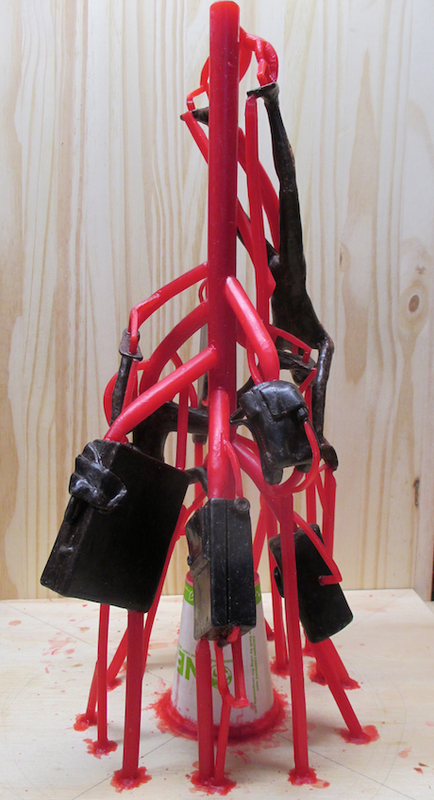 Baggage gating | 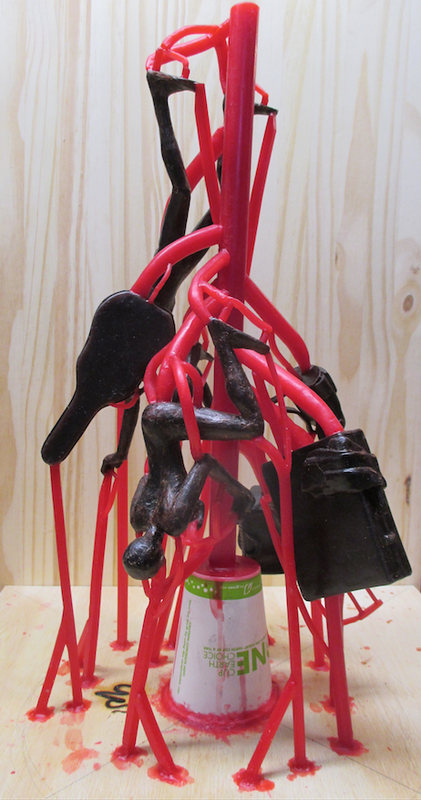 Guitar case added |
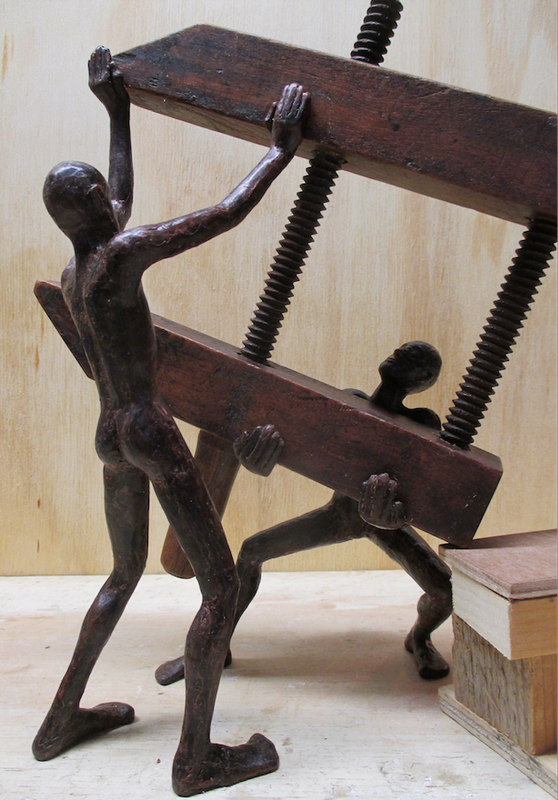
The straps on the backpack and the handles on the rolling case, the large suitcase and the guitar case all needed to be either gated or vented to insure that the bronze could flow through these relatively thin structural elements. I also added wax attachment posts to the bottom of each bag as I had done to the figures. After securing the pour cup and the large vertical main gate to a plywood baseboard, I began the process of attaching the individual wax forms. (I must mention that good wax welding technique is a great asset when setting up this kind of intricate gating structure.) I started with the crouched figure because it had so many different angles (bent elbows & knees) that had to be considered in determining its positioning in the system and the placement of its gates and vents. I set the figure up so that the bronze would feed in through the feet and buttocks, and vent out through the hands, shoulders and head. I used a similar approach with the standing figure. Once the two figures were attached, I began adding the various bags, starting with the rolling case. In addition to keeping the the gating arrangement both compact and "flow efficient", I also try to keep in mind the dismantling stage of the casting process...I will eventually need to be able to cut away the gating from the cast bronze pieces without damaging them. So - gating should be compact, efficient, and accessible!
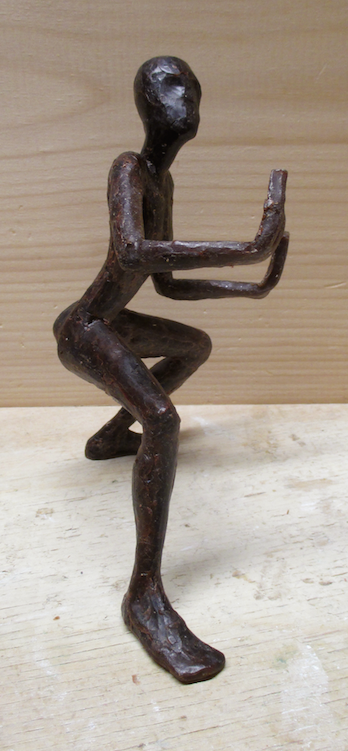
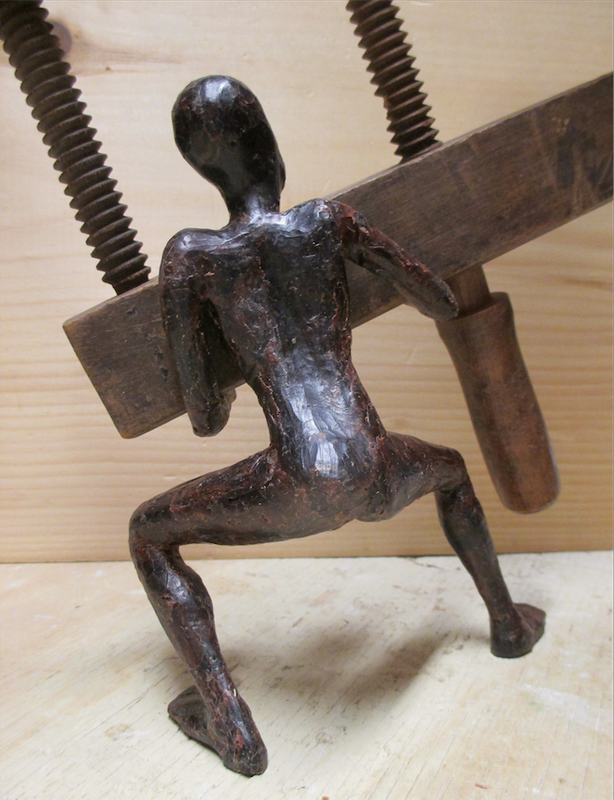
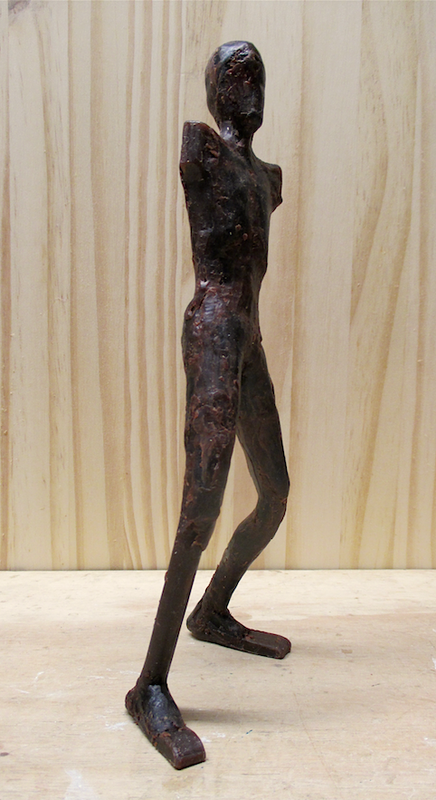
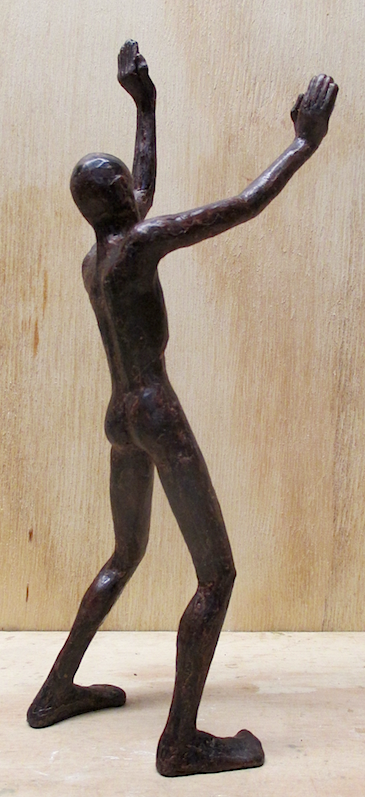
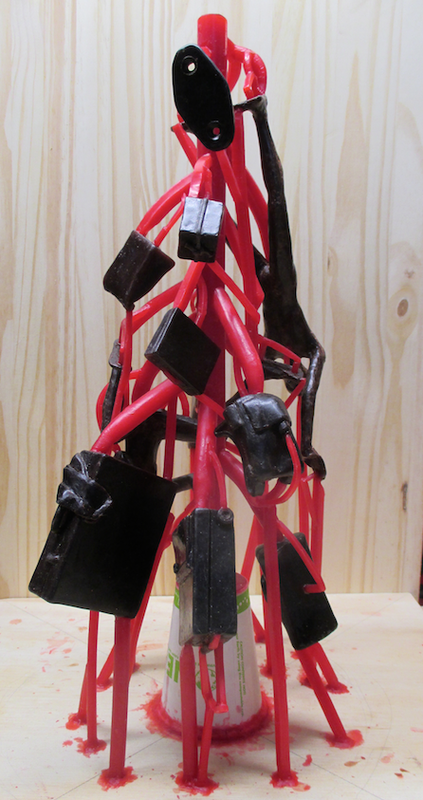 Completed - View 1 | 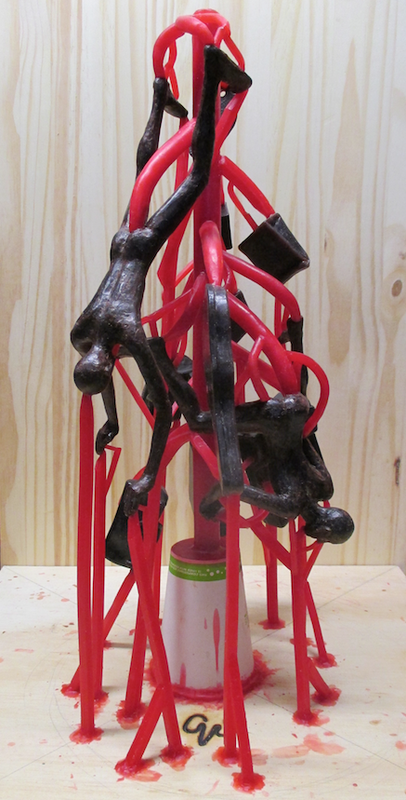 View 2 |  View 3 | 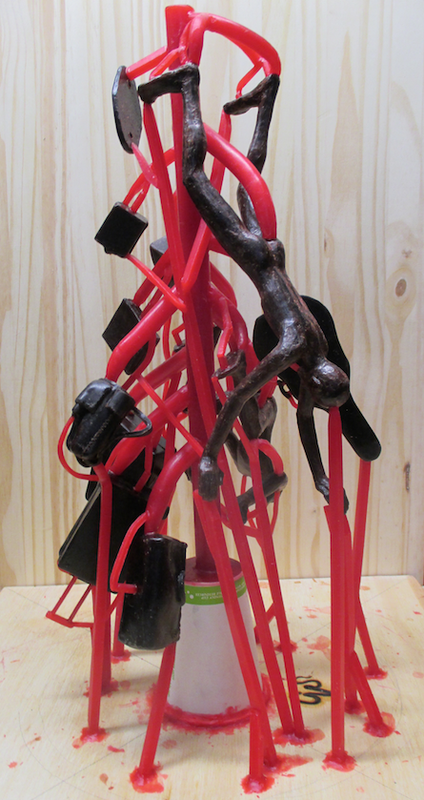 View 4 |
The next step will be to make a flask to contain the mold and then pour the investment...
stay tuned!

 RSS Feed