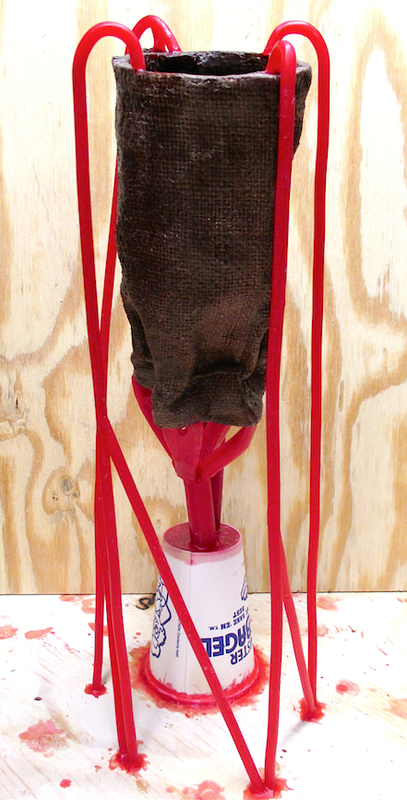
The gating process for forms that are going to be cast in bronze requires an understanding of structure and balance, good wax welding technique, and a lot of patience...especially when you are dealing with forms that may have multiple contradicting angles. Your goal is to create a sequential pathway for the bronze to flow smoothly through the spaces in the mold, while forcing air and gases out the vents ahead of the incoming bronze. You want to avoid the possibility of creating "dead ends" that might trap air and create unfilled voids in the casting. Once you have taken all these things into consideration, you are ready to gate.
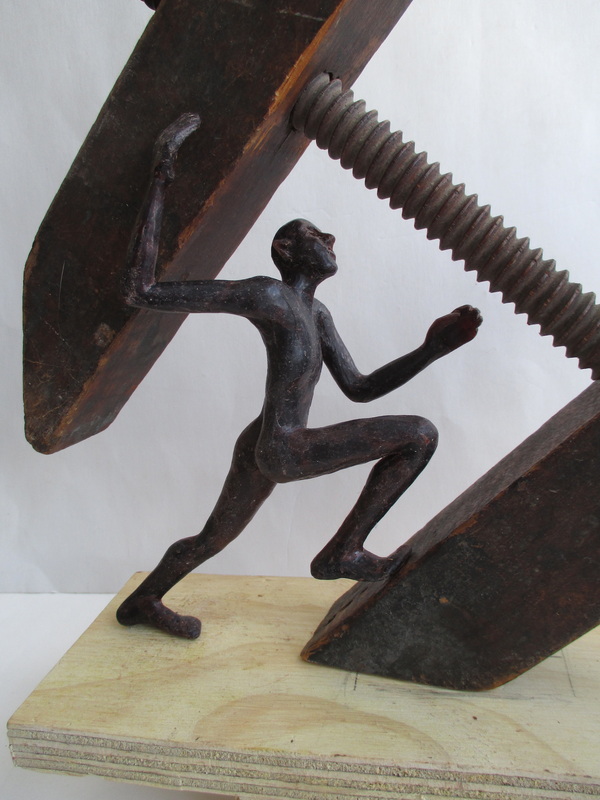
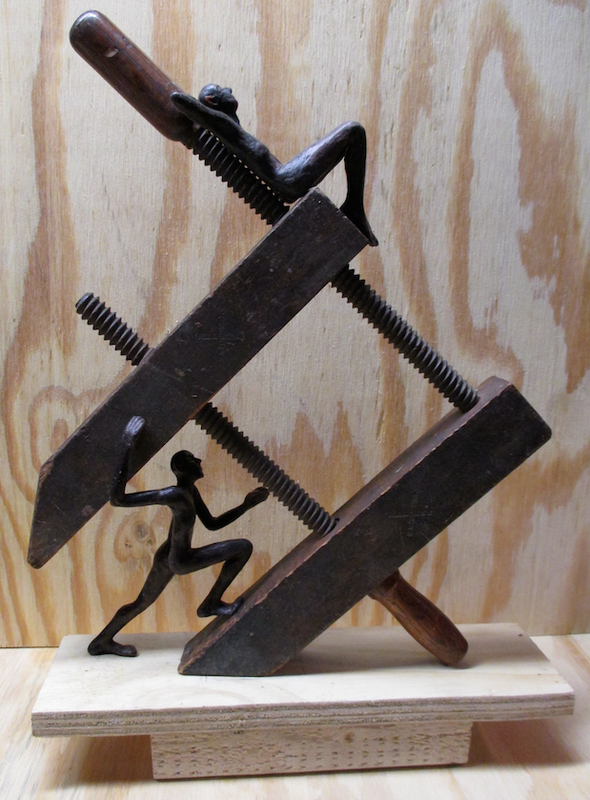
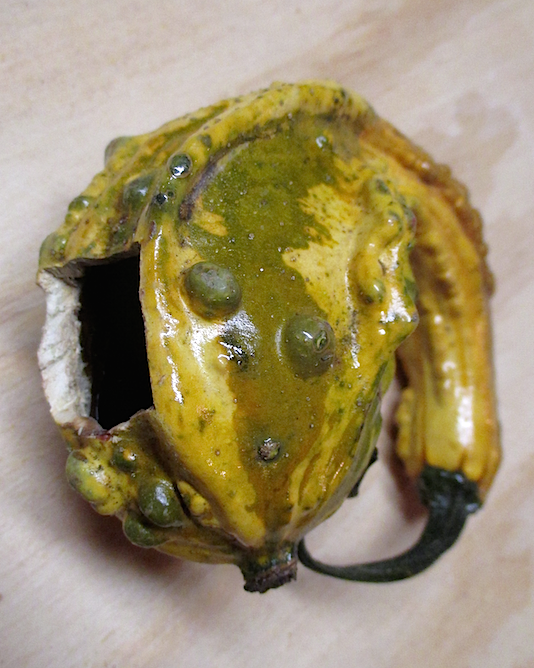
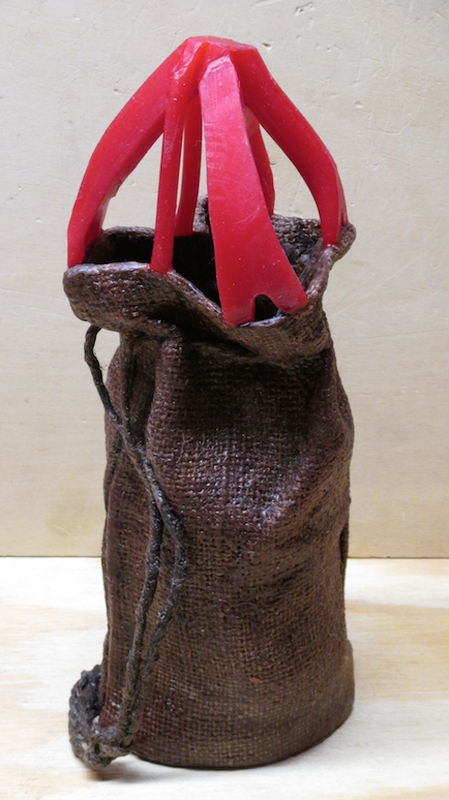
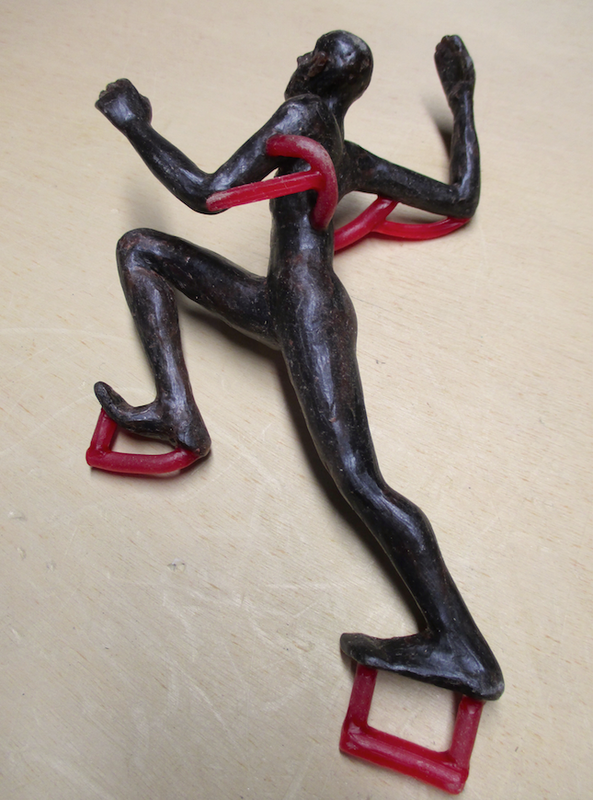 Running figure 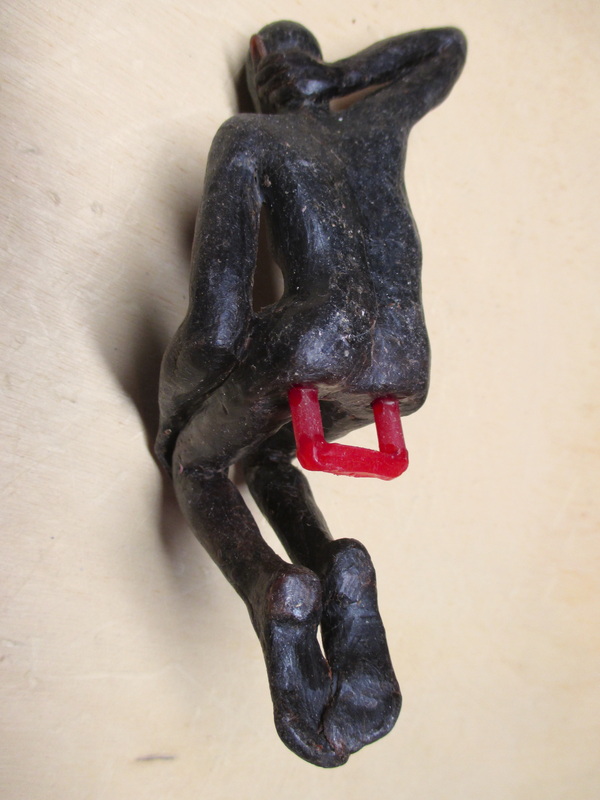 Seated figure 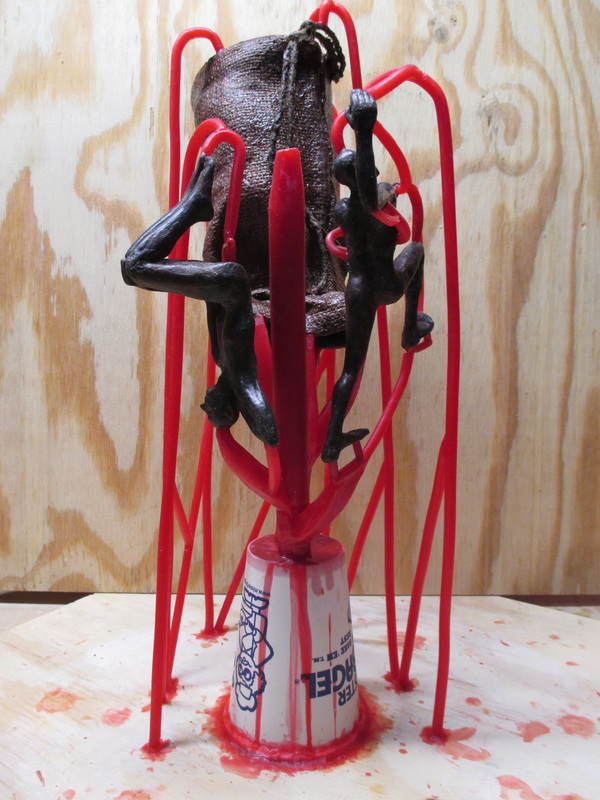 Both figures gated 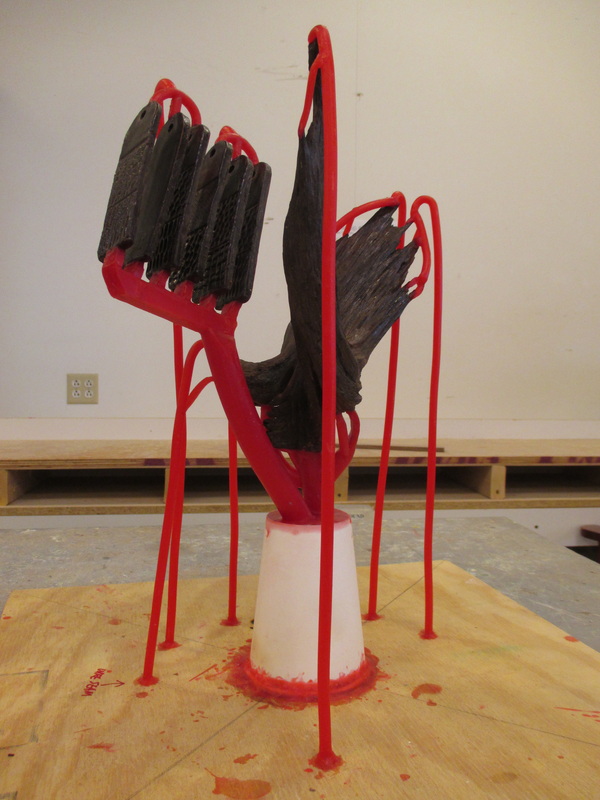 Wood & test pieces gated | In my last blog post (3/11/15), I wrote about finishing the last of the project waxes and the process of gating the burlap sack. I next added a second longer main gate to the sack's sprue cup so that the wax figures and gourd could be integrated into the sack's gating system. I then determined where, and in what position, the two wax figures would be attached. The running figure was set up to so that the bronze would feed in through the feet and vent out through the head and hands. The seated figure would be fed through the top of the head and raised elbow, and vent out through the feet. The final step was to add the gourd to the system. It was attached above the figures on the end of the main gate, with its opening at the top so that the investment would fill the hollow area of the gourd. The bronze will feed in through the thin neck end of the gourd. I gated the wood piece and test samples in a separate system. A main gate for the wood was attached to the flat base end of the piece and then welded to a sprue cup on a plywood base board. Vents were attached to various points on the "wing tips". Next I gated the six test strips together as a unit, and then attached that unit to a second longer main gate on the sprue cup. The good news is that all the pieces were gated and ready for investing... The bad news is that the gated pieces were stored for a week in the foundry work room before we were scheduled to invest them in molds. The foundry is located on the top (5th) floor of Maine College of Art and, because it has been a cold spring and heat rises, the storage area got so hot that the gated pieces literally "wilted" in place. The discovery led to a mad scramble to put things "right" so that the investment process could proceed on schedule. Fortunately my wood gating only developed a bit of a lean, so it was fairly easy to repair. The sack group welds had held, but the gating had drooped like cooked spaghetti. It required almost a total remake! *#@&%#* !!!! | 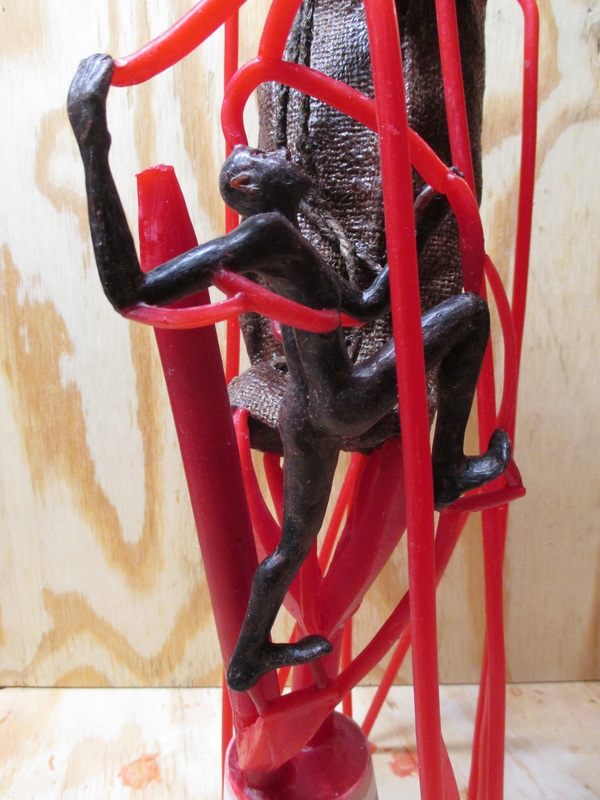 Running figure gated 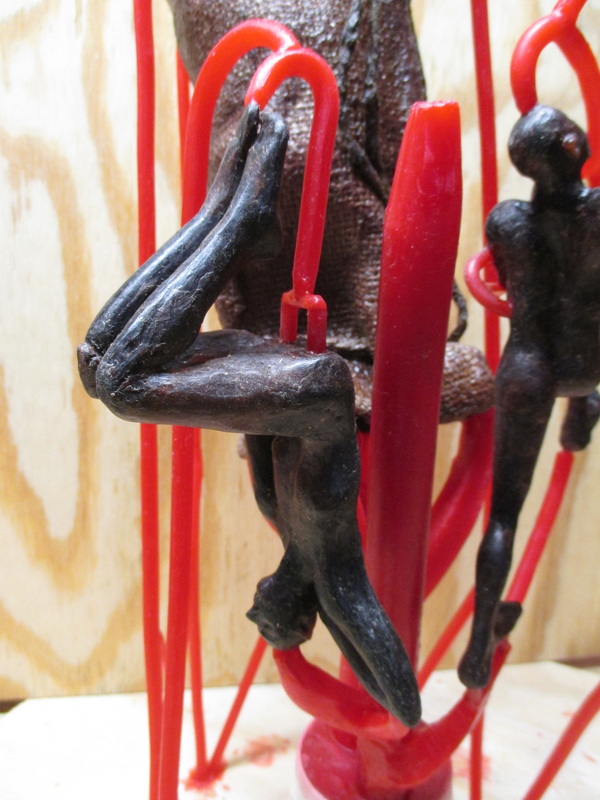 Seated figure gated 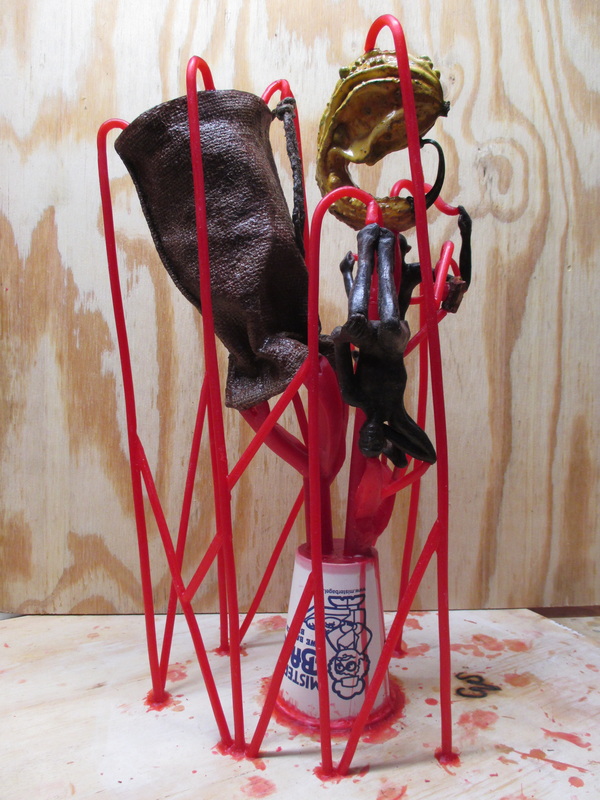 Gourd gated 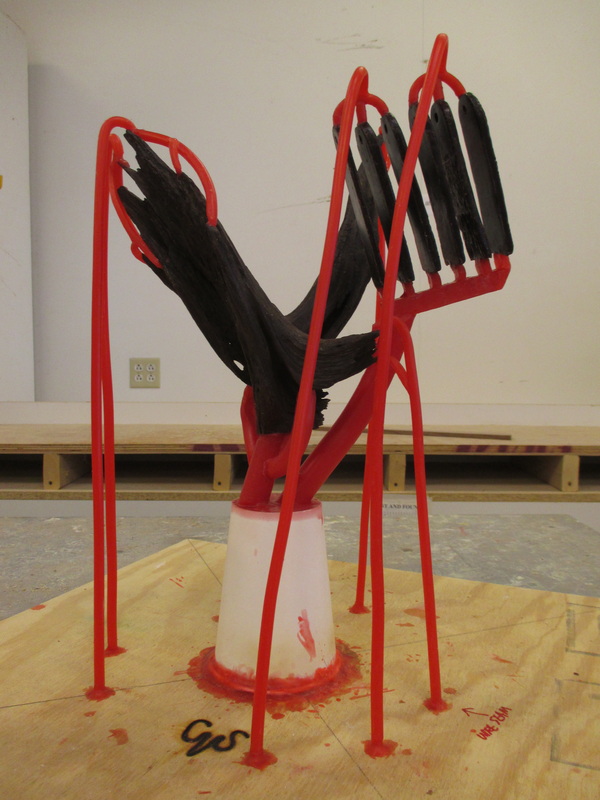 Slow lean... |
The good news is that the investing went on as scheduled and all of the waxes are safely encased in their molds!


 RSS Feed