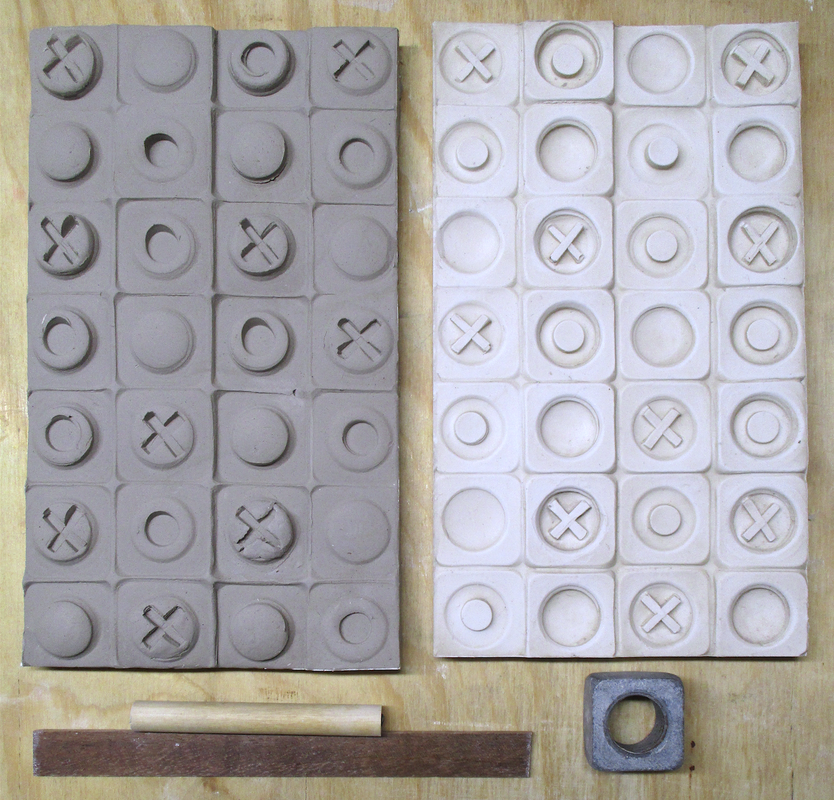
Rang in the New Year by finishing up two pieces for entry into the upcoming Black & White themed show at the River Arts Gallery in Damariscotta. The first piece that I tackled was a vertical design plaster relief. I was taking a brief break from the plaster fish relief designs I had been working on and wanted to play with something abstract. After experimenting on a slab of clay with a variety of objects from my collection of "impressionables" I zeroed in on a very large nut (the nut & bolt variety, not the edible kind!). It measured about 1 3/8" square. It had slightly rounded corners and one face was slightly rounded while the other was flat. Pressing the nut into the clay produced a domed effect in the center of the impression. When I pressed the end of a wooden dowel into the dome it became an "O". This led me to the idea of creating some sort of relief "tic tac doe design", so I used the end of a small thin piece of wood to impress an "X" in one of the domes. I liked the effect. I rolled out a 1/2" thick 6" x 10" slab of clay and got to work executing my design.
 Tools, original clay & casting | 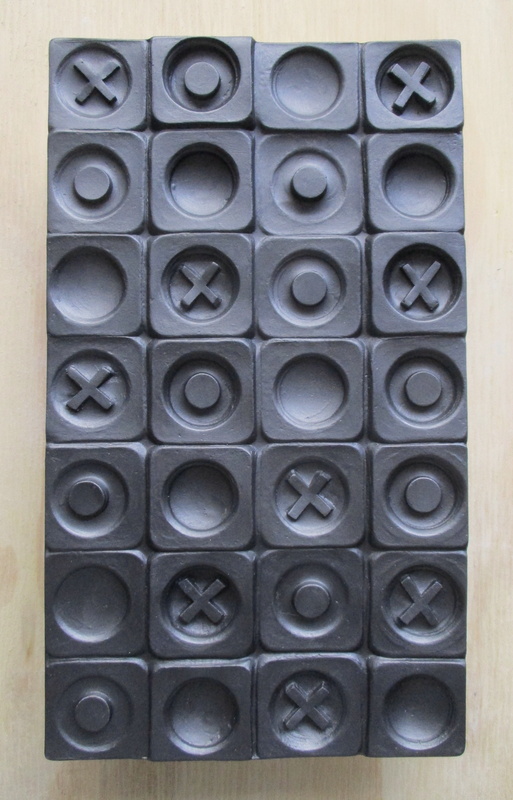 Painted | 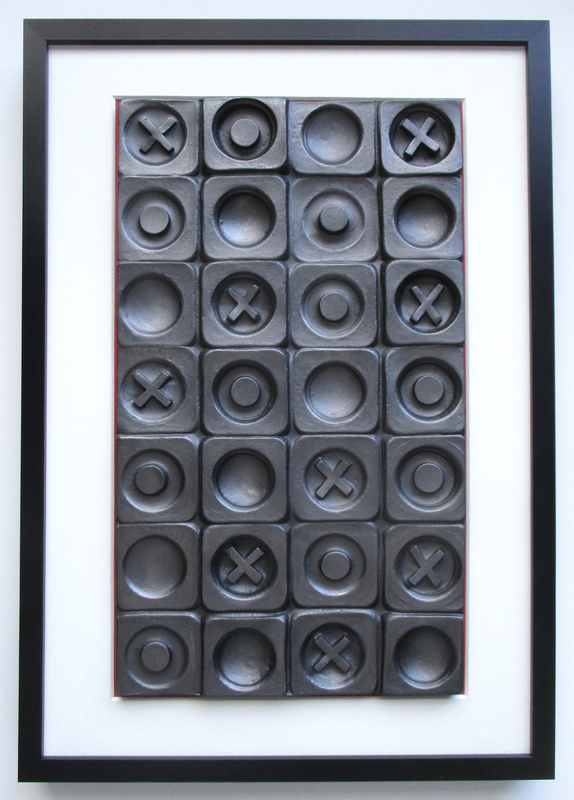 Framed ..."Tic Tac Tic Tac" |
The size of the slab allowed me to make 21 impressions of the nut in 4 vertical rows of 7 (or 7 horizontal rows of 4, if you prefer). The design was to be based on the idea of tic tac toe, but it was not going to be an actual game set up with 9 boxes. I impressed X's and O's in patterns that I though might simulate game play without using 3 marks in a row, and I also left some domes plain to indicate that the game was either in progress or unfinished. After casting the design in plaster, I cleaned up any surface and edge irregularities, dried it and then painted it with graphite gray acrylic paint. Before framing the piece I rubbed the surface with a soft cloth to bring out the metallic quality of the paint. After matting and framing the finished piece, I was ready to start work on my next entry for the show.
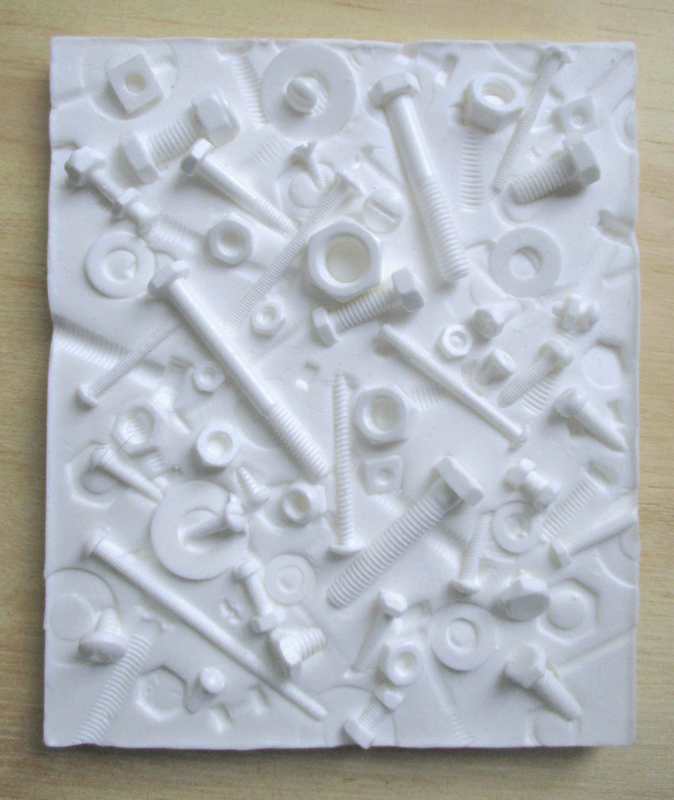 Resin casting 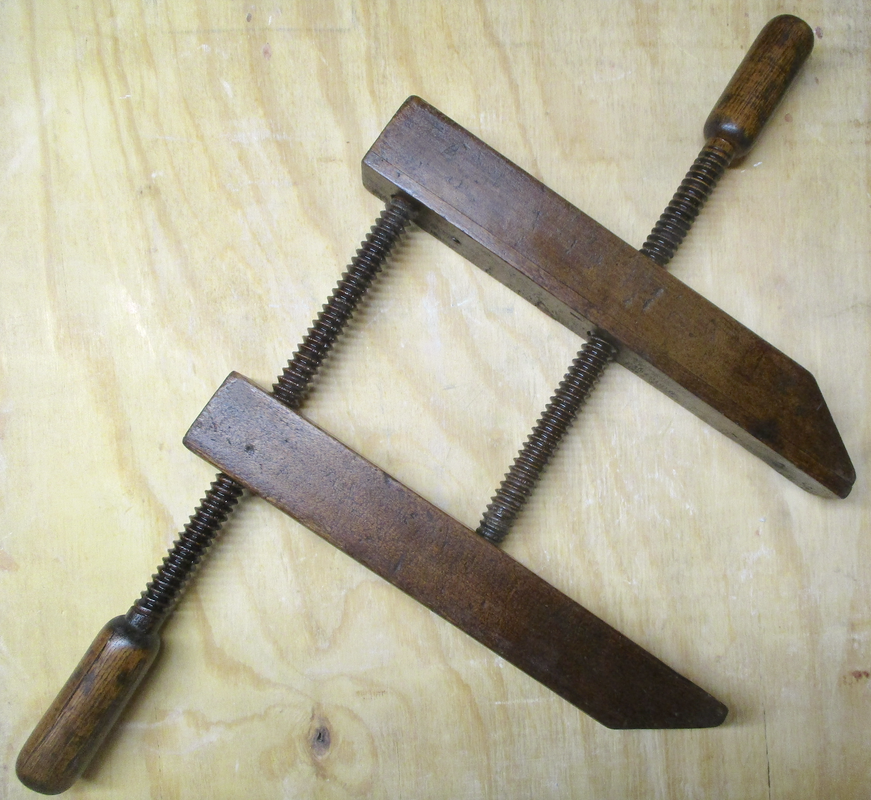 Wooden screw clamp | I thought that the Black & White theme was the perfect opportunity for me to utilize one of the resin castings that I had made while taking a moldmaking class last summer at Maine College of Art in Portland (see my blog post for 7/6/18). I didn't want to frame it in the same way as I had framed my plaster casts since the resin was white and would not be enhanced by a white mat....and I wasn't sure if the details in the relief would show up as well if I painted it with the graphite gray acrylic. As I considered alternative framing options, it occurred to me that I still had a wooden screw clamp left over from my clamp sculpture series (see my blog posts for 1/27/17, 6/9/15 and 5/4/14) that could not only serve as a creative frame, but would also add to the visual dialogue of the piece. After making my framing choice, I determined that I would need to add a wooden backing to the casting that would allow me to attach it to the clamp more securely. After cutting, staining and sealing the board, I attached it to the back of the casting with four screws. I set two short pieces of doweling into each side edge of the board and glued them into holes that I had drilled into the inside edges of the clamp. |
I had to cut off the center portion of the bottom wooden screw so that I could glue the handle end in one side of the clamp and the tip end of the screw in the other side so that it would appear that the screw still went all the way from one side to the other. The top screw was easily glued into position without any adjustments. The final step was to add a hanging wire on the back and "Tic Tac Tic Tac" was complete. Both pieces have been delivered to the gallery and await the jury's verdict!
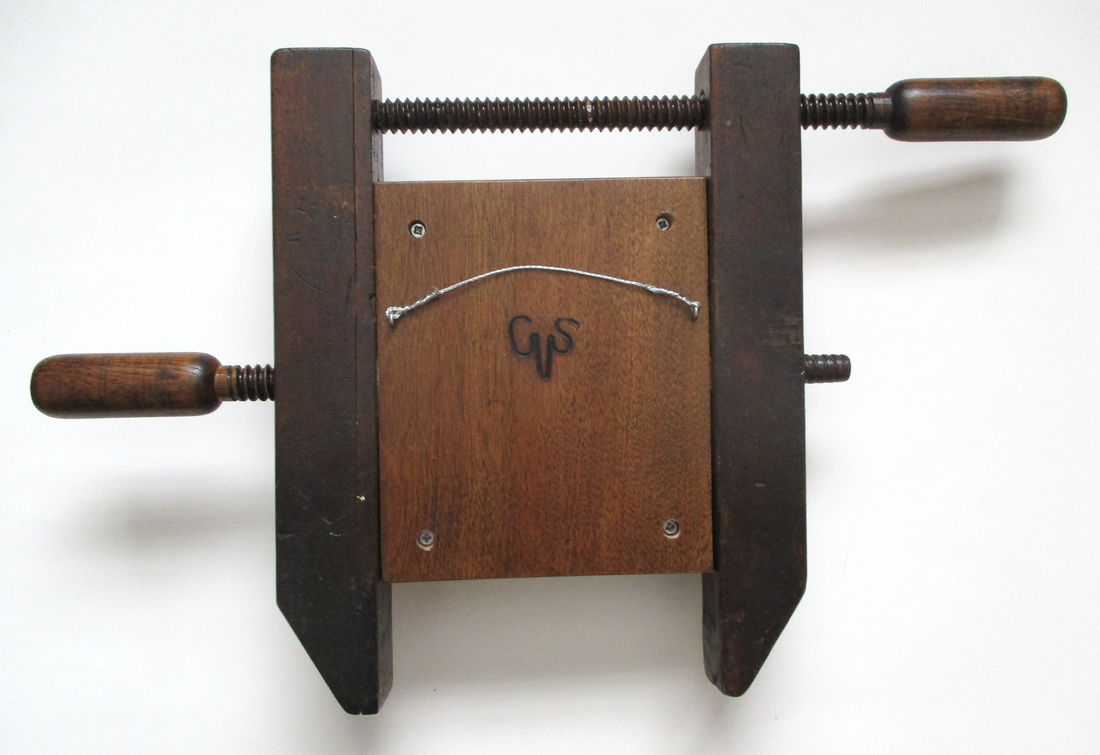 Wooden screws & casting with backboard attached | 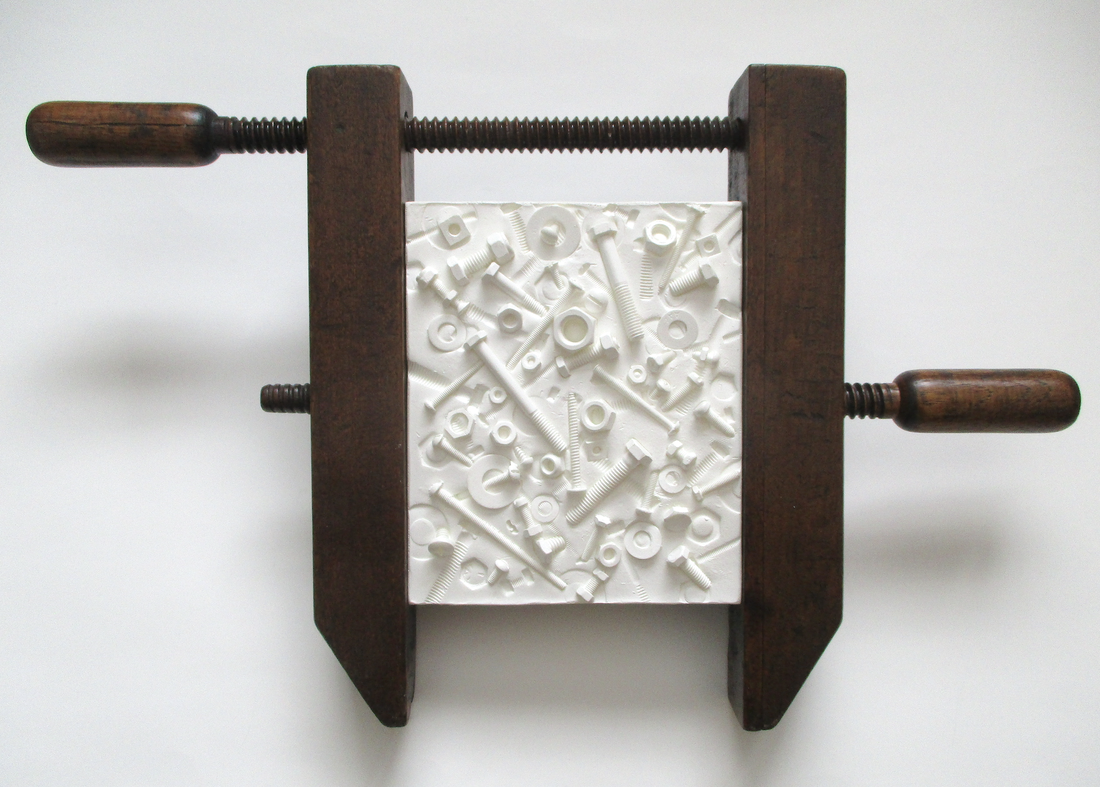 "Peace of Mind" ...completed |

 RSS Feed