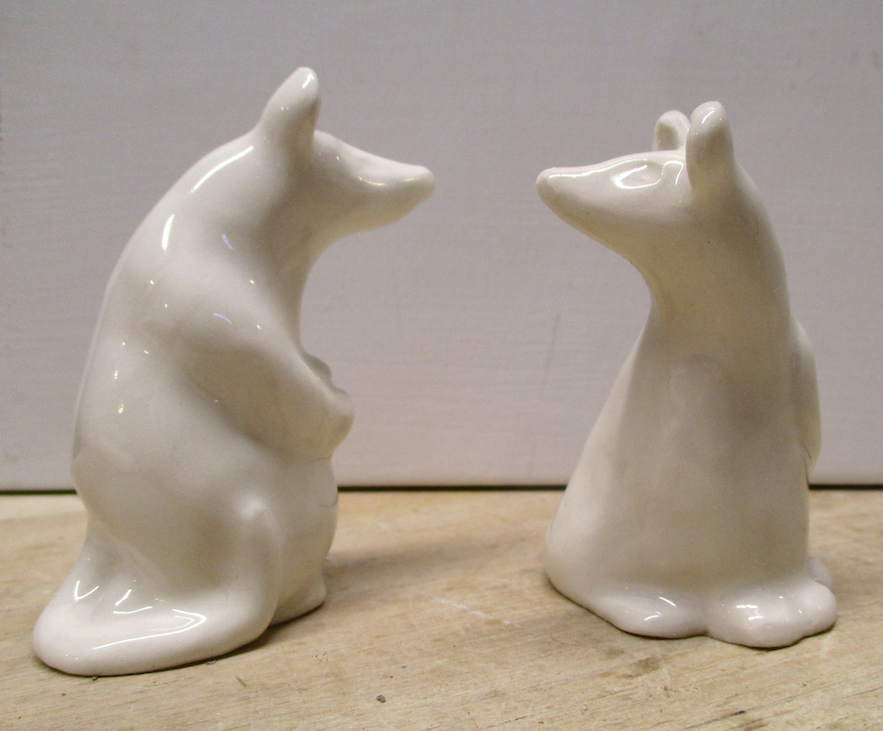
 Porcelain mice 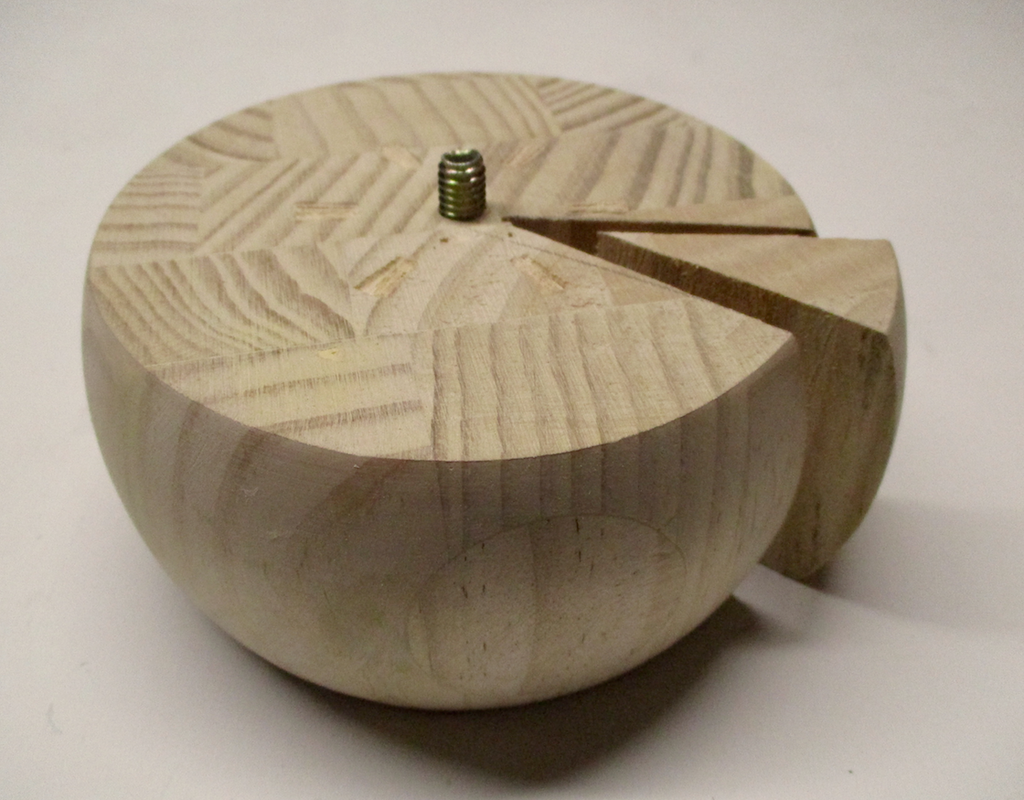 Finial ...wedge cut 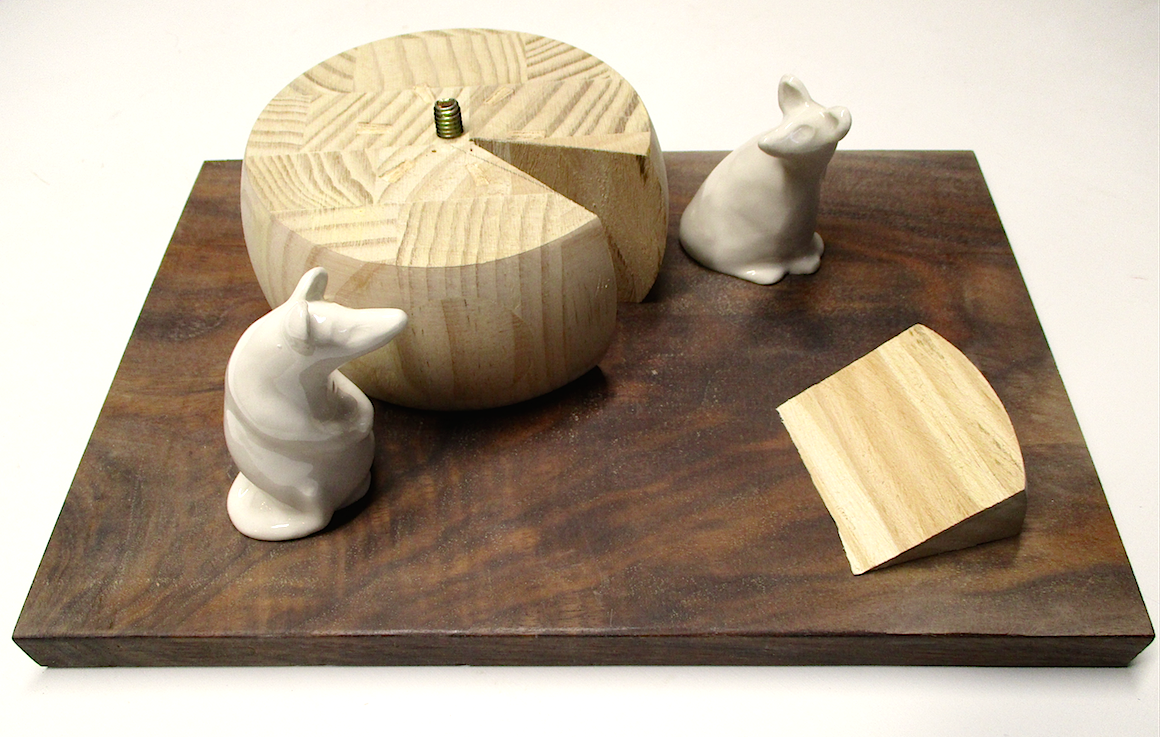 Preliminary set-up  Gessoed / notch cut / begin paint | In 2012 I took a moldmaking class at Maine College of Art. One of the projects involved utilizing a plaster gang mold to produce at least 50 porcelain castings. I created a 3 mouse mold and a 3 cat mold to make my 50 castings, then made a cat & mouse board game that utilized 24 of my 50 castings. (See my blog postings for 8/10/12 & 4/27/13 for background on the various choices I made in the process of creating the piece and for the actual moldmaking process.) I recently got inspired to incorporate some of the unused mice into a new piece. While wandering the aisles of the local Home Depot, I happened to notice some large wooden finials that reminded me of wheels of cheese. This in turn made me think of the porcelain mice. I purchased a finial, unearthed the leftover mice, and began to consider various ways to combine these elements into a sculpture. My first instinct was to set them up on a cheeseboard. I had a piece of black walnut that was about the right size for what I had in mind, and I thought it would provide a nice color contrast to the white mice. I also decided that I wanted to cut a wedge out of the wheel. This would allow me to expose the inside color of the cheese, in addition to providing another element to the composition - and add to the visual dialogue I was trying to create between the elements. I gessoed the "cheese" and wedge, painted them with acrylic paint, and sealed them with liquid matte medium. I drilled a hole in the board so that the short threaded rod on the bottom of the finial could be set into the board. I also added a short piece of dowel to the bottom of the wedge and drilled a hole in the board to receive it. At this point I decided to expand the cheeseboard concept into a cheese tray. I added oak sidepieces and wooden handles to the board, then sealed the finished tray with satin polyurethane. |
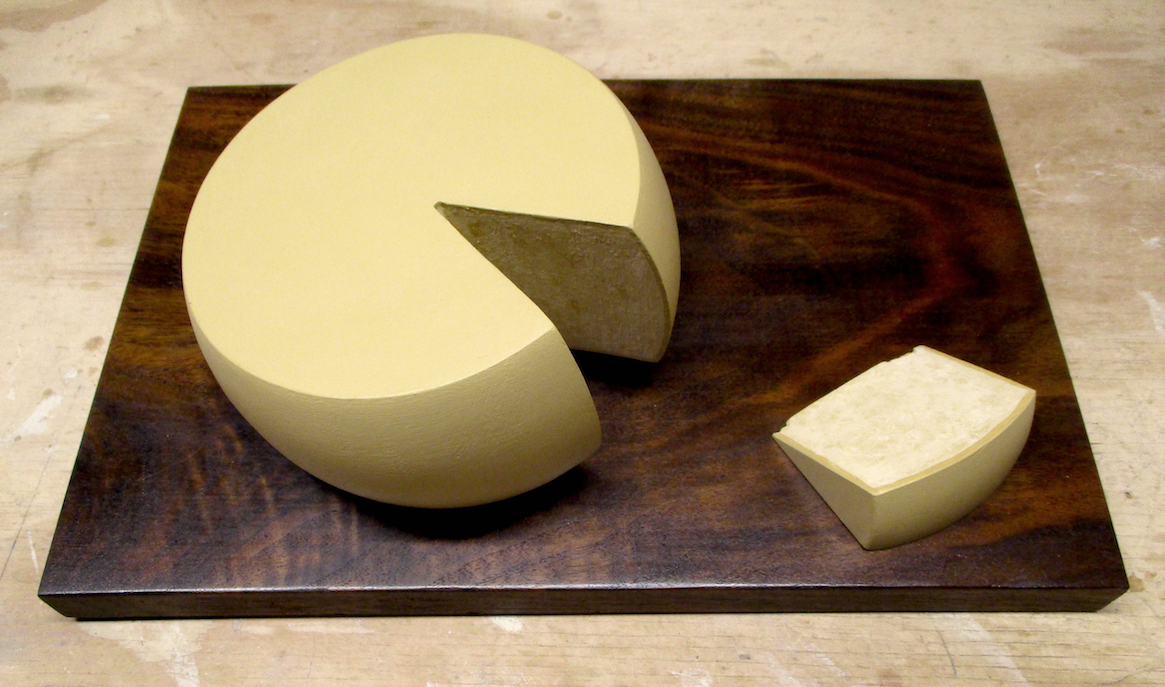 Painted & sealed | 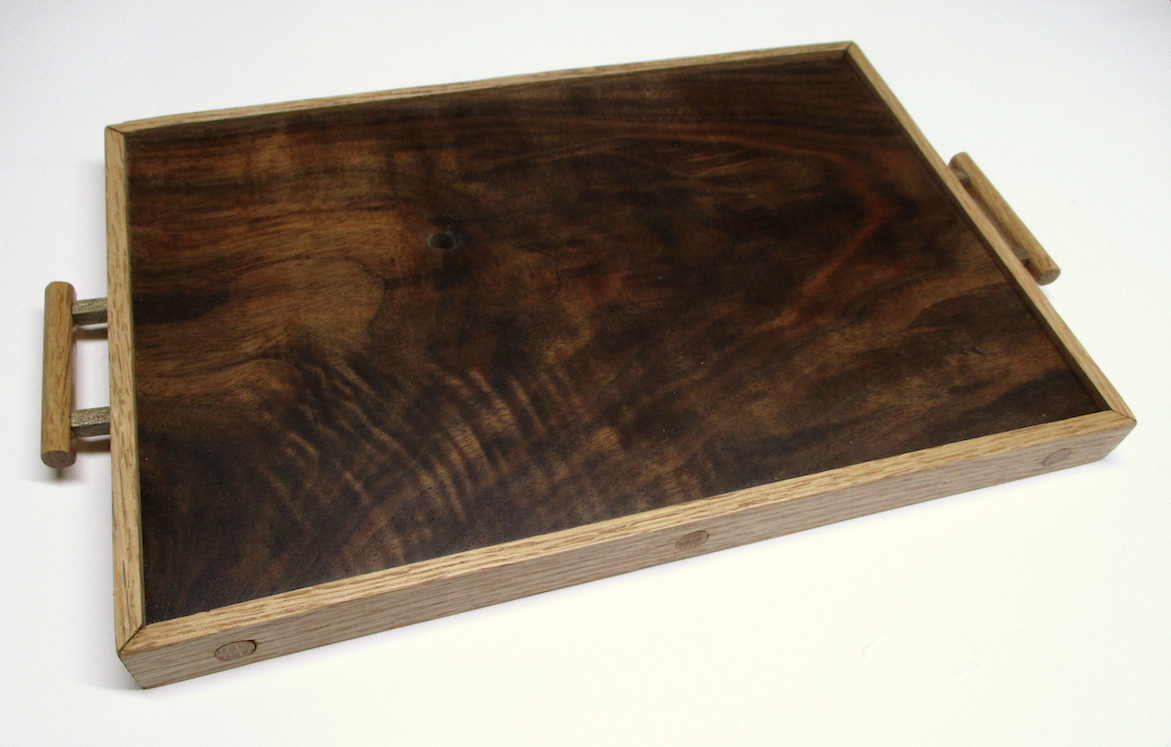 Tray base assembled & sealed | 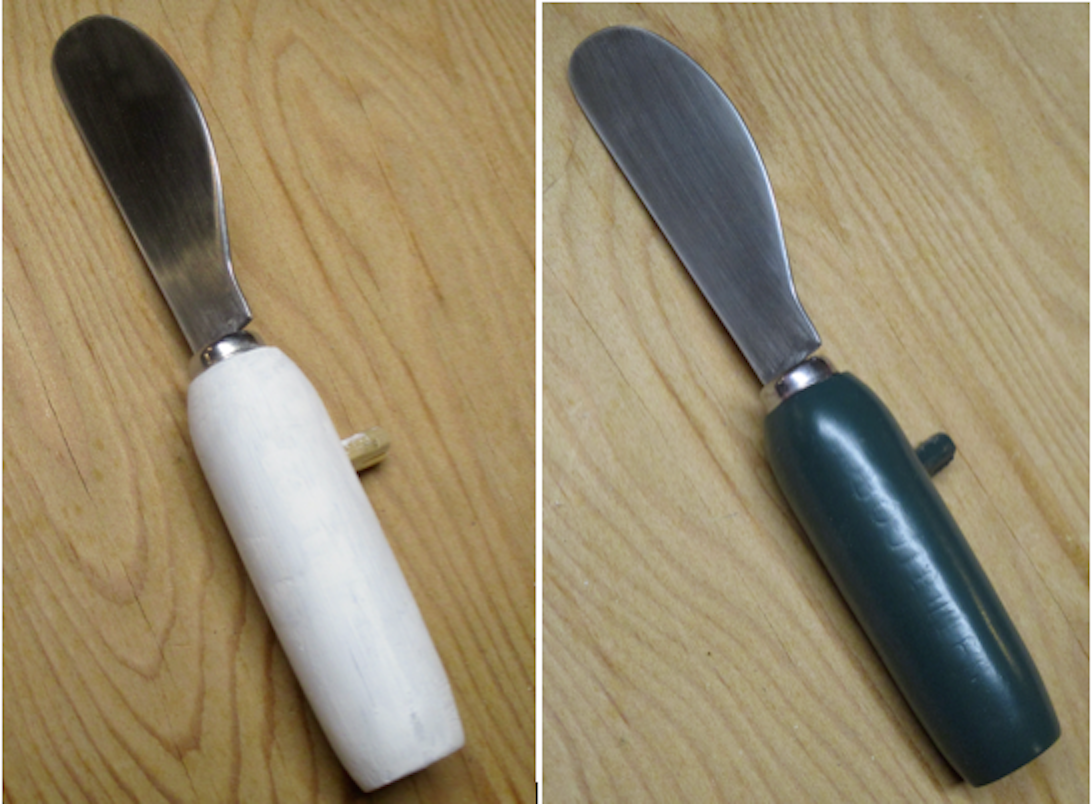 Cheese knife prepared / painted |
I was almost ready to assemble the piece, but I felt it needed another element - a cheese knife. I rooted throughout the kitchen "whatnot" drawer and came up with a likely candidate. It was an inexpensive cheese knife with a handle that was made to look like a wine cork. I used a Dremel sanding drum to re-shape the handle and eradicate the words and decorations that were imprinted on it. After adding a short piece of doweling (to use to attach the knife to the top of the cheese wheel), I spray painted the handle a dark bluish-green. Now I was ready to assemble. First I epoxied the cheese wheel and the slice to the tray. After drilling a hole in the top of the cheese, I added the knife. Finally I epoxied each mouse in place... and - voila! "Le Fromage" was done! I have more mice and there are many types of cheese... so stay tuned!
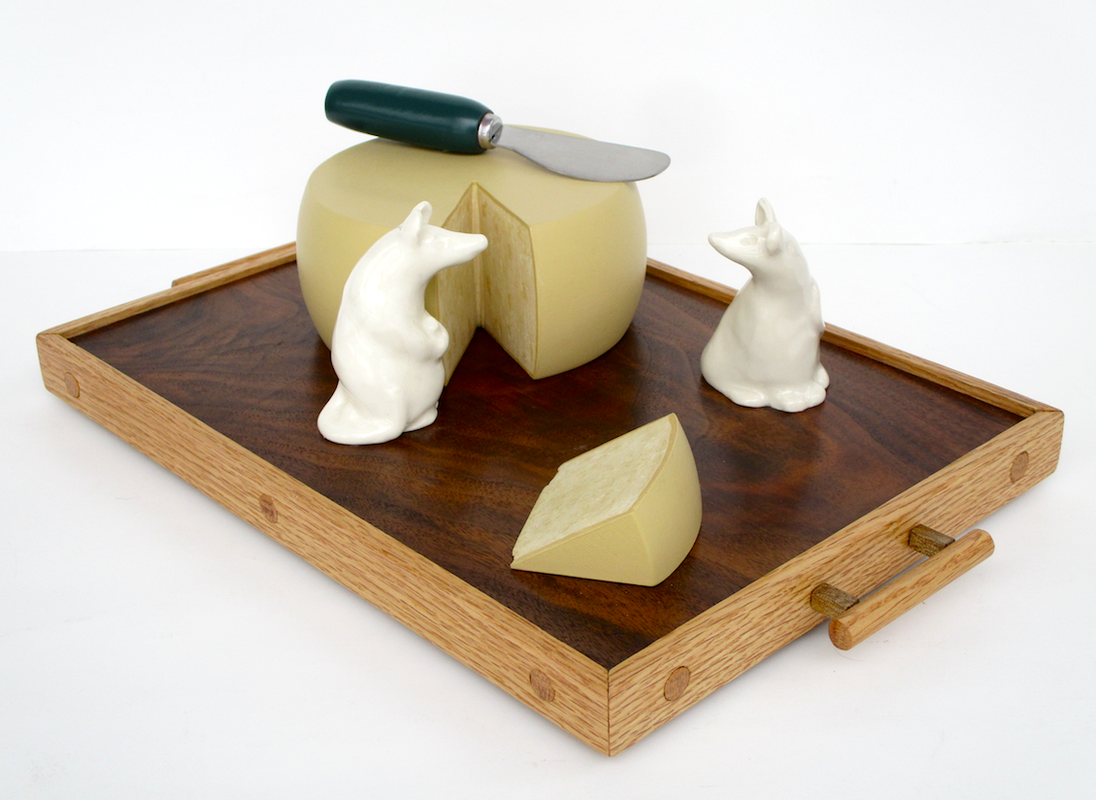 | 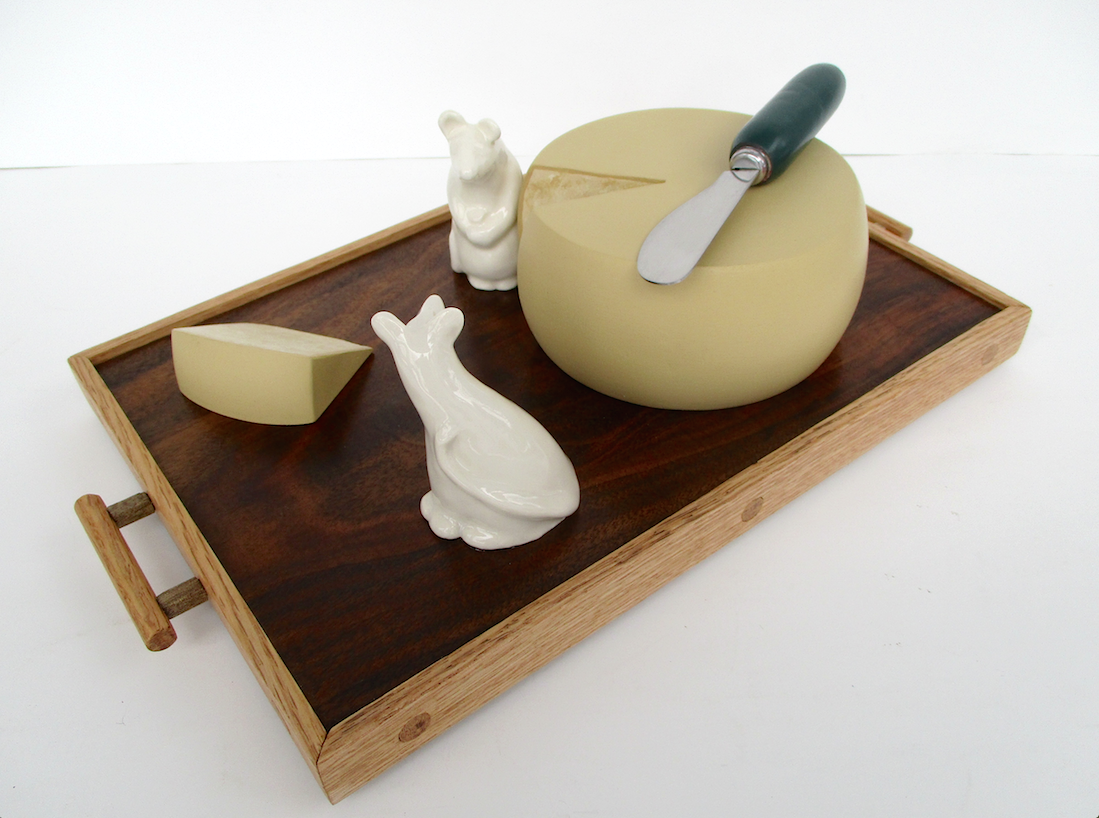 |
Le Fromage - 13 1/2" l x 8 1/4" w x 4 " h

 RSS Feed