| I mentioned in my posting for 7/6 that I was going to be working on a couple of two-part brush-on molds that I started in the moldmaking class that I had taken at MECA. One of the objects that I had chosen to make a mold of was a lotus pod. I liked the contrast of textures between the concave pockets on the front side where the seeds had been and fabric-like folds on the back side. The pod was fairly delicate, so in addition to sealing the outside with shellac, I also drilled a hole in the stem and injected epoxy into the body of the pod to give it more rigidity so that it would be less likely to collapse during the actual moldmaking process. After building up a plasticine shim frame around the pod exposing the seeded side, I inserted marbles into the clay border to act as registration keys. I also carved a thin channel | 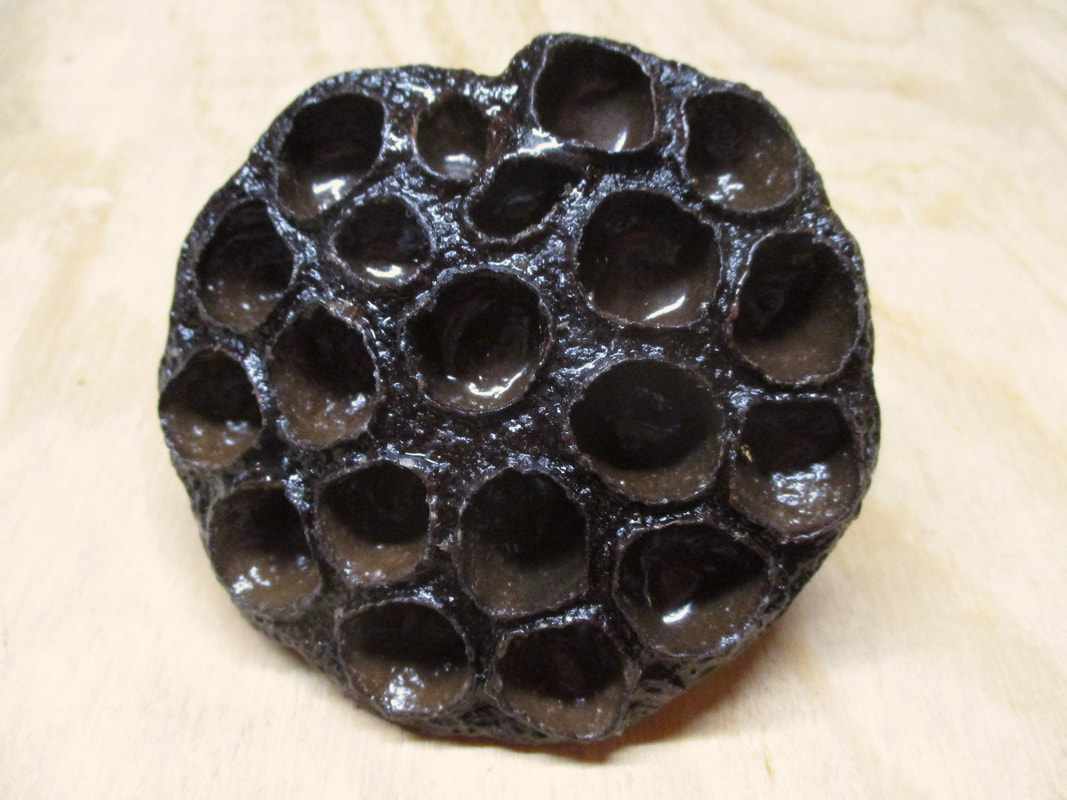 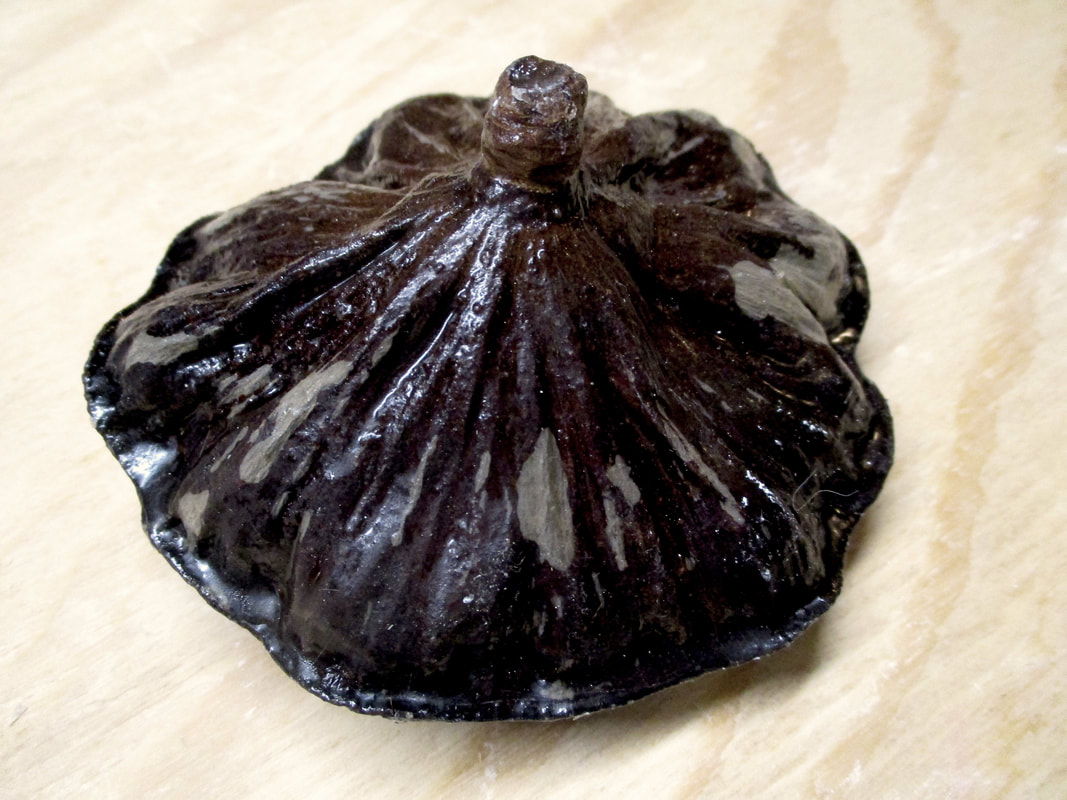 |
 1st coat of silicone side #1 | 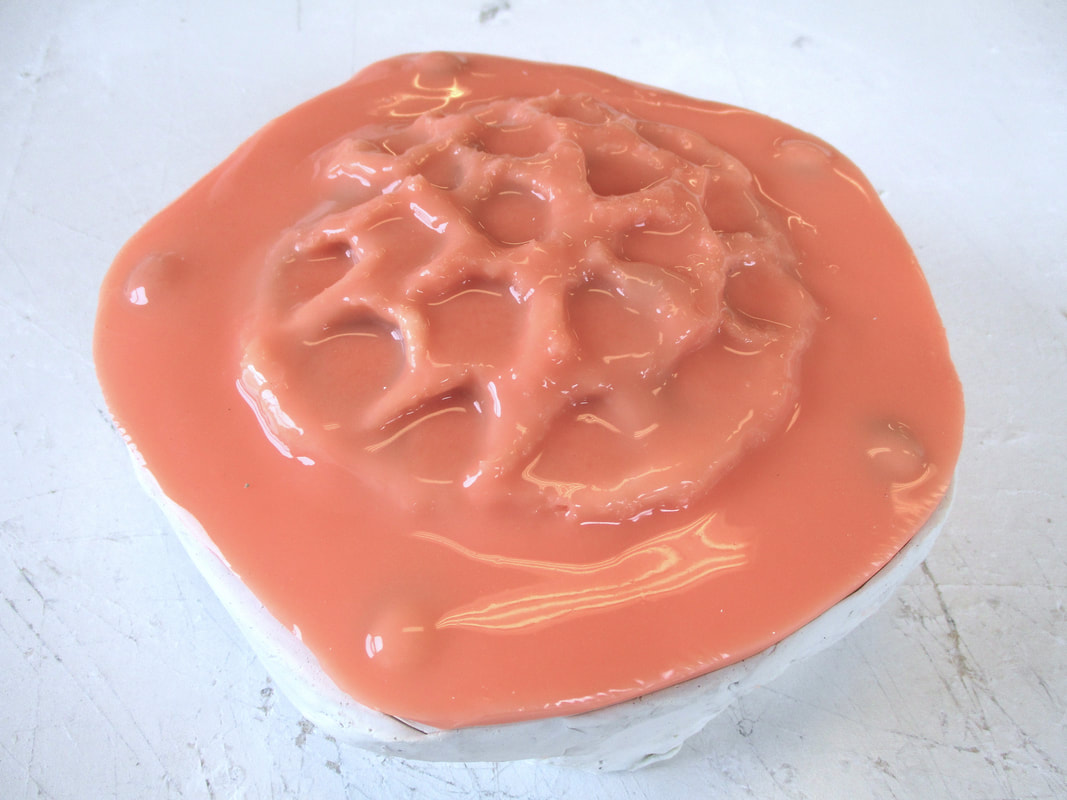 #1 ready for mothermold | 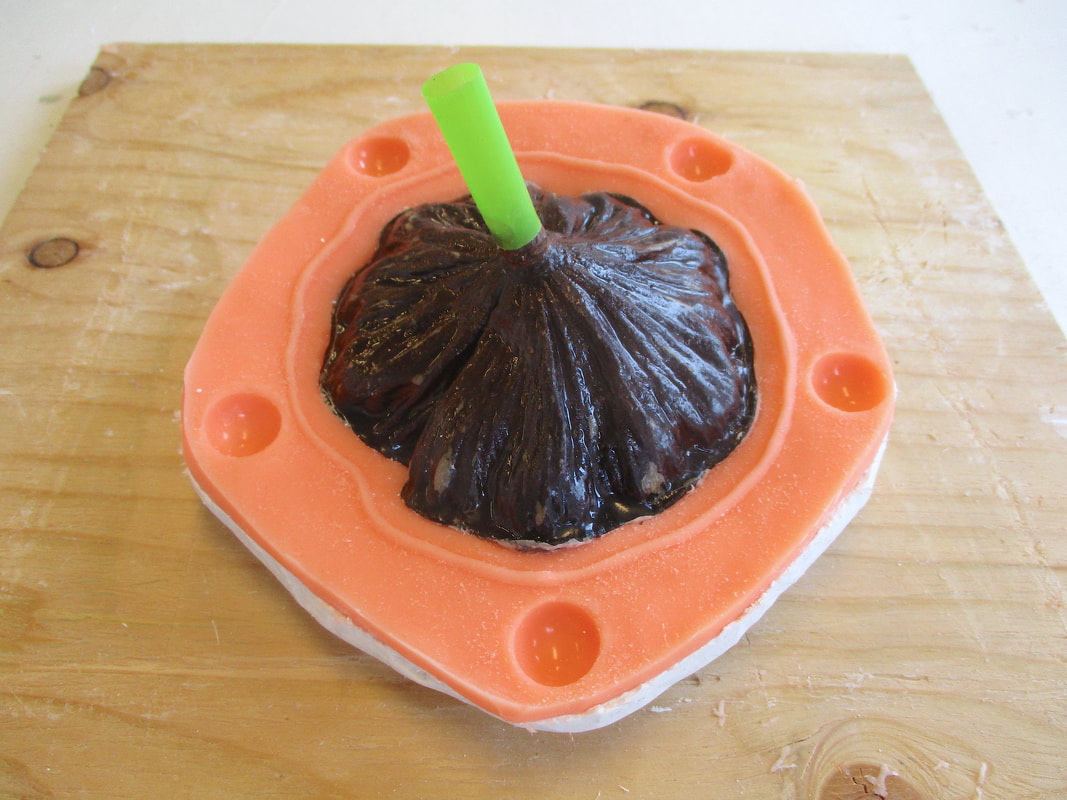 Side 2 ready for silicone | 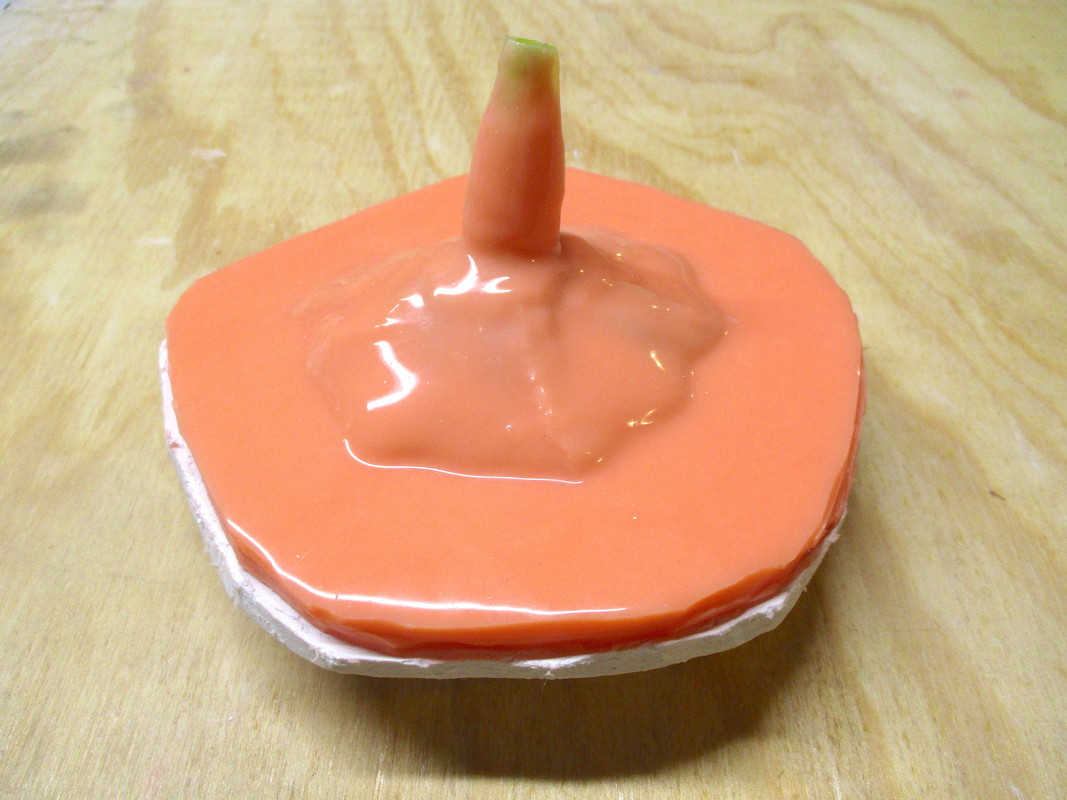 #2 ready for mothermold |
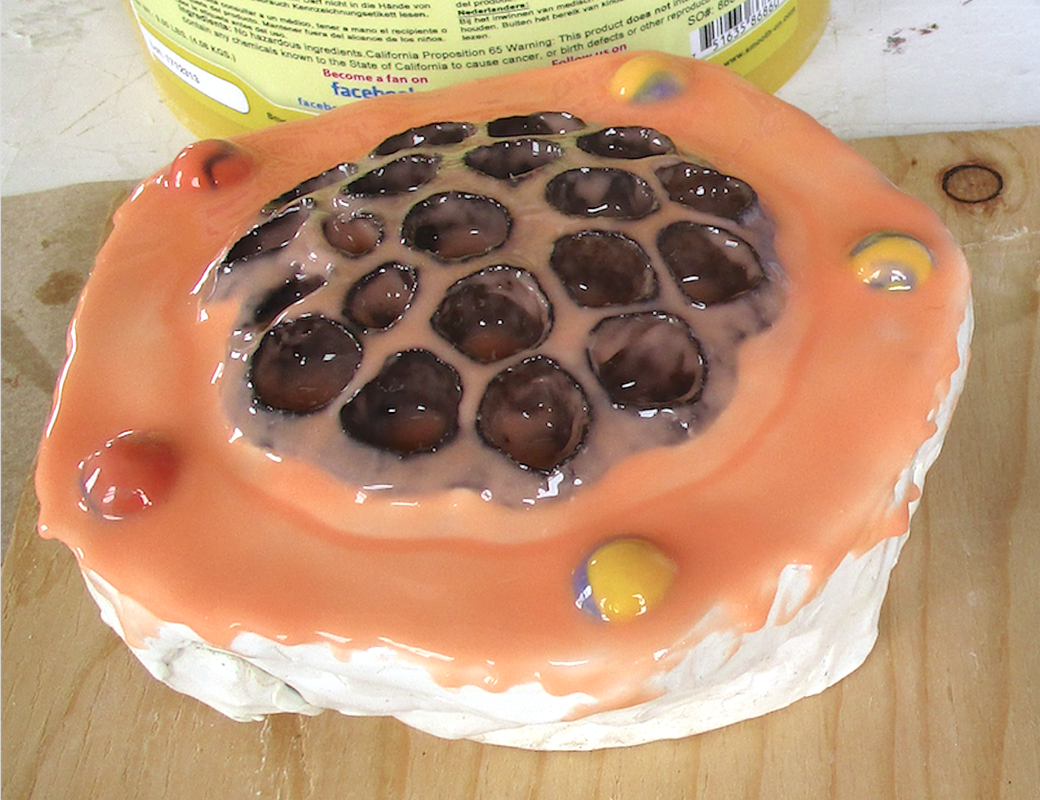
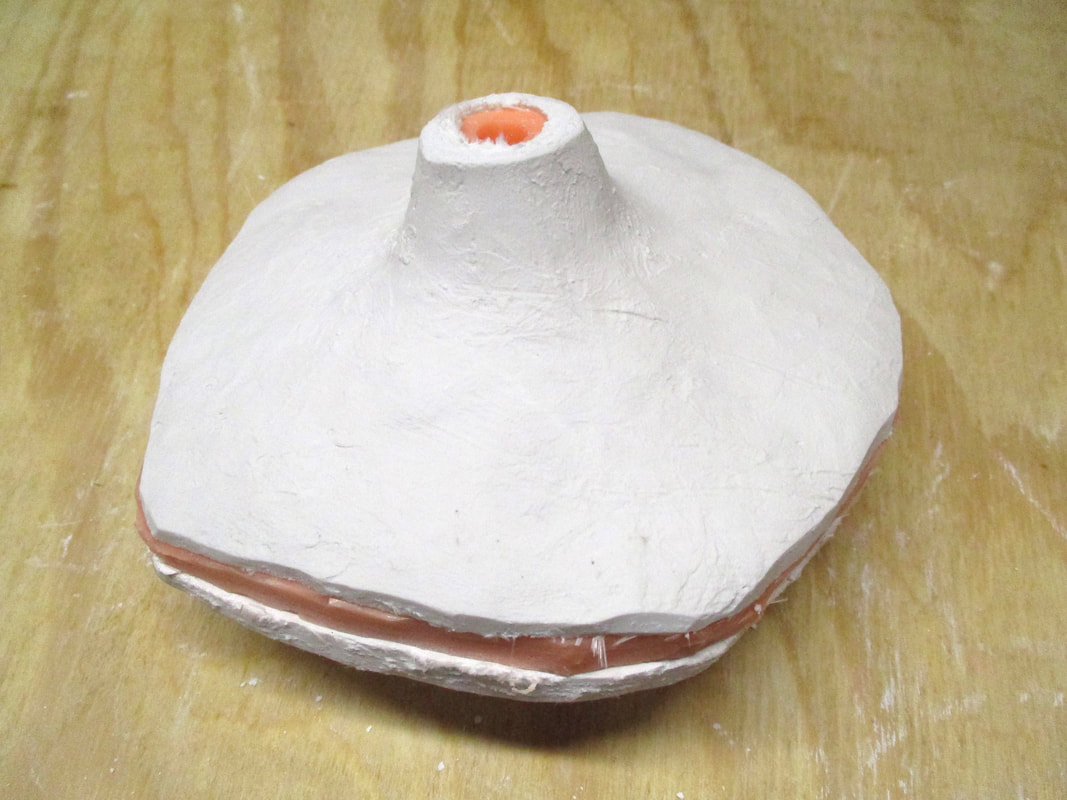
in the clay just outside the pod edge to create a seal that would keep the casting material in the mold. Using Smooth-On Re-Bound 25 silicone rubber, I stippled on the first layer to insure good detaiI, and then I brushed on layers of silicone (allowing each to cure before applying the next) until I reached a thickness of about 1/4". The final step for the first side was to apply layers of plaster and fiberglass cloth shreds to create a 3/8" thick "mothermold" that would serve to support and help the silicone keep its shape during the casting process. Once the rough edges of the mothermold were trimmed (easier to trim plaster before it hardens), I removed the plasticine shim and the marbles, inverted the piece, and started the second side.
 Mother mold completed | 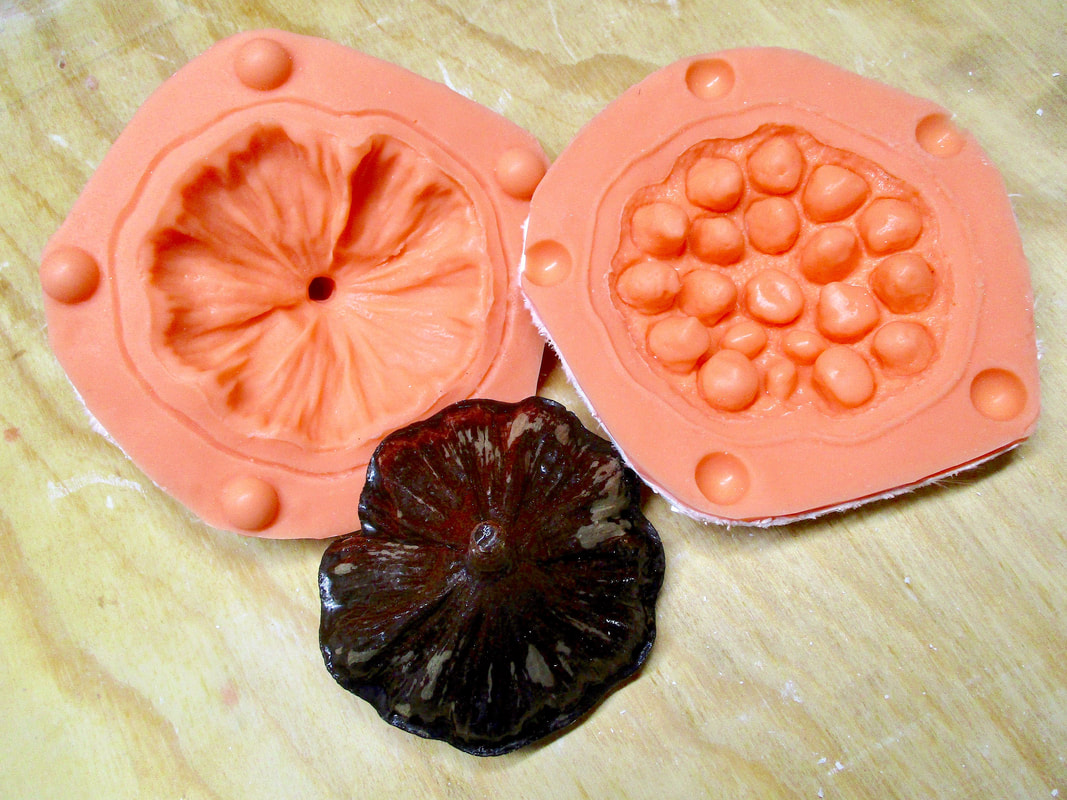 Pod removed | 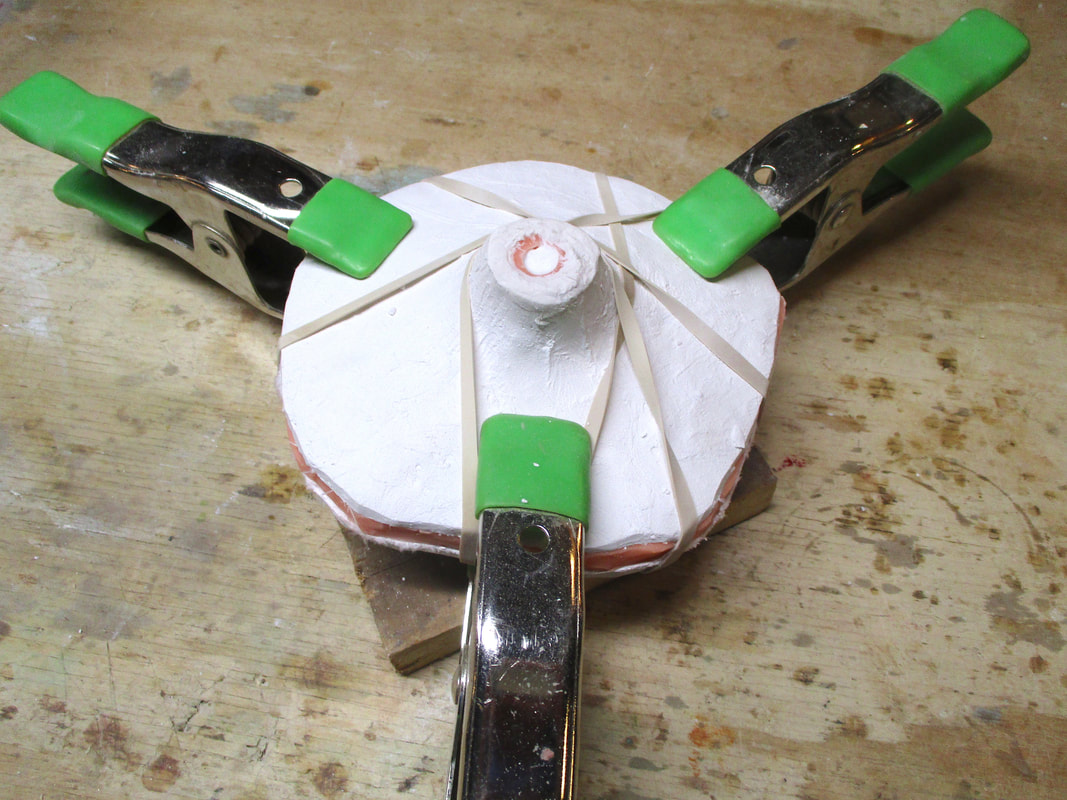 Plaster poured |  Mold opened |
Before applying the Re-bound-25 to side two, I added a short length of plastic straw to the end of the pod stem. The straw would eventually act as the pour gate for the casting medium. After spraying the exposed silicone for side one with mold release so that the new layers of silicone would not adhere to it, I completed the application of silicone for side two. Once that side had cured, I applied the plaster and fiber glass. After trimming the second side of the mothermold, I extracted the lotus pod and the length of plastic straw. When the plaster was throughly hardened, I was ready to make a plaster test casting. I secured the two mold haves together using rubber bands and 3 metal pinch clamps. I used a large syringe to inject plaster into the mold through the gate created with the plastic straw at the end of the stem. It took 4 injections of plaster and I rotated the mold after each to insure even and thorough coverage.
 View 1 | 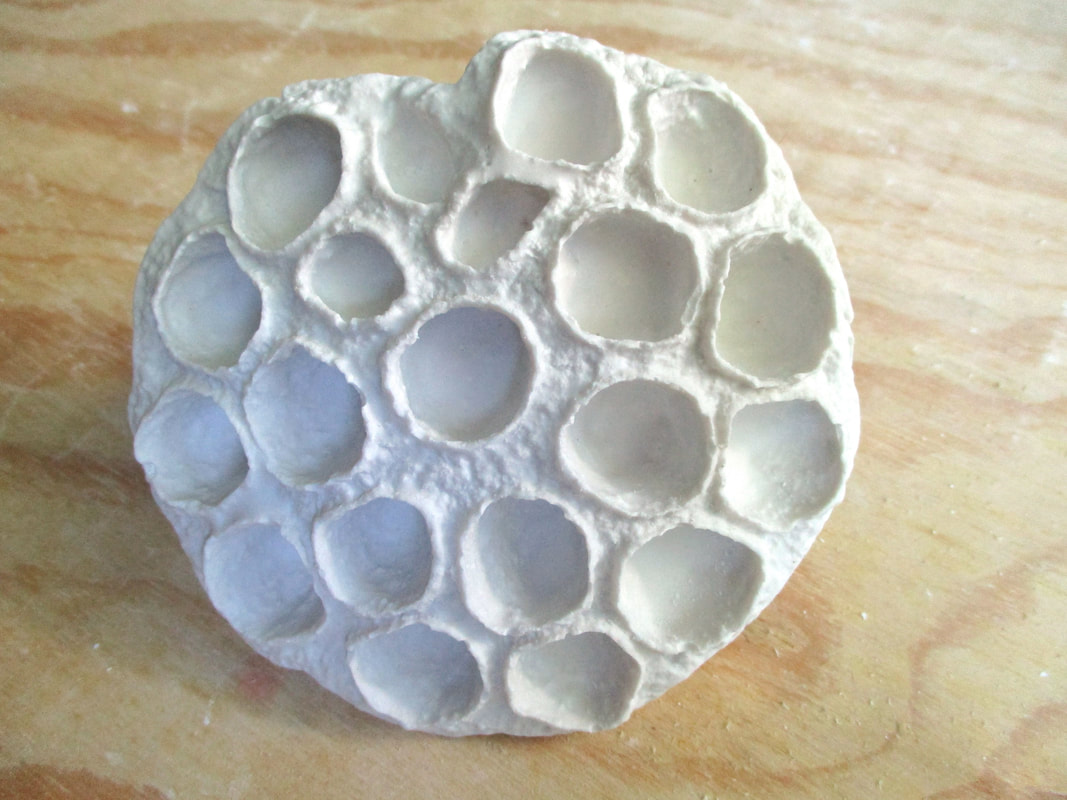 View 2 | 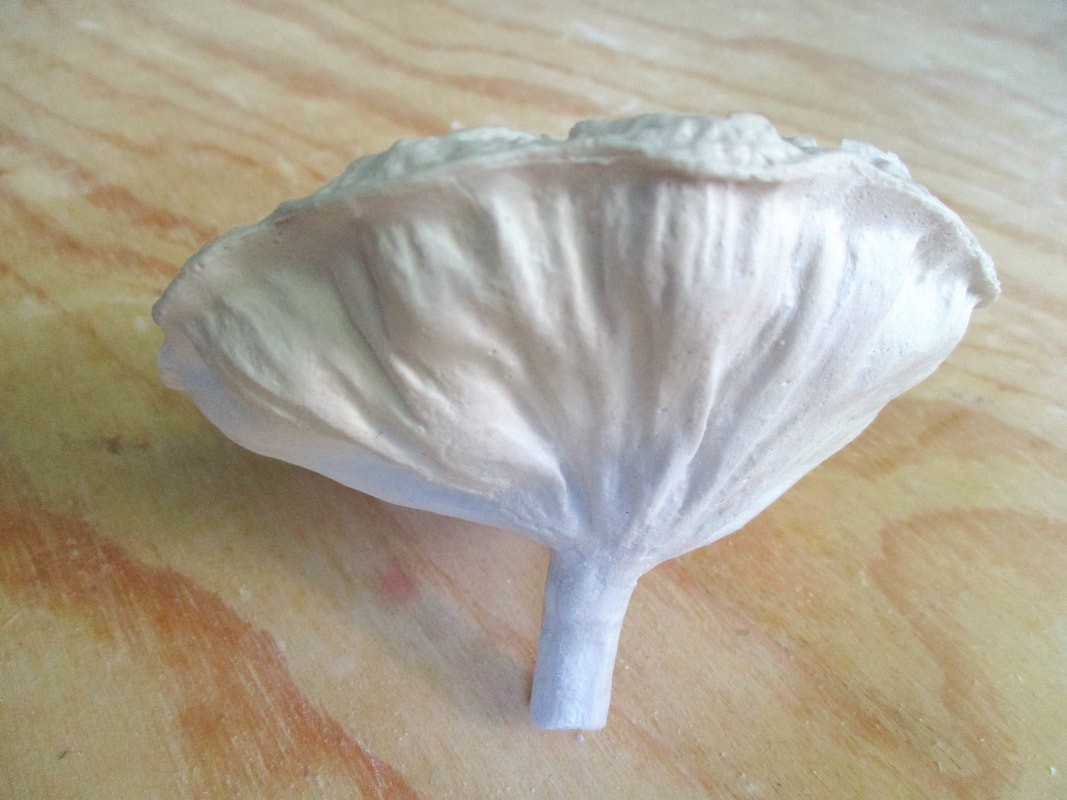 View 3 |
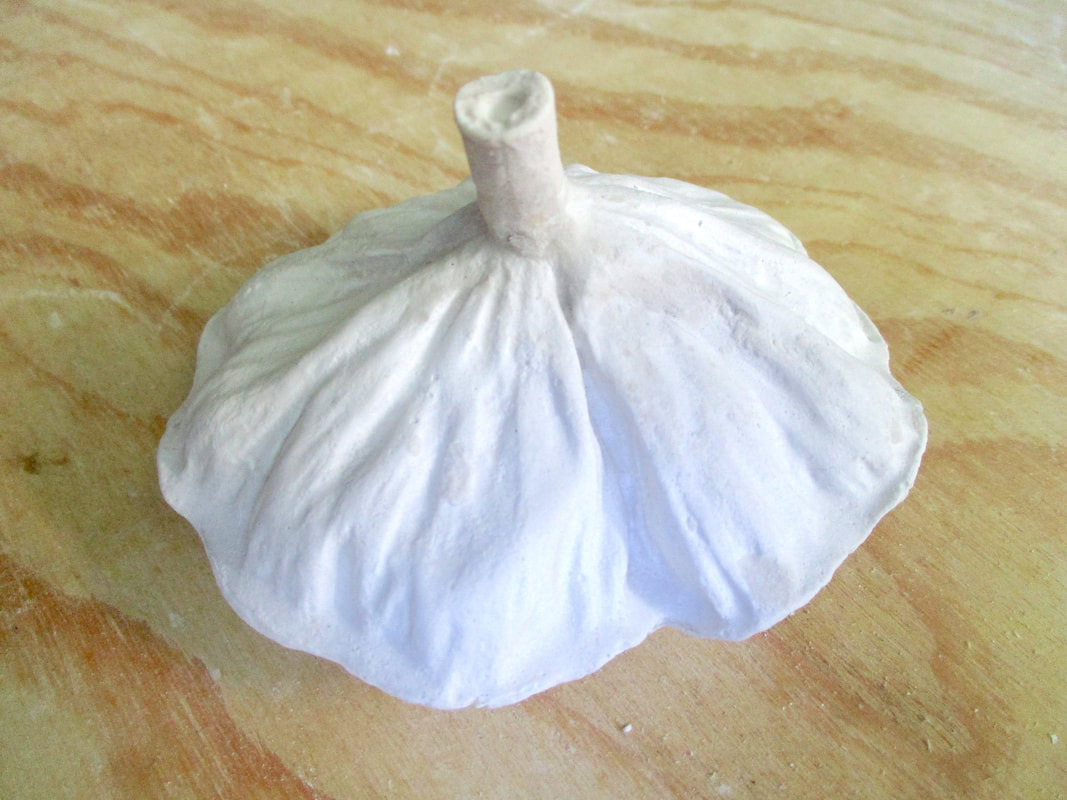
The casting was very successful. It had very nice detail and little evidence of air bubbles. The only issue was that part of the thin stem broke off during the removal process, but I was able to reattach it by drilling a small hole in both the stem portion and the pod, inserting a piece of a round toothpick, and then patching the break with plaster. I will most likely use resin for future castings. I am not sure yet how I will utilize castings made from this lotus pod mold...but I'll keep you posted!!

 RSS Feed