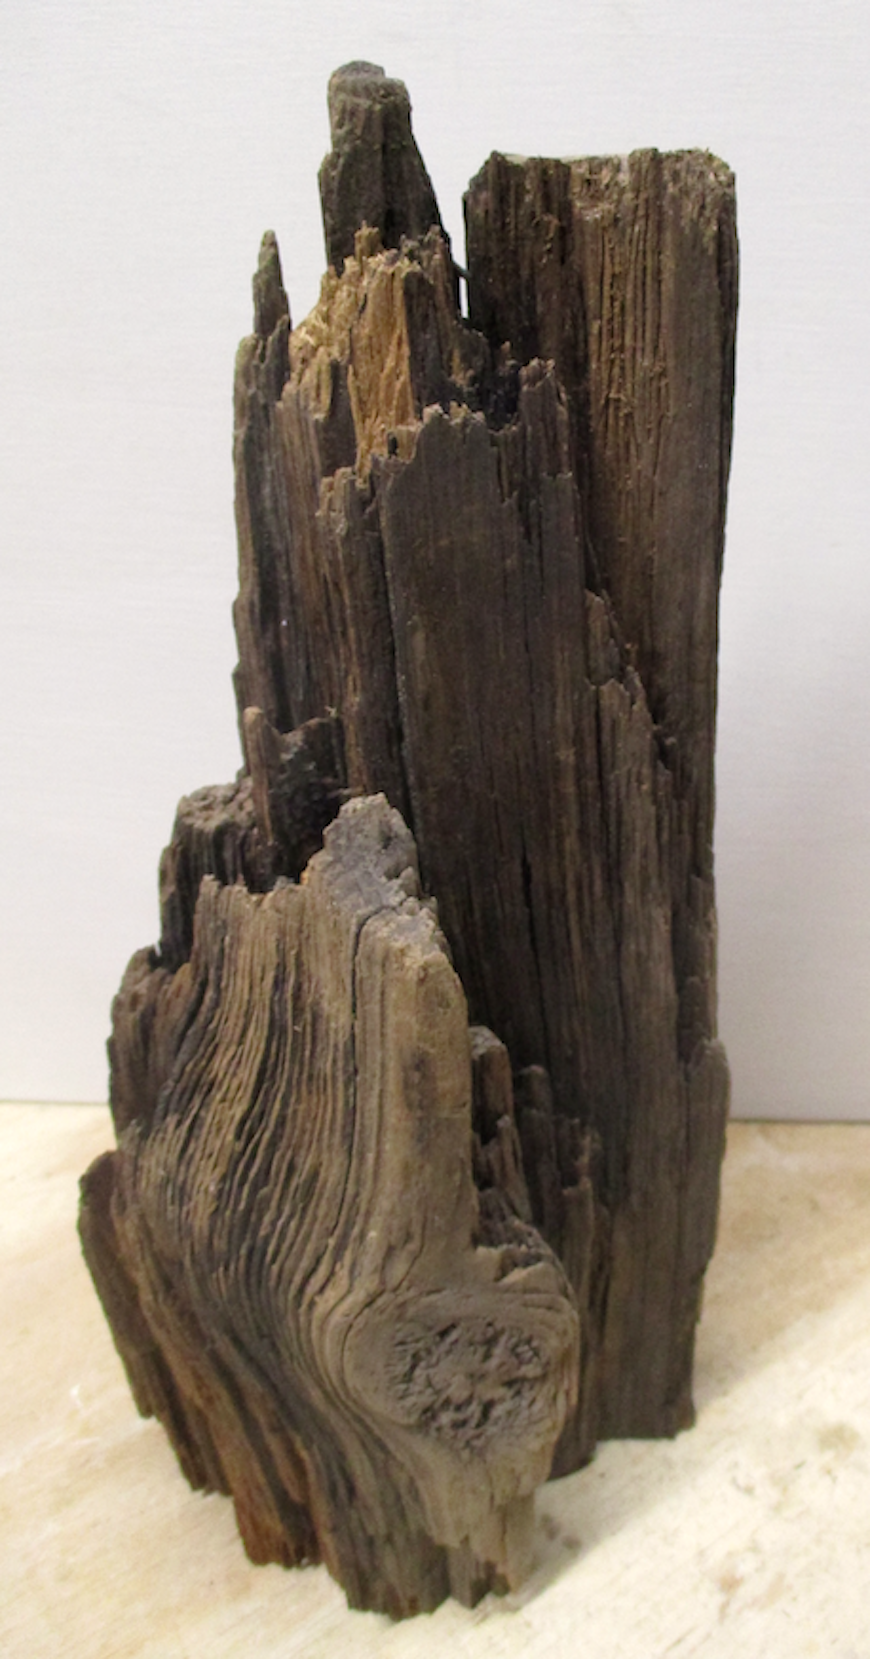
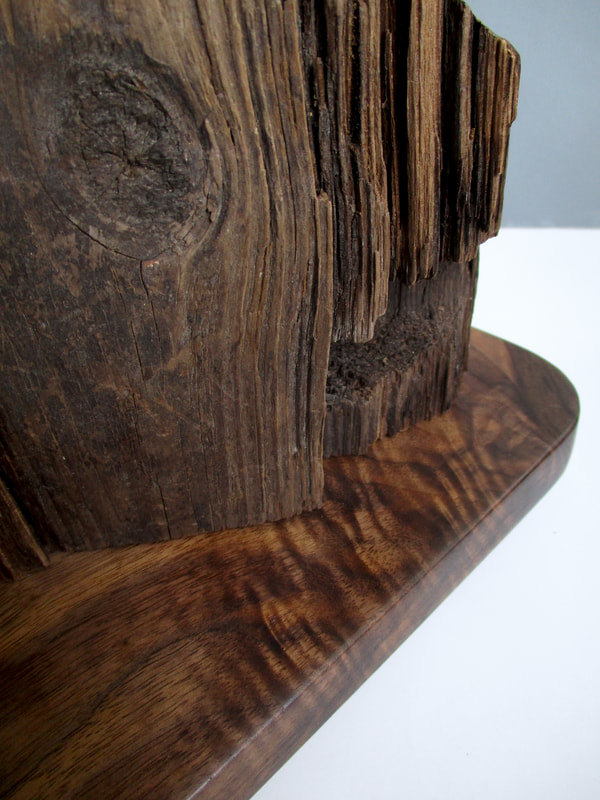
 Wood piece #1 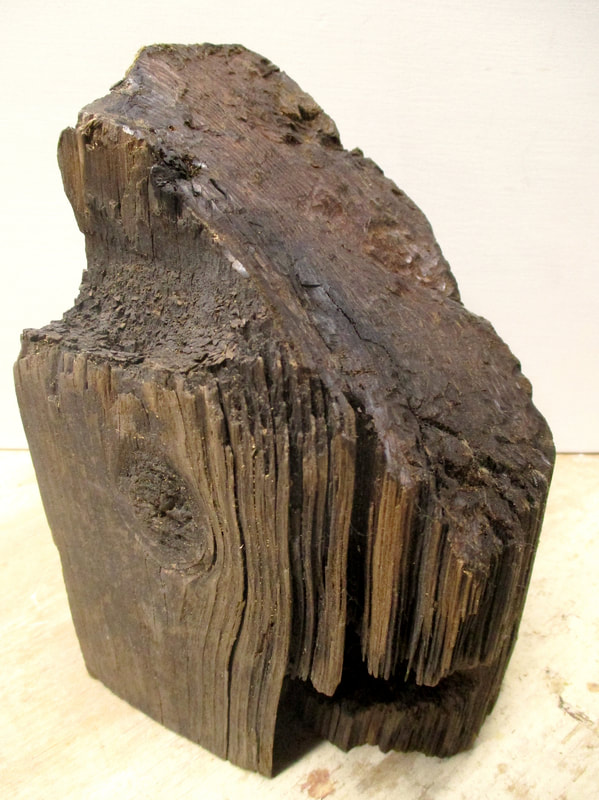 Wood piece #2 | With the deadline for the upcoming Celebrate Maine themed show at River Arts Gallery in Damariscotta fast approaching, I prowled around in my stash of potential sculpture materials for inspiration. I unearthed a couple of interesting chunks of driftwood of similar coloration that had interesting shapes and surface textures. I envisioned them transformed into a rugged coastal outcropping with seagulls perched on top. Each piece of wood had a flat side that allowed me to attach them together as a single unit, plus I had a couple of smaller scrap pieces that I was able to attach to add additional variation to the form. I also had a leftover scrap section of black walnut board that had a dark swirling grain pattern that I knew would make a great base under the joined pieces of driftwood. I rounded off the corners of the board, then sanded it and sealed it with satin polyurethane. Next task - make the gulls. | 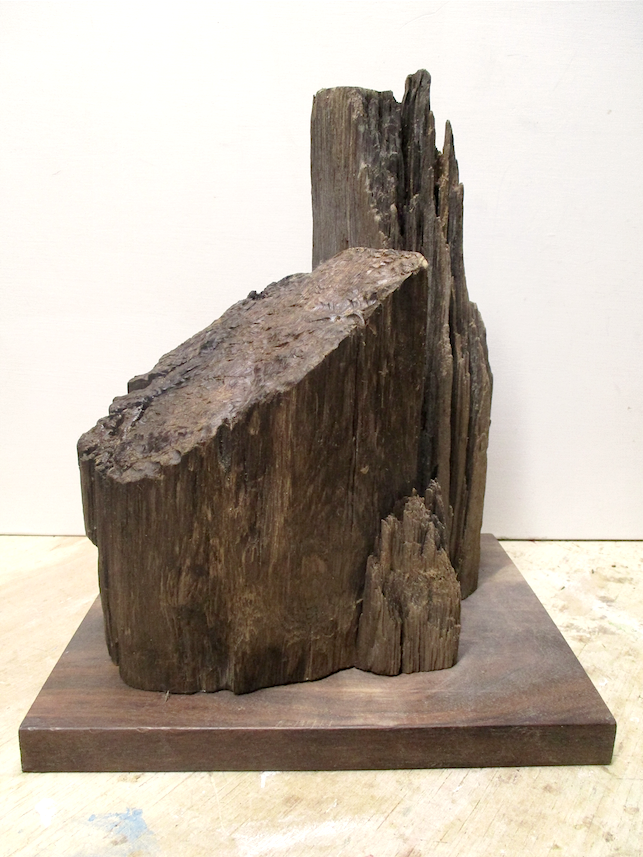 1st scrap piece added 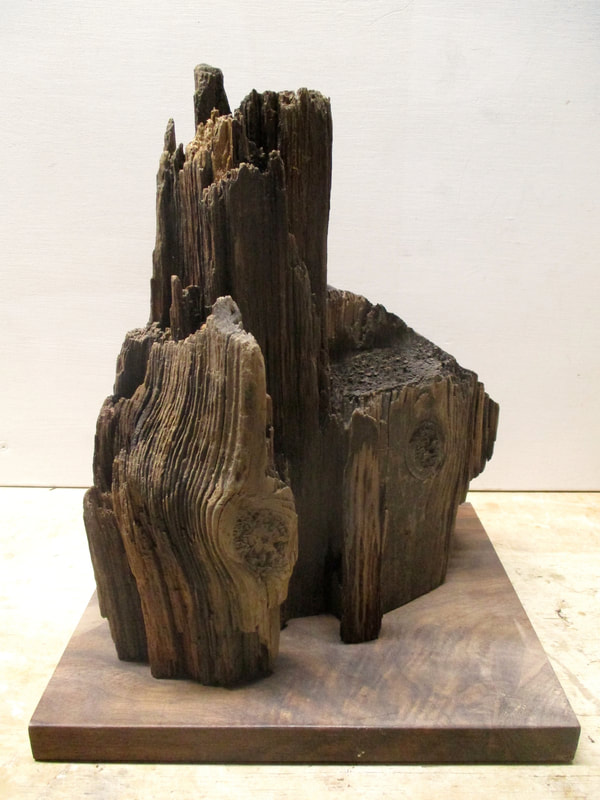 2nd scrap piece added |
 Gull armatures | 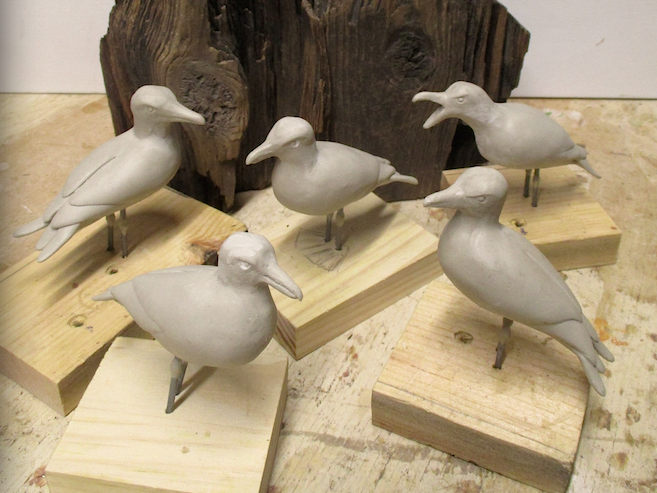 Apoxie clay gulls formed | 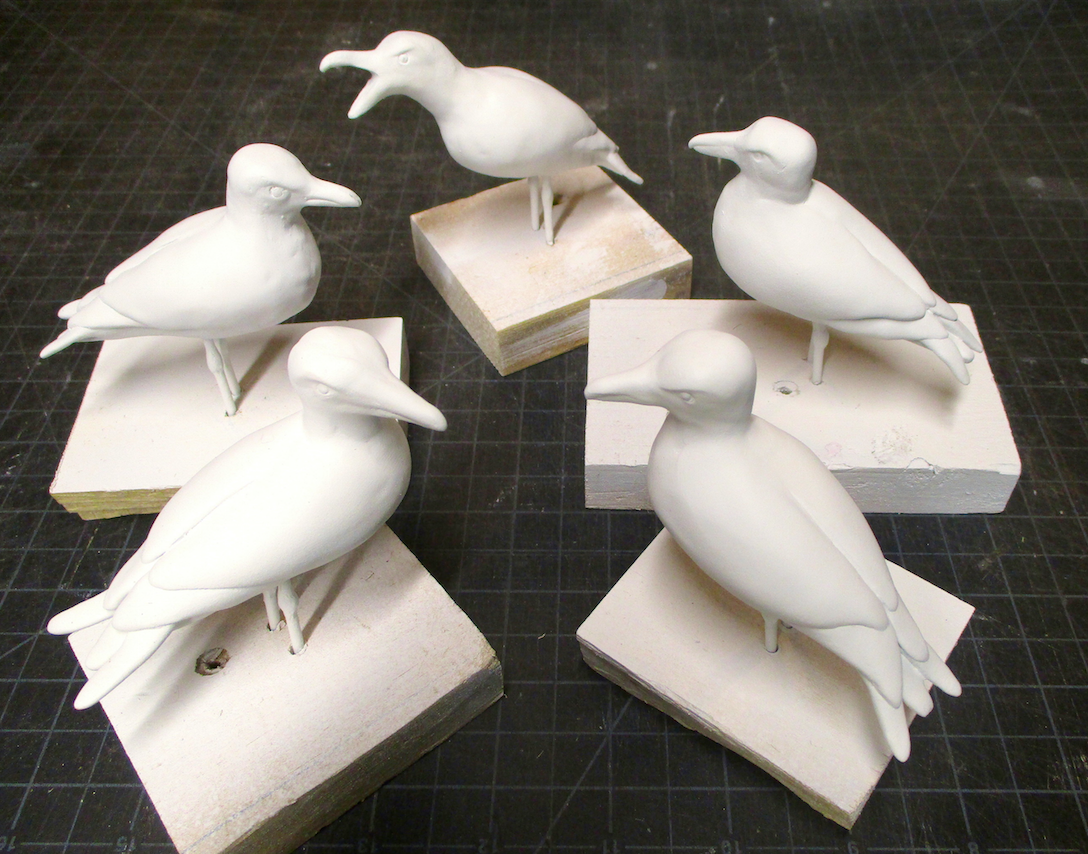 White base coat |
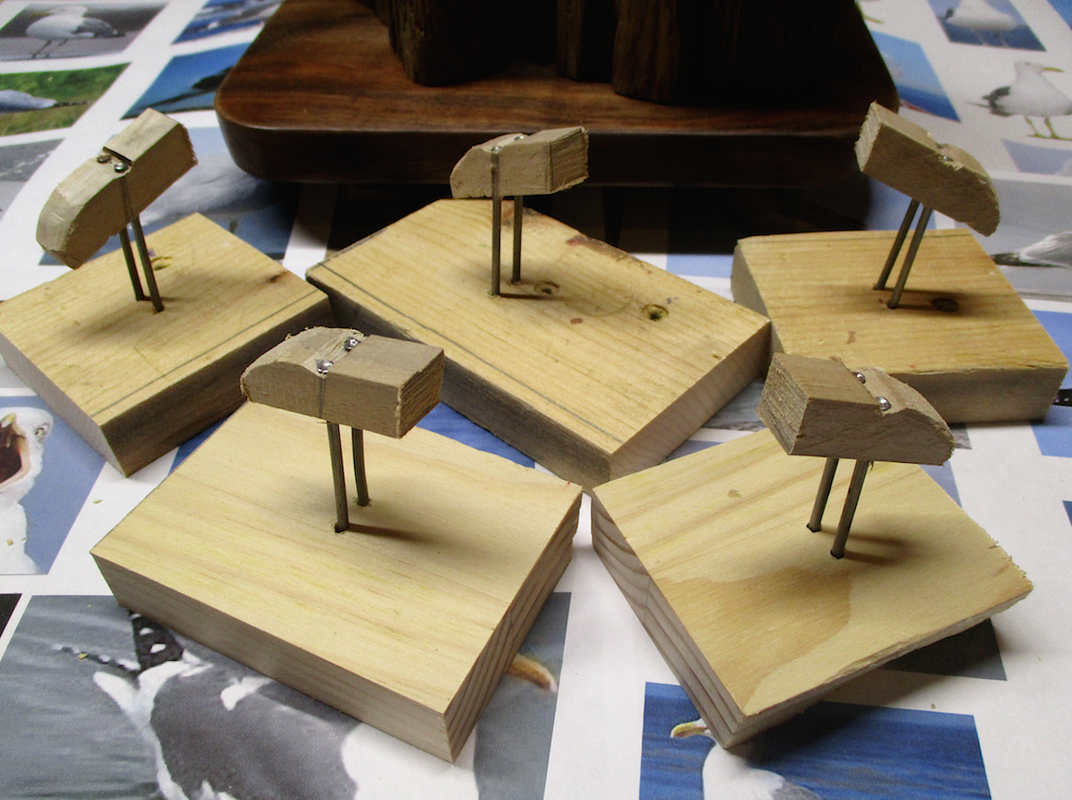
I knew I was going to make the gulls out of Apoxie Clay, so the first thing I did was to make some armatures out of small pieces of wood and finish nails. The nails would make sturdy legs and would be used to mount the gulls on the driftwood base. I wasn't sure how many I would need, so decided to make 5 - better too many than too few (any spares could be put to use in a future project). I used Apoxie Clay to build up each of the gull forms, varying head positions and "attitudes". I sealed each gull with flat white enamel spray paint, and then experimented with positioning the gulls on the driftwood base. After determining that 3 was the optimum number of gulls that would fit on the base, I tackled the tricky job of adding the gulls' webbed feet. Each bird was only about 3" high and 3 1/2" long, so the feet would be small and would have to conform to different specific surface contours. For each foot I made a small thin wedge of Apoxie Clay, then pierced the tip with a toothpick and threaded the leg nail through the hole. I made the webbing effect by pressing a clay tool into the wedge of Clay. I then inserted the gull's nails into the holes I had drilled for them in the driftwood base and let the feet harden in place on their perches. (I covered the wood with a small square of plastic wrap so that the Clay wouldn't stick to it.)
 Driftwood on base | 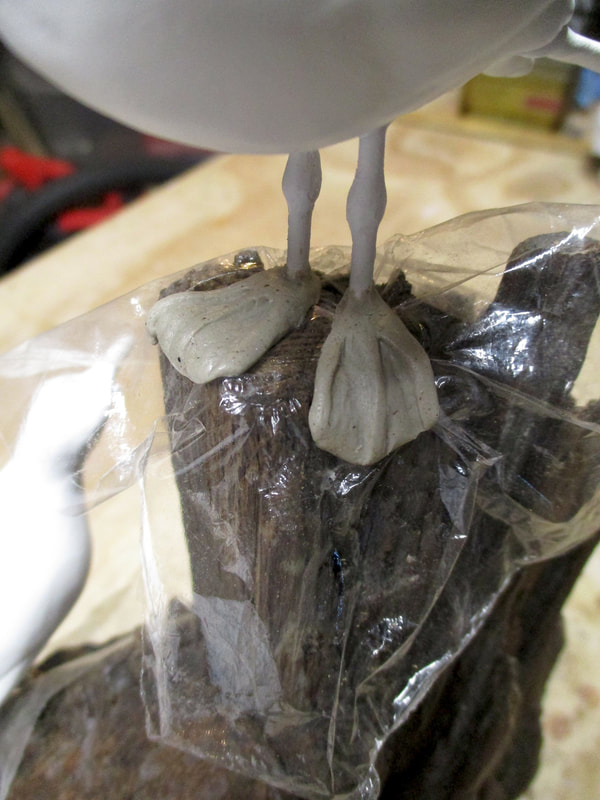 Shaping feet to "perch" | 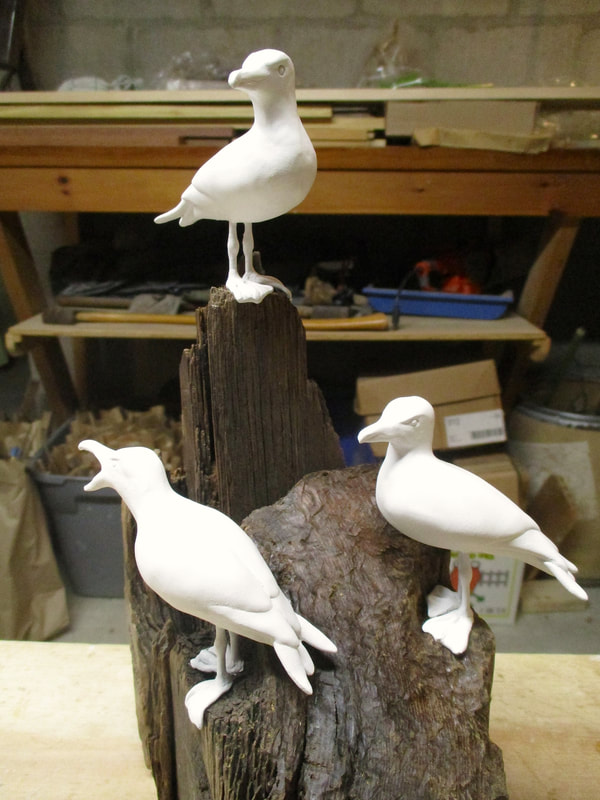 Hardened & painted white | 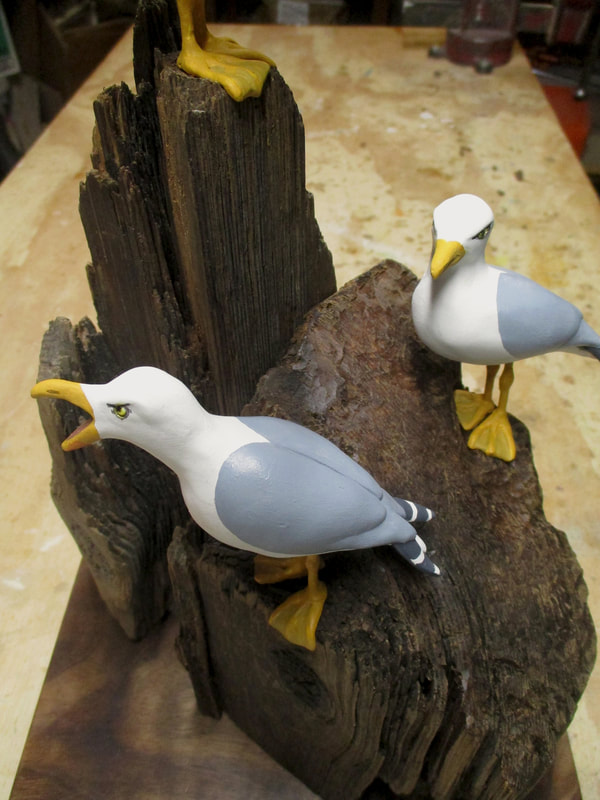 Painted & epoxied to base |
After painting the hardened feet with the flat white enamel, I used acrylic paint to add color to the gulls' beaks, legs, wings and tail feathers. Next came the assembly process. I used wooden dowels and epoxy glue to attach the driftwood form to the base. Then I attached each gull by putting epoxy into the drilled holes made for it in the driftwood and a small amount on the bottom of the gull's feet. Gulls attached...piece complete!
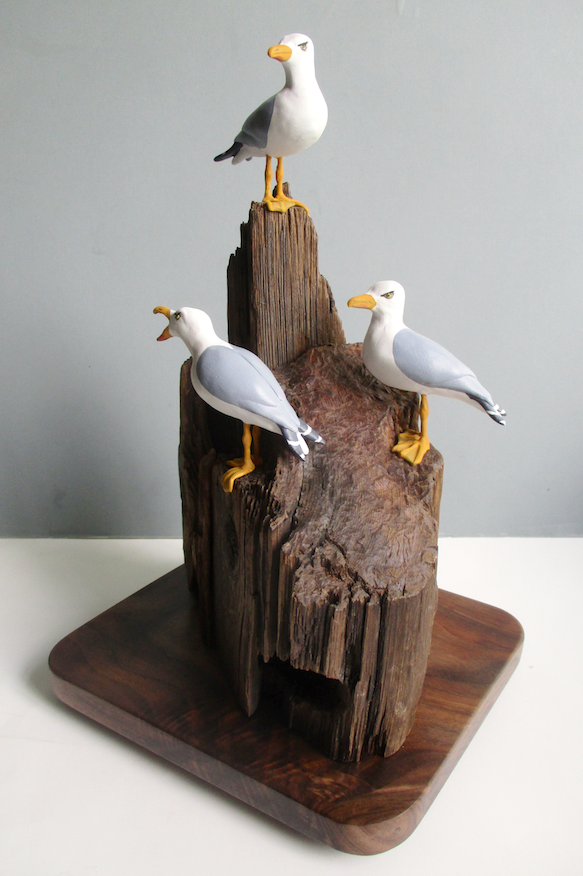 Coastal Trio | 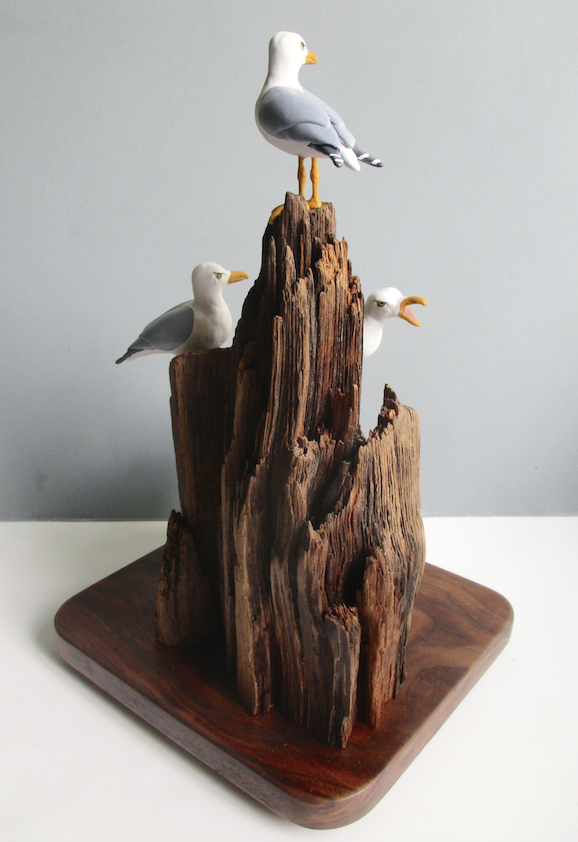 13 1/3" h x 8 3/4" w x 7 3/4" d |

 RSS Feed