 | After a very long, cold, and snowy winter in Maine, I took a much needed break on a warm tropical island with a white sandy beach. Returned to the studio renewed, refreshed and ready to continue work on my unfinished bronzes. * * * |
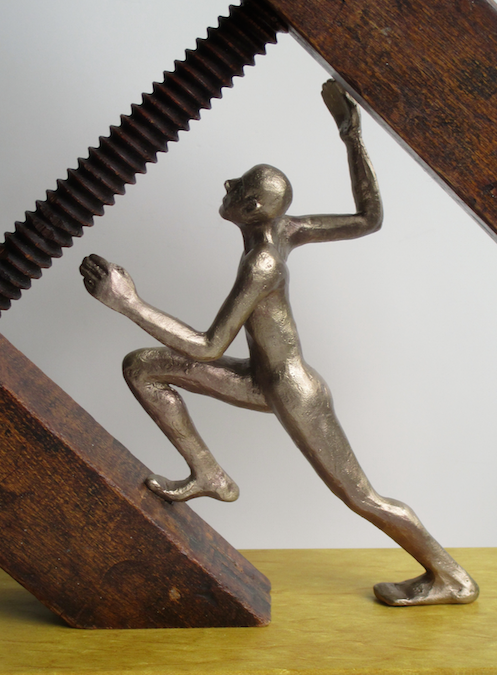
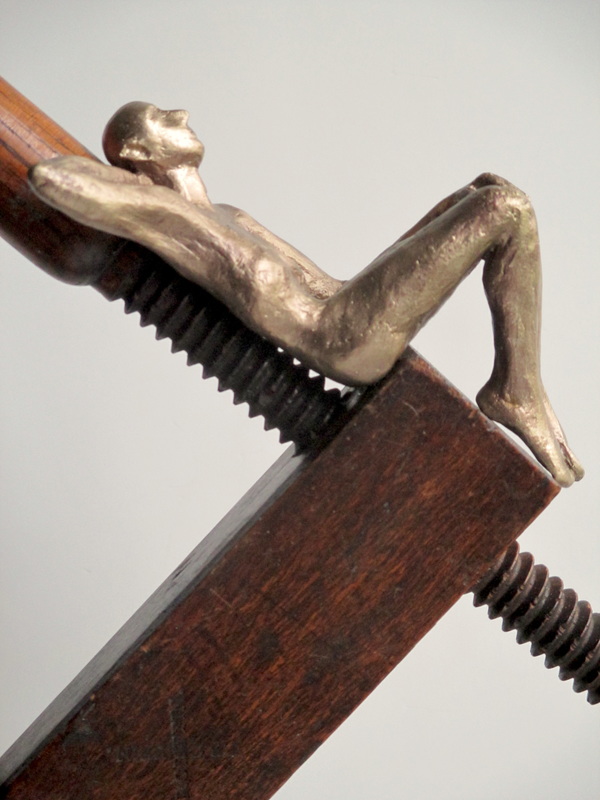
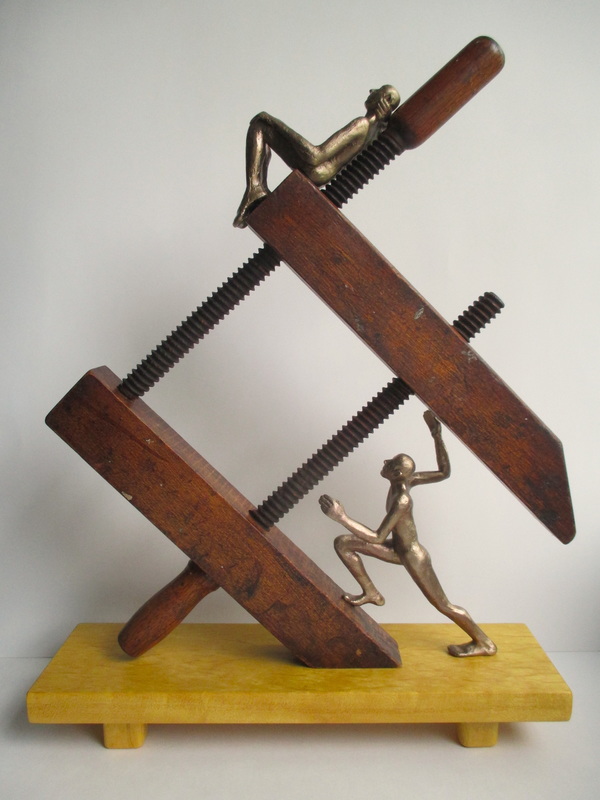
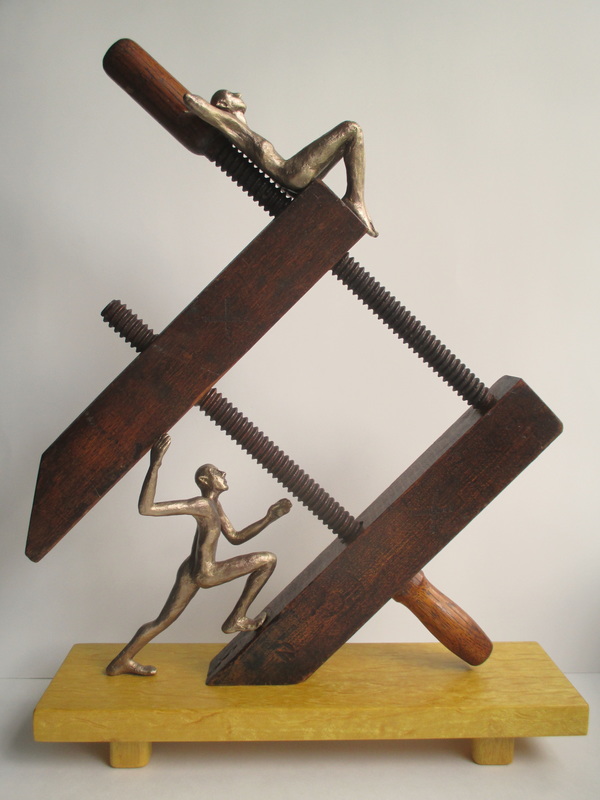
| The first piece that I resumed work on was the one that included the two small figures and the wooden screw clamp. I needed to drill a number of holes so that the figures could be attached to the clamp and so that the clamp could be attached to the piece of yellowheart wood I had set aside to use for the base. After sealing both of the bronze figures with satin finish spray lacquer, I began the assembly process. I started by drilling the holes for the seated figure that was to sit on the end of the top jaw of the clamp. Determining the location of the holes was fairly easy because the attachment pegs extend straight down from the seat of the figure. I was also able to drill a hole in the bottom jaw for the front raised foot of the second figure. Before I could drill the holes needed to attach the back foot of the second figure to the base board, I needed to prepare the board. This involved drilling a 1/4" hole in the board that would line up with the hole that I had previously drilled in the bottom slanted side of the lower jaw. I widened and recessed the underside of the hole to accommodate the threaded rod, washer and nut that would eventually hold the clamp to the base. Next I made four small blocks of yellowheart to serve as feet under the base. I drilled a hole and glued a short length of dowel in each block, and then drilled four holes in the bottom of the base board. I sanded the board and the blocks, gave them three coats of satin finish polyurethane, and then glued the blocks into place. The next step was to epoxy the seated figure onto the end of the top clamp jaw. I then had to assemble and secure the whole clamp, so that I could determine the placement of the holes for the back foot of the second figure. I put epoxy into the hole in the bottom jaw that the top threaded rod screwed into, and then put epoxy on about an inch of the threads of the bottom threaded rod (just below where it entered the top jaw), and then screwed it the rest of the way in. I also put two small finish nails in near the base of the bottom handle to insure that the rod could not be turned. | 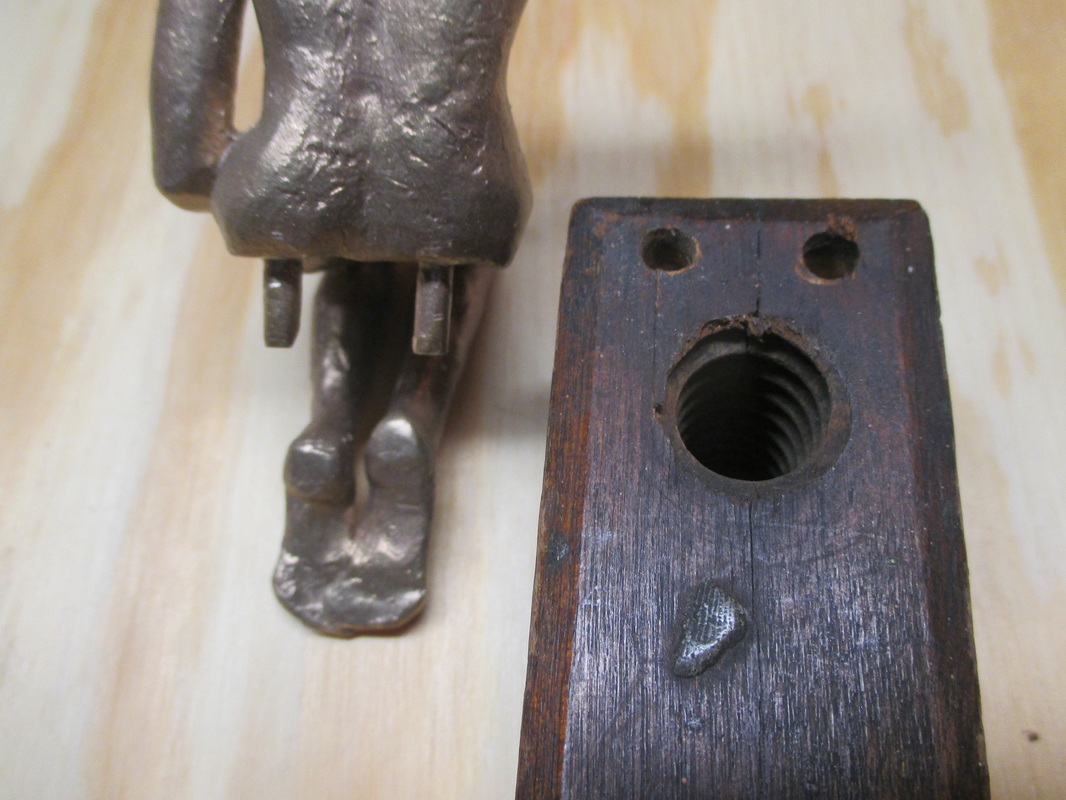 Holes drilled for seated figure 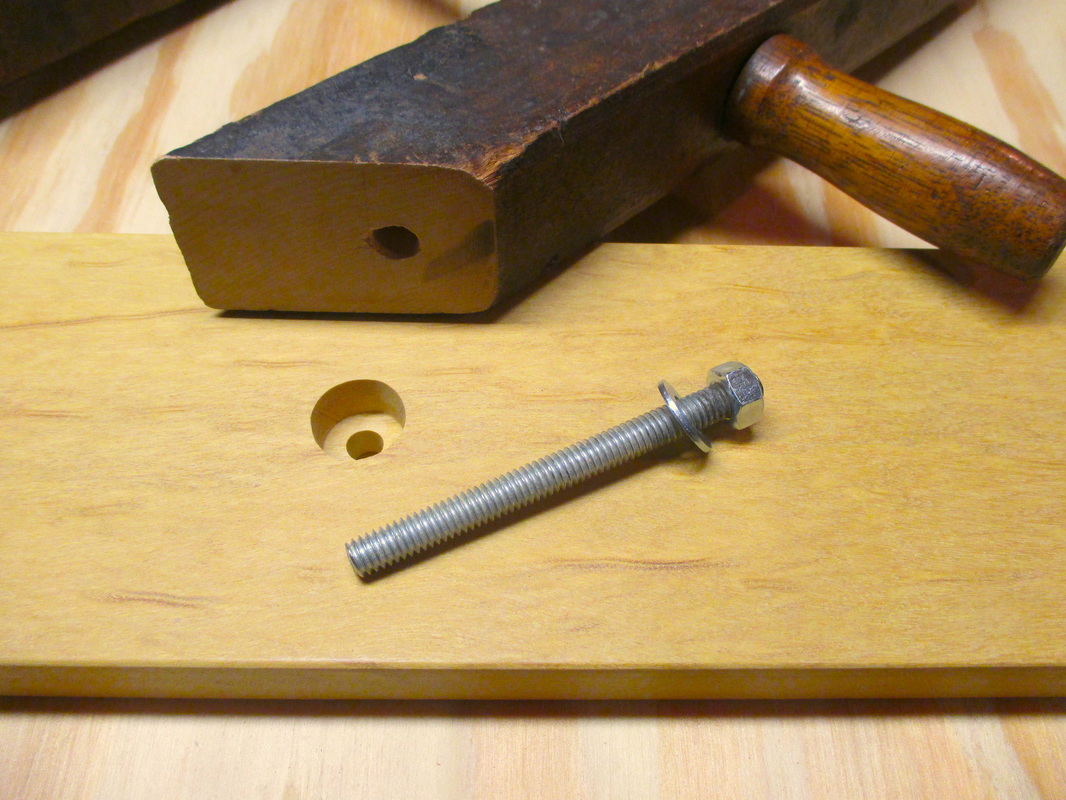 Holes drilled for attachment 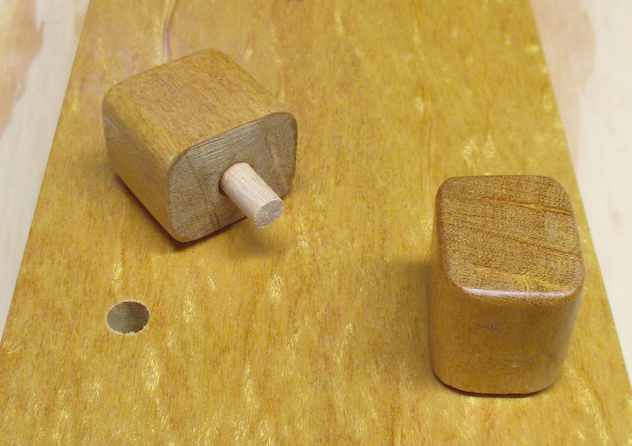 Pegged wooden blocks for base 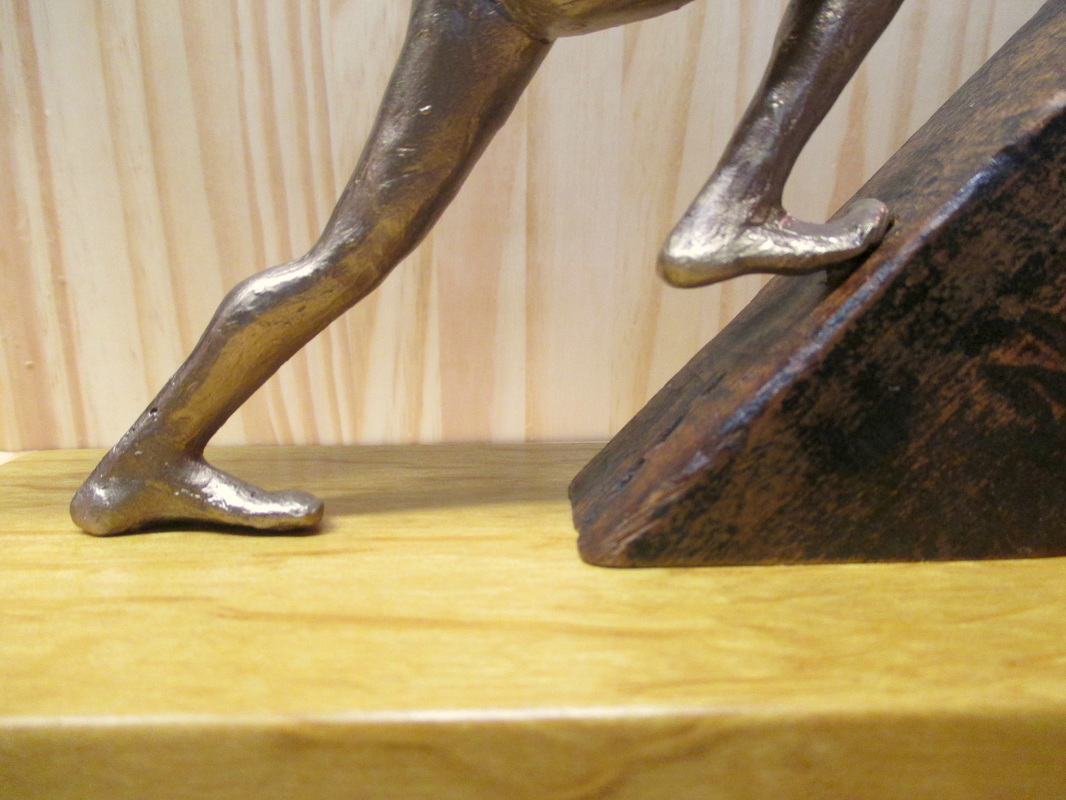 Running figure set into holes |
I practiced setting up the second figure using some scrap wood. After I was sure of what I had to do to get the correct placement of the holes for the foot that would attach to the base, I temporarily attached the clamp to the base board and marked the spots where I needed to drill the final two holes. I reattached the clamp to the base board after drilling the holes and then tightened the nut securely. The last step for this project was to epoxy the second figure into place. One project done...on to the next!
 |  |  |  |
* For background information on this sculpture see my blog entries for 1/30, 2/24, 3/11, 3/29, 4/11, & 4/29.

 RSS Feed