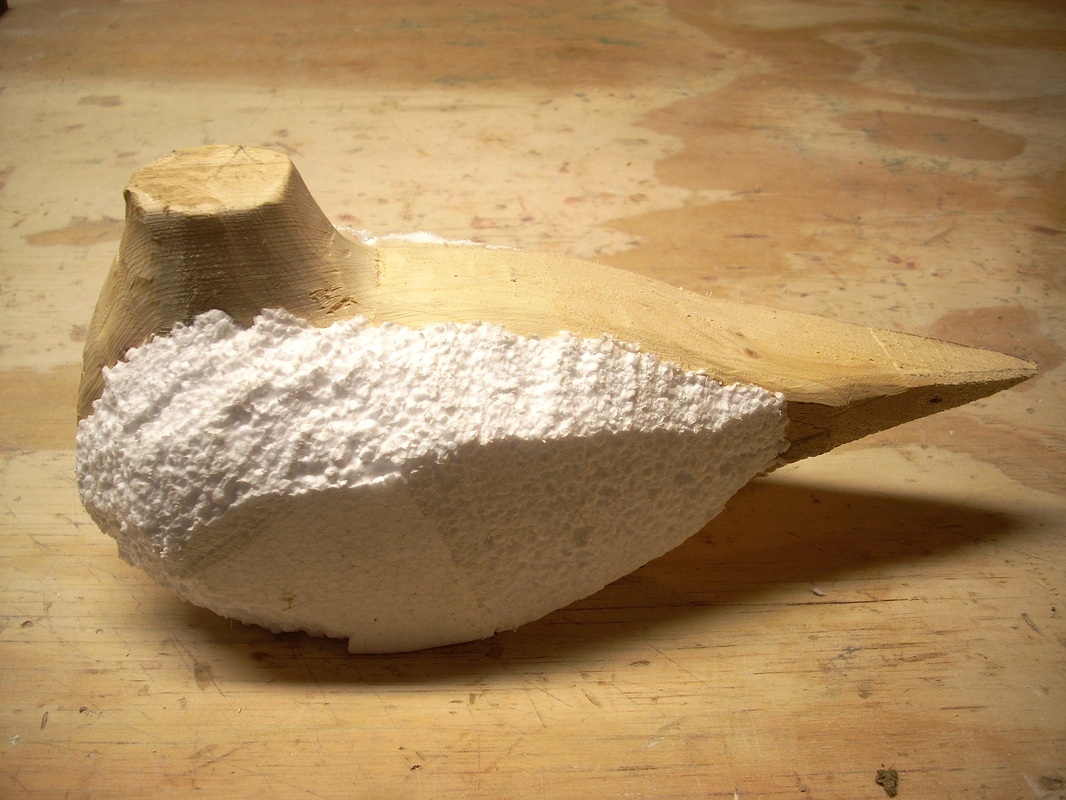
 Carved 2"x4" wood armature with shaped styrofoam sides 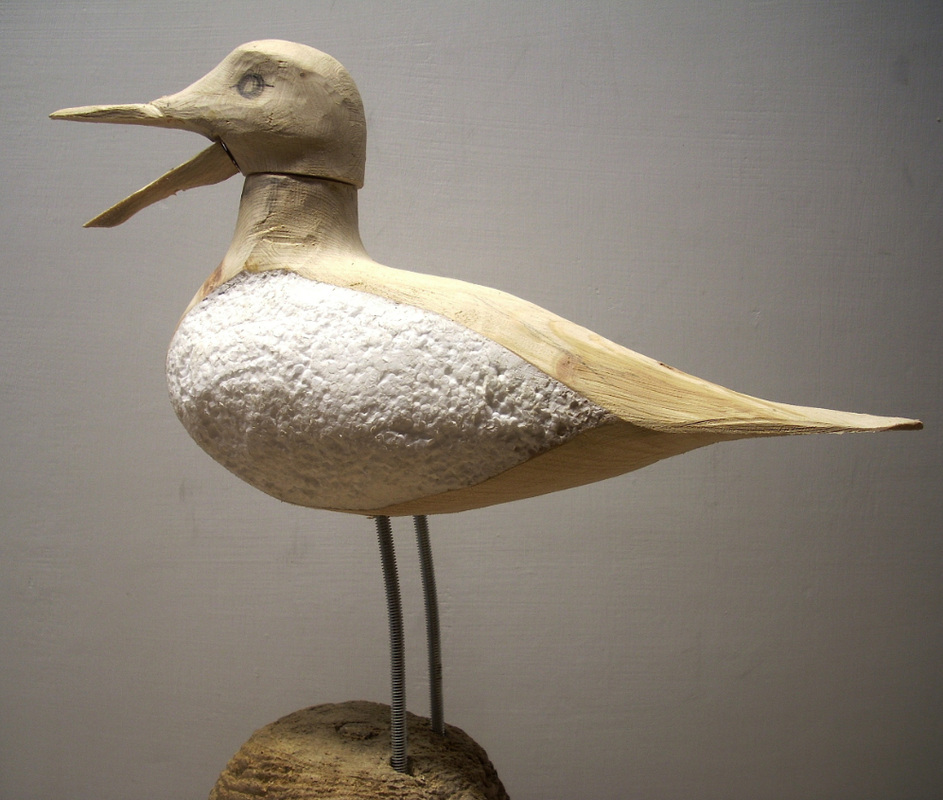 Armature with carved wooden head and threaded metal rods attached 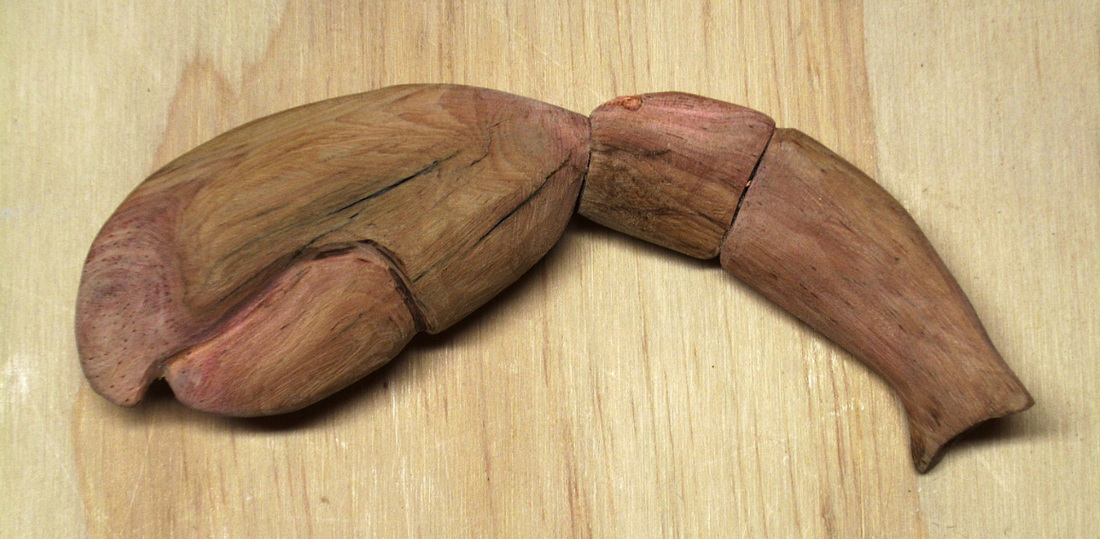 Carved wooden lobster claw 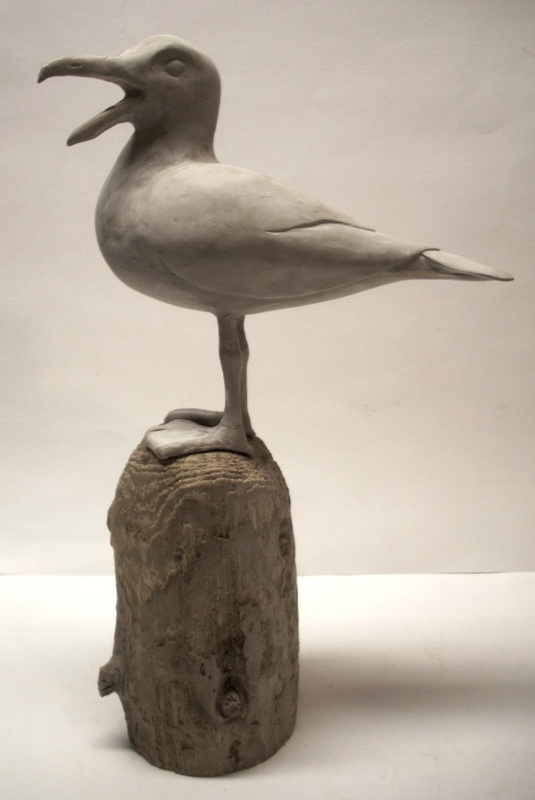 Armature coated and shaped with Apoxie Clay 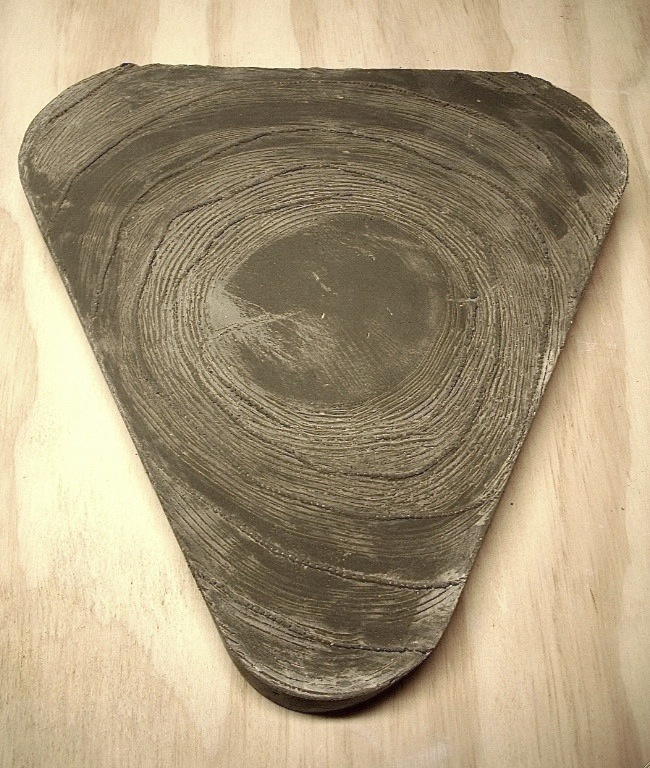 Portland Cement base with texture | I recently completed a sculpture utilizing a medium called Apoxie Clay. It is a 2-part synthetic self-hardening clay and this was my first experience working with it. The piece that I was constructing was going to be a seagull standing on a post holding a lobster claw in its beak. The first step was to make an armature. I did this by cutting the profile of a bird body out of a piece of a wooden 2"x4" and shaping pieces of styrofoam that I had glued on each side of the wooden form. I carved a head out of wood and fashioned a lobster claw out of a piece of driftwood (that was conveniently slightly red in color). After making holes to allow me to fastened the claw to the beak with wooden pins, I attached the head to the neck and inserted 2 threaded metal rods into the underbelly for legs. I was finally ready to apply the Apoxie Clay. The 2 parts of Apoxie Clay had the consistency of putty and were easily mixed by kneading them together for about 2 minutes. Not being familiar with the medium, I mixed small amounts at a time (about the size of a ping pong ball). It was fairly easy to smooth over the surface of the armature - a little water on the fingertips was helpful. I did find it necessary to take breaks to allow the material to stiffen up so the freshly applied Apoxie wouldn't be disturbed as I handled the piece. Once I had all surfaces covered, I began to build up and shape specific areas. The bird's feet had been made out of duct tape and wire so that I could form them to the top of the post . These were also easily covered with the Apoxie. While waiting for the Apoxie to harden so that I could sand any rough or uneven areas (about 24 hours), I made a mold and cast a cement base that I would eventually mount the seagull and post on. After putting the finishing touches on the Apoxie surface, I sprayed the piece with primer and proceeded to paint the seagull with acrylics. The final area of concern was the attachment of the claw to the beak. Once the claw was pegged and epoxied in place I had to fill the holes with Apoxie Clay and repaint the areas to match the rest of the beak. The next step was to attach the seagull to the top of the post by inserting the leg rods and epoxy into holes I drilled in the top of the post. Another threaded rod coming out of the bottom of the post was used to attach the post and the gull to the cement base with a washer and nut. This first experience with Apoxie Clay was a good one and I will be looking for projects to use it on in the future! |
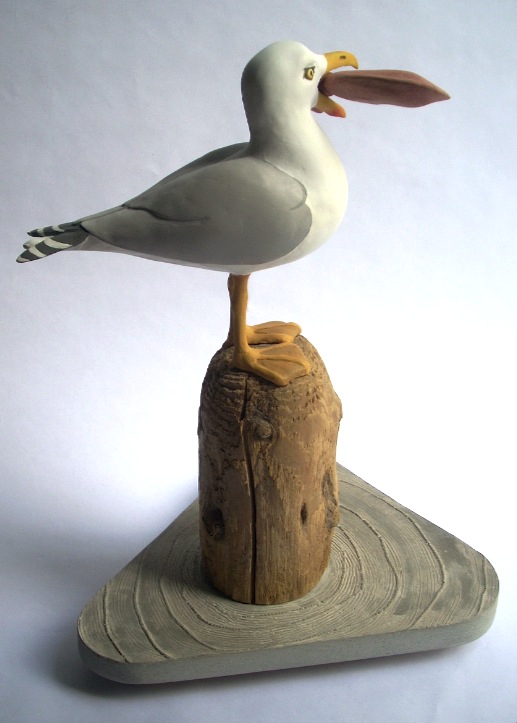 |  |  |
Completed seagull sculpture (16 1/2 " h) with lobster claw in beak, mounted on post and attached to cement base.
*This piece has been entered in the juried show 'Maine Icons' at the River Arts Gallery in Damariscotta.

 RSS Feed