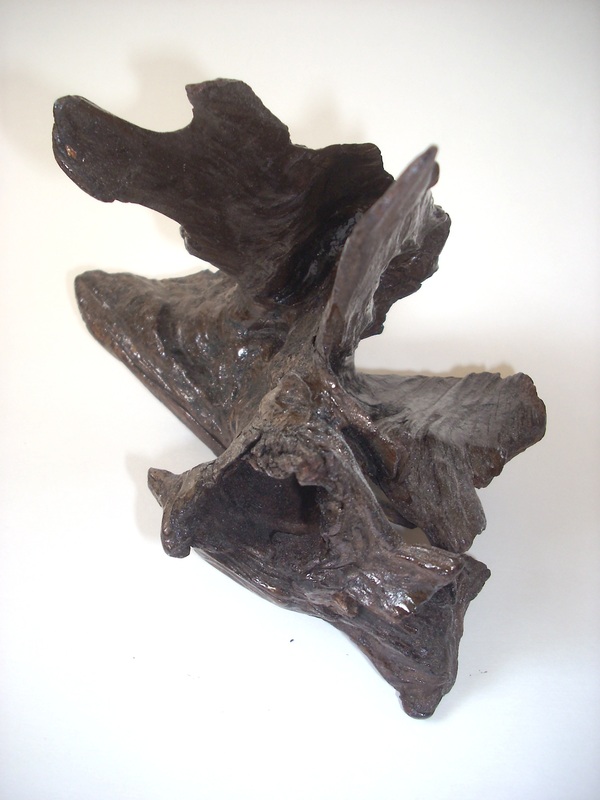
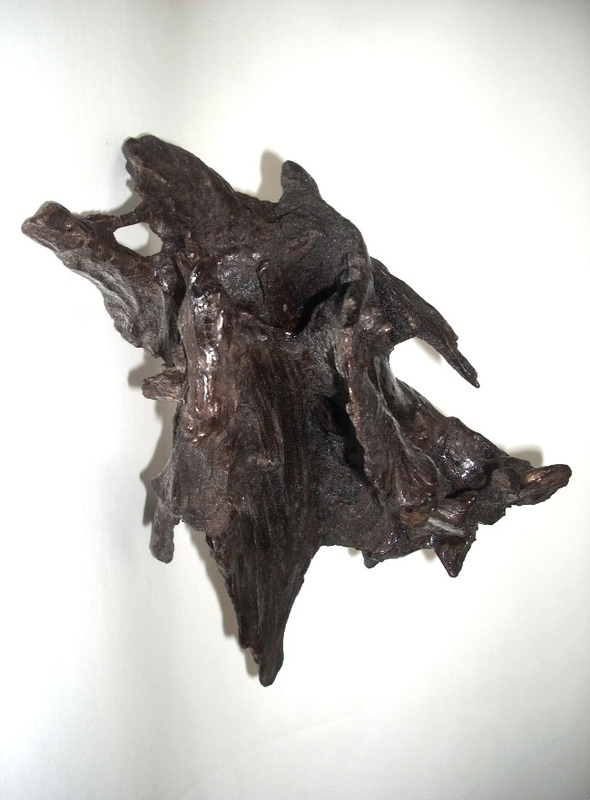
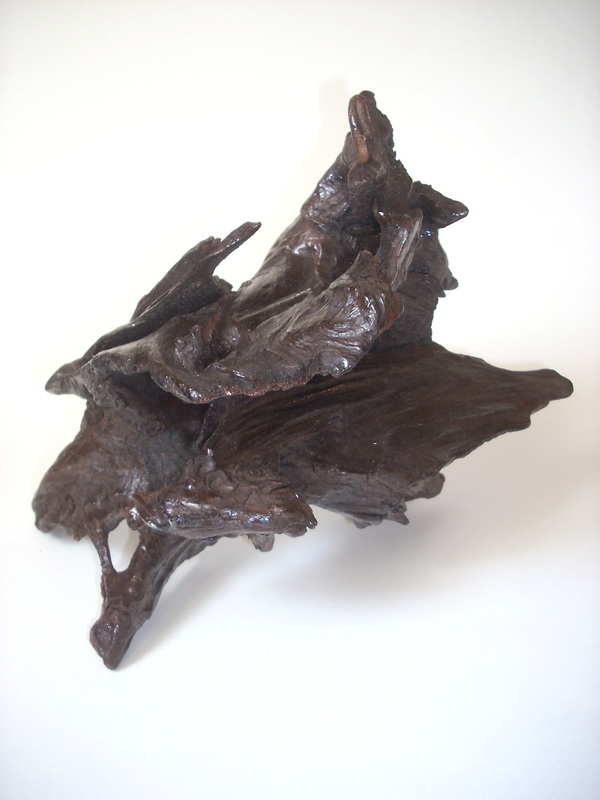
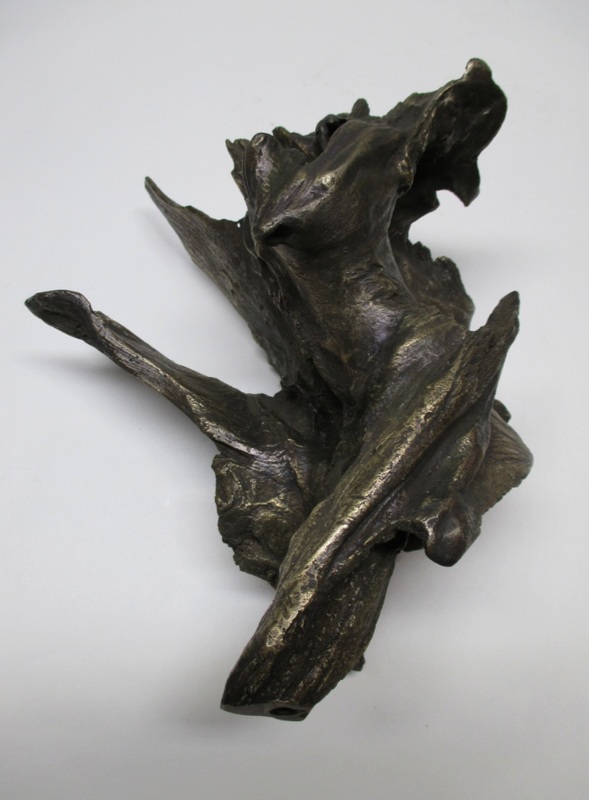
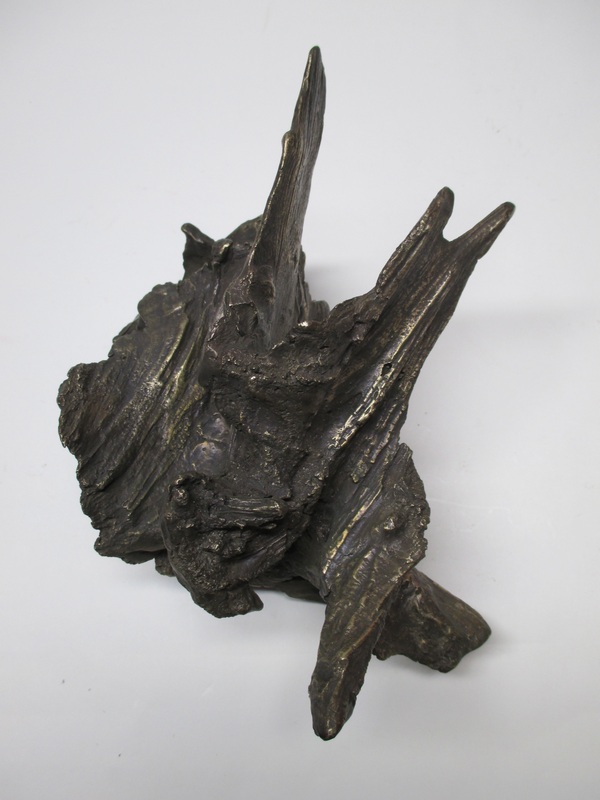
Driftwood shellaced
| 
| 
| 
| 
|
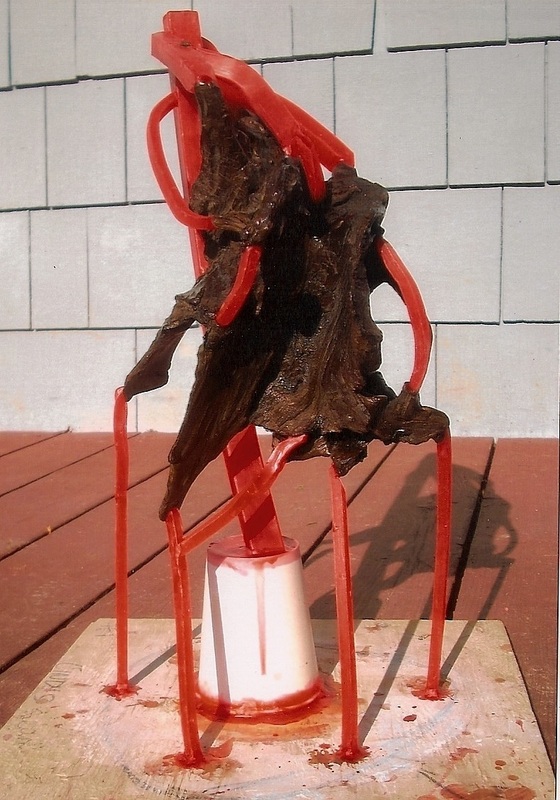
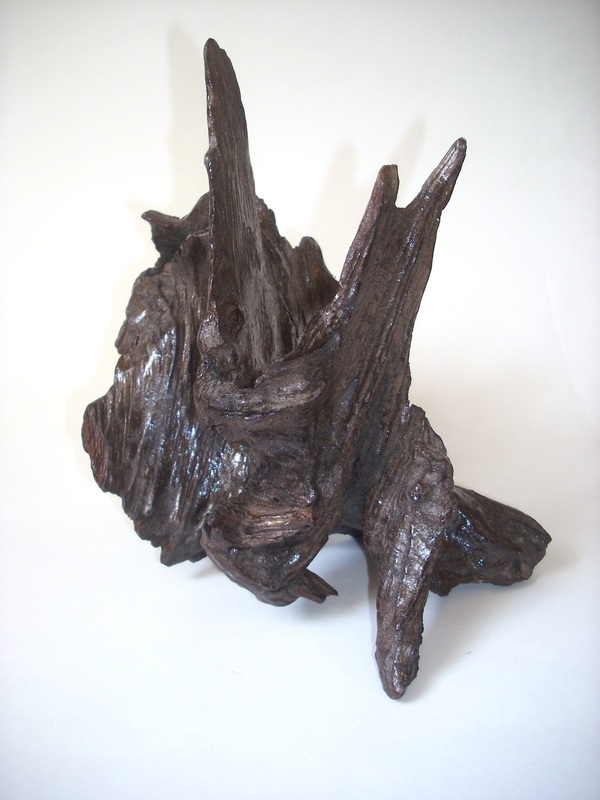
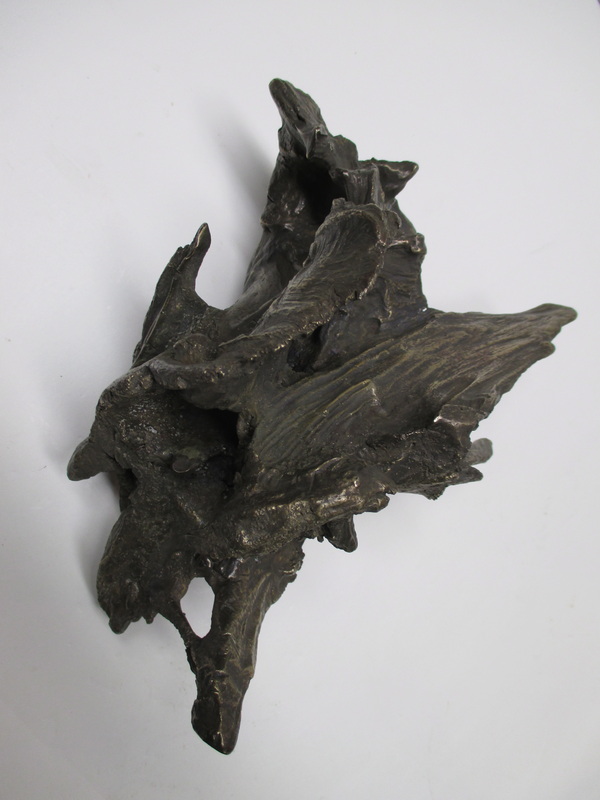
Gated
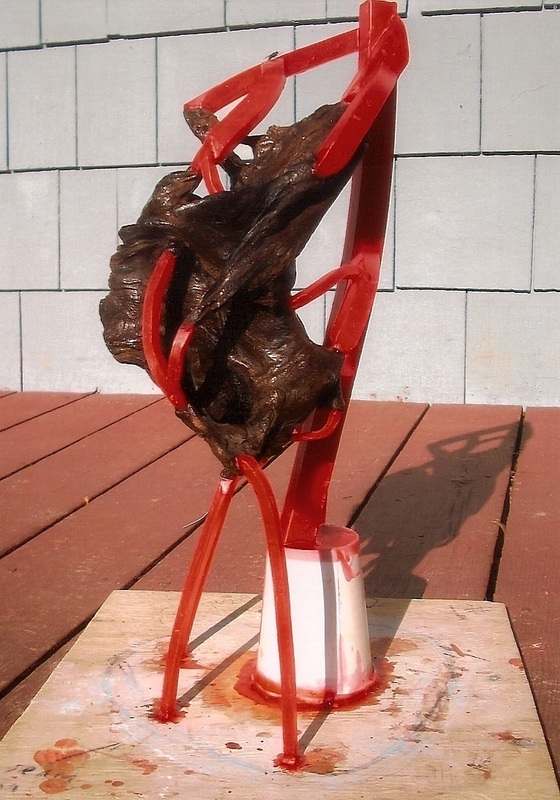
Gated ... view 2
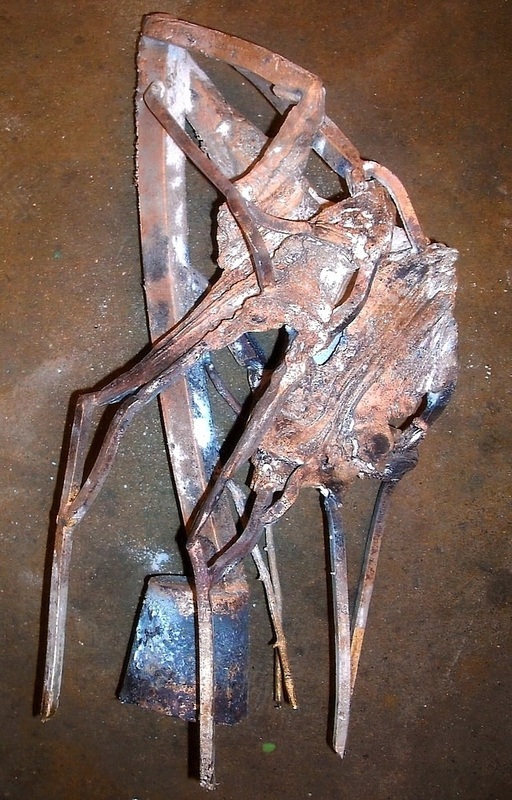
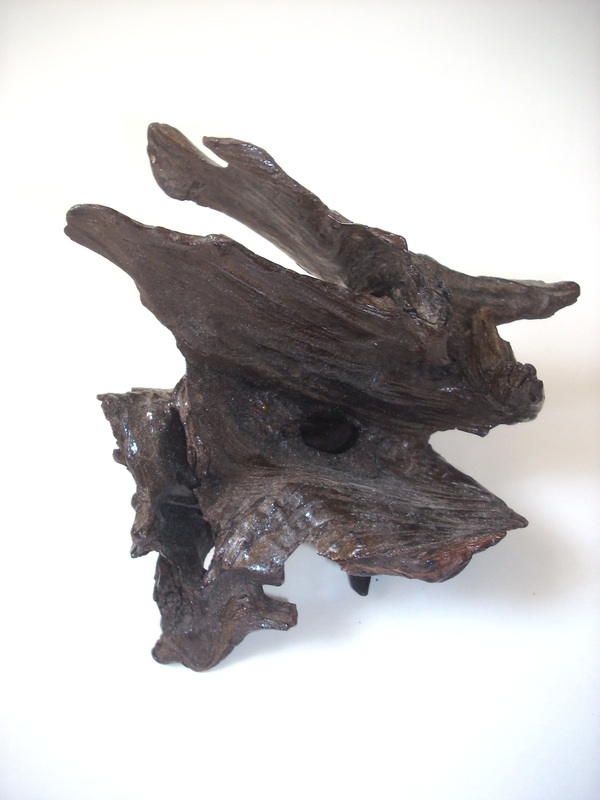
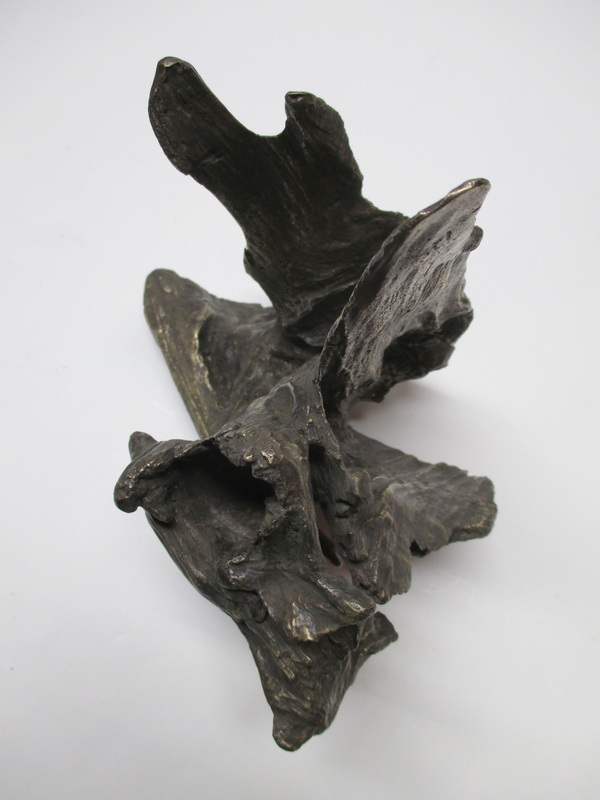
Cast ... gating still attached

Cast...view 2
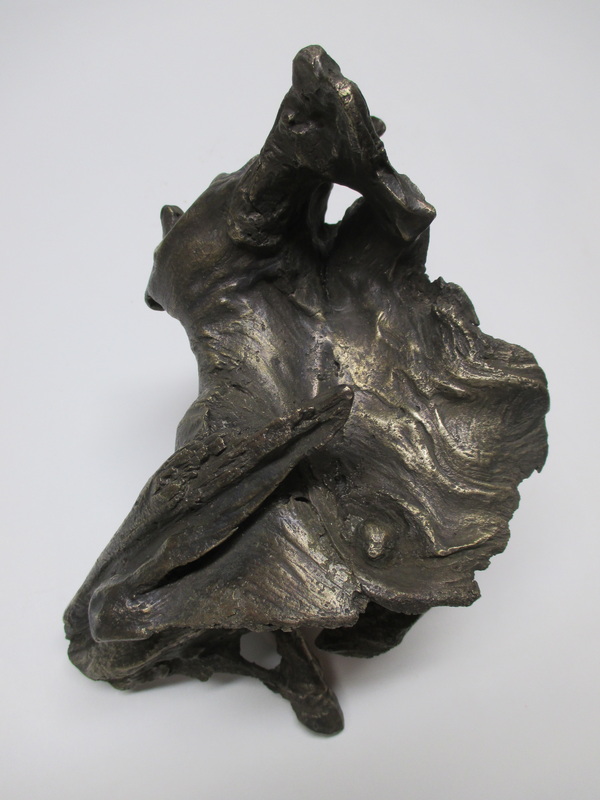
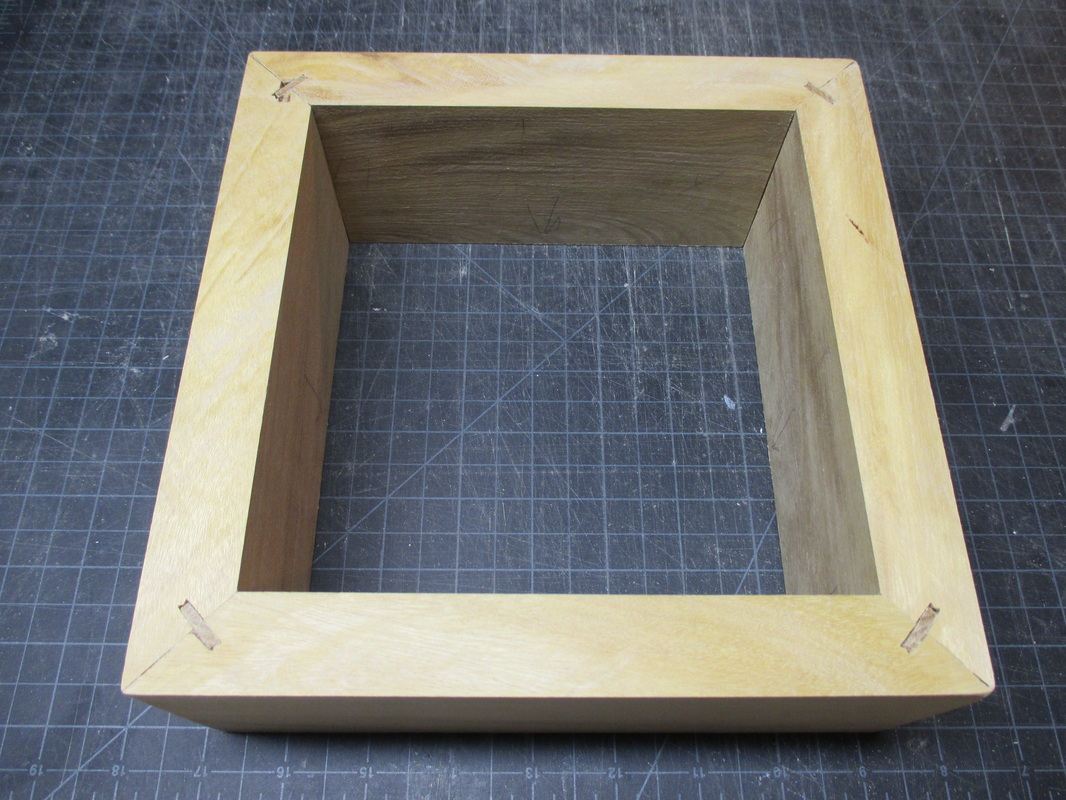
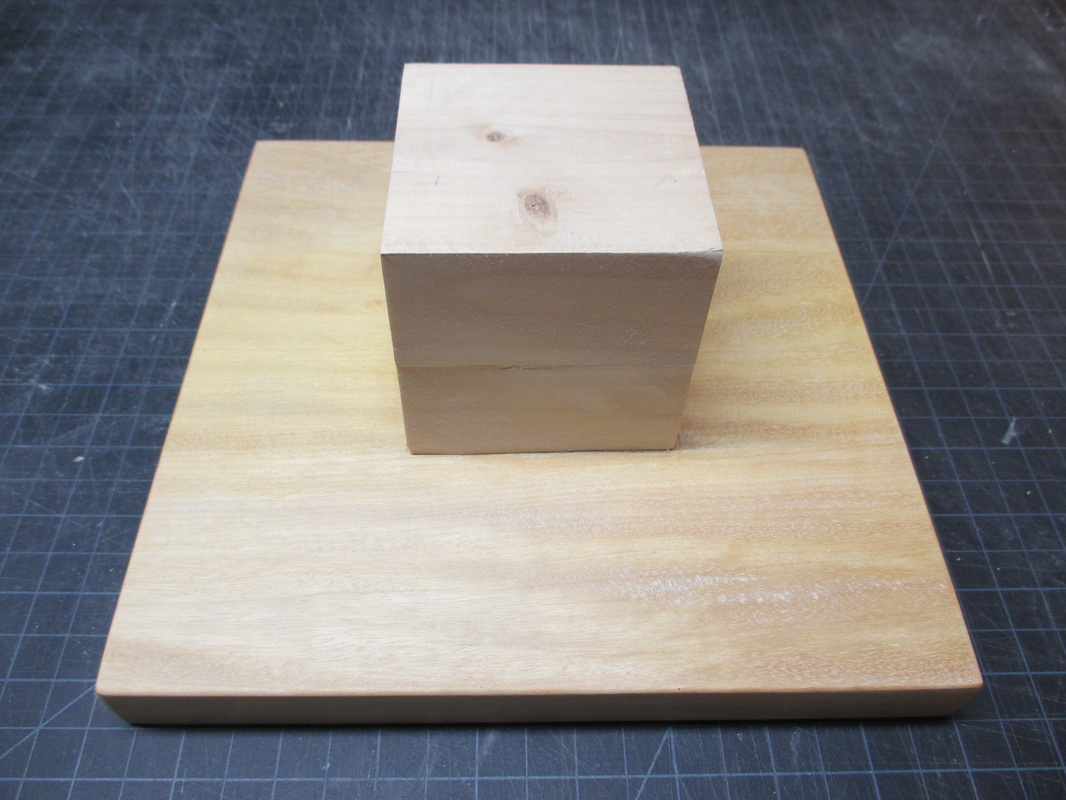
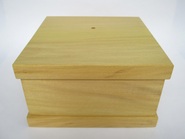
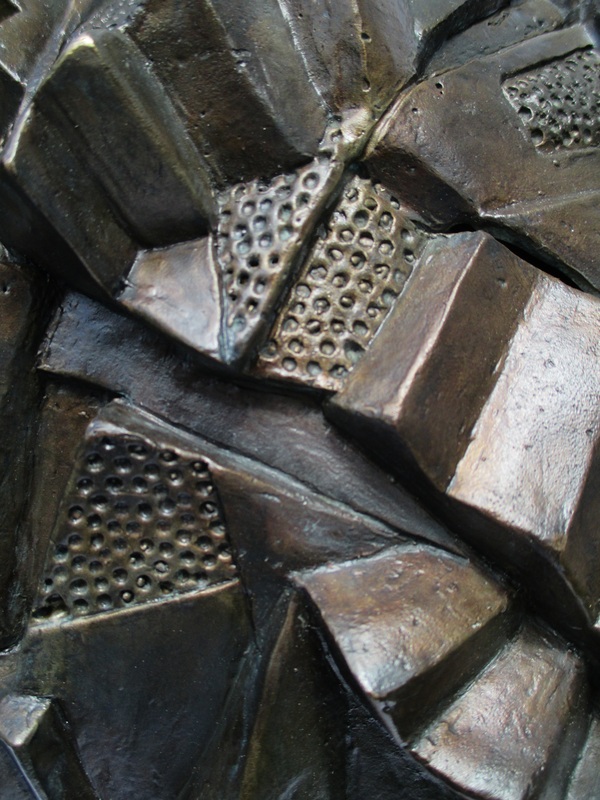
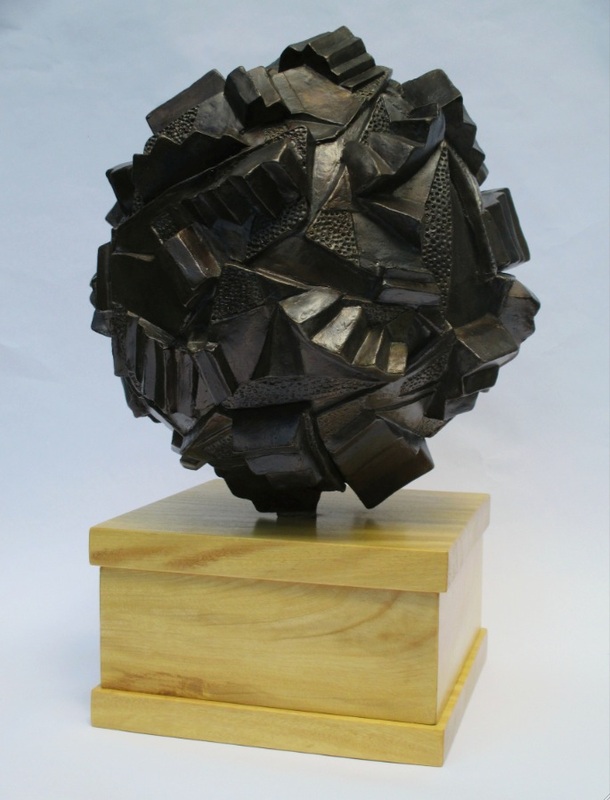
| Sometimes Mother Nature provides a natural form that an artist feels compelled to preserve and share with others. Such is the case with a bronze piece that I finished recently. A number of years ago I came across a piece of driftwood that offered a myriad of complex intersecting planes and textures. A slight change of viewing angle could provide a profile that represented itself as a completely different form. I knew the piece had potential but, because of its seemingly endless possibilities, I did not know exactly how I wanted to present it. I kept this piece of wood tucked away with various other "future" projects until I finally decided to go ahead and try to cast it in bronze. The challenge was to retain the textures and come up with a way to mount the piece that would still allow it to maintain the complexities of composition that drew me to it in the first place. Once I committed to casting the piece, the first step was to seal it with shellac and then to begin the actual gating process. Surprisingly, the angles of the various projections off the wood lent themselves to a fairly clear path of flow for the gating. The tricky part was to make as few attachment points as possible and to make them in areas that could be most easily re-textured after casting. I did my best and crossed my fingers. Once the gated piece was encased in its investment mold and the bronze was poured, it was a done deal. The revelation of success or failure would come when the piece was broken out of its mold. After breaking it out, cutting away the gating and chasing the attachment points, it appeared that the casting had indeed been successful. The next step was to chase and re-texture the attachment points. After bead blasting it, I was then ready to apply the patina. I used a 1:1:1 combination of Birchwood Casey black and brown and white vinegar to achieve a darkened surface color. After rinsing it with water to stop the darkening process, I used a soft souring pad to lightly rub away some of the patina on the high surfaces to enhance the various textures. Before sealing the piece, I needed to plan and construct a base and determine the best method for mounting the sculpture on the base to show it to best advantage. I knew I wanted to use yellowheart wood for the base, but would I be able to attach the sculpture to it? Stay tuned.... |
Cast, chased & patinated
| 
| 
| 
| 
|


 RSS Feed