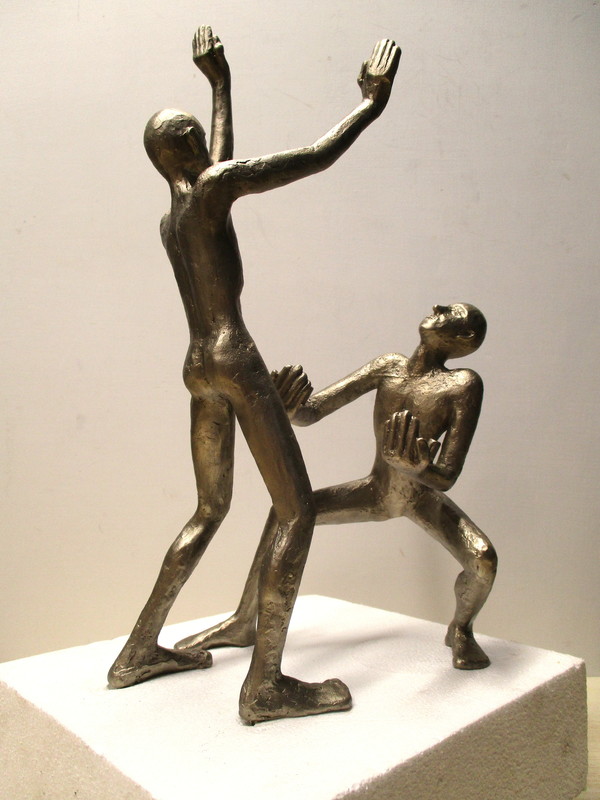
At long last - the two bronze figures and wooden screw clamp sculpture that I started many months ago (see blog entry for 3-10-16) is finally finished. The completion of this piece has has been impeded by a variety of detours, roadblocks, and distractions...the need to finish other pieces for juried show deadlines, difficulty locating wood for the base, life, politics, etc. But, I also think one of the reasons was that I was avoiding the actual final assembly process. As much as the process made sense in my original planning, I knew the actual execution of that process would be difficult.
 Buffed & sealed |  Clamp expoxied to arms |  Securing 1st figure | 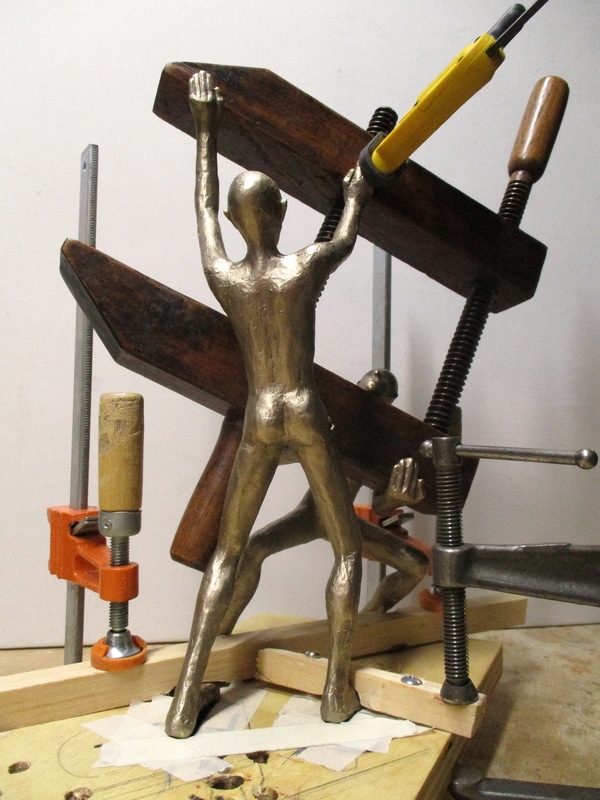 Hand expoxied to clamp |
My first task, after buffing the 2 figures and sealing them with satin polyurethane spray, was to attach the wooden clamp to the forearms of the squatting figure. I had previously 2 drilled holes on the underside of the bottom jaw of the clamp. These aligned with the attachment rods on the forearms (see blog entry for 9-22-17). I set up the figure on a scrap board, put epoxy in the 2 holes, and then used 2 spring clamps to hold the wooden clamp in place. The next day, after the epoxy had set, I secured the figure with a piece of wood clamped down over its feet. I put epoxy in the hole in the side of the upper jaw of the wooden clamp, and positioned the standing figure so that the attachment rod extending from his right palm inserted into the hole, and then clamped it in place. I had fashioned a small length of wood to use to secure the right foot of the figure in place. I used a screw to hold the interior end of the piece of wood, and a C clamp to hold the outside end. While waiting for the epoxy to set, I prepared the piece of wood I had chosen for the base of the sculpture.
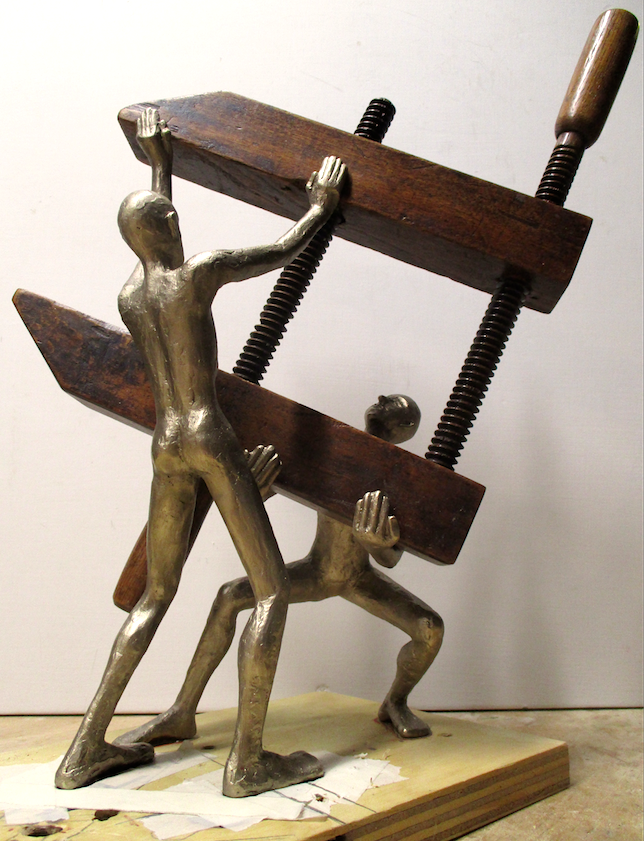 Clamp expoxied to figures |  Holes drilled & feet made | 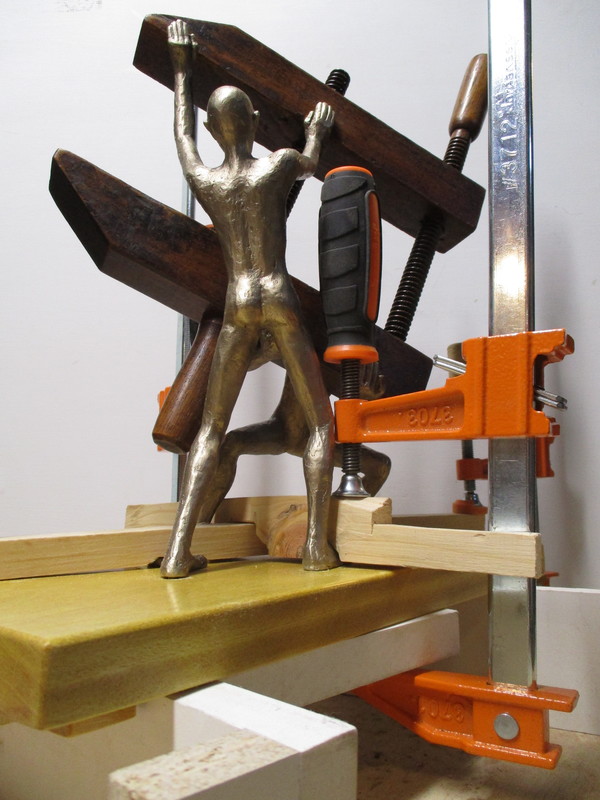 Epoxying figures to base | 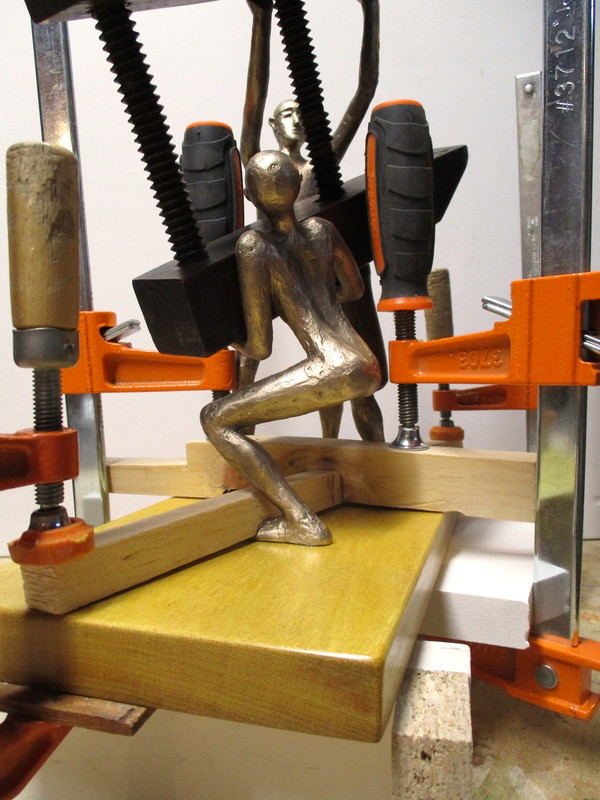 Epoxying - view 2 |
As in the earlier 2 clamp sculptures I had done, I chose yellowheart wood for the base. I was unable to locate any locally, and eventually ordered some online through Bell Forest Products in Michigan. (They have wide selection of woods, their website provides photo images of individual boards, and shipping costs are reasonable.) I cut the piece to the desired size, sanded it, then sealed it with satin polyurethane. I made 4 small yellowheart feet for the base that would serve elevate it slightly. These were pegged with 1/4" dowels and glued into holes at the 4 corners of the underside of the board. Next came the most difficult part. I had to determine the exact position on the base for the holes that would receive the attachment rods on the bottom of the feet of both figures. I did a "trial run" with piece of scrap wood. Because the figures were epoxied to the wooden clamp, it was easier to mark out the hole locations. I used tracing paper to transfer the hole locations onto the yellowheart board, then drilled them. I fashioned another set of wood pieces that could be clamped on the feet of the figures without denting the surface of the base board. The final step was to put epoxy into each of the 8 holes, set up the figures in position, then clamp down the wood pieces so the figures were securely set onto the base...sounds simple enough, but it was a challenge to get everything in place before the (5 minute) epoxy set up! The good news is that I "beat the clock" - the figures are securely attached and the piece came out as I had envisioned it! On to the next!
 View 1 |  View 2 | 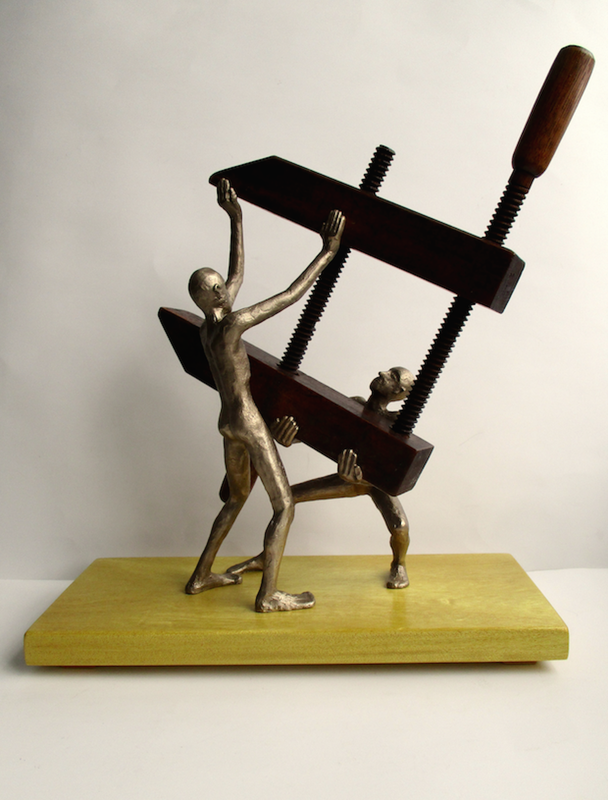 View 3 |


 RSS Feed