| ... 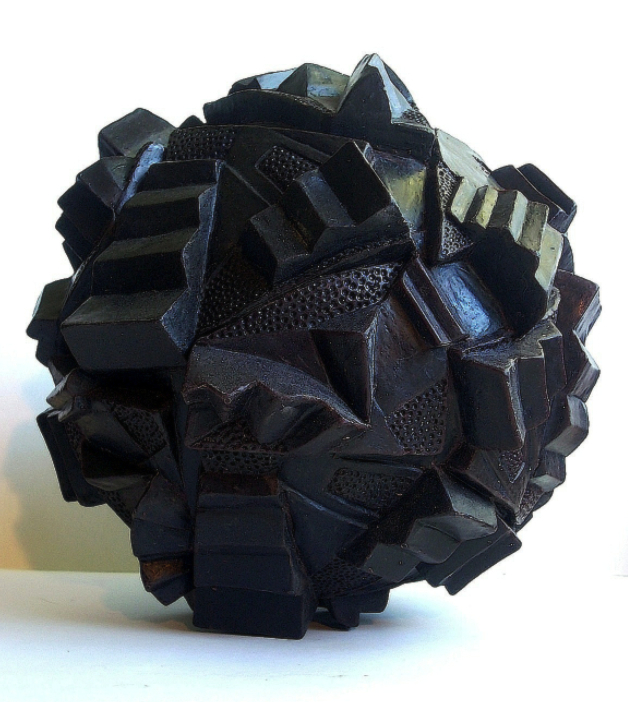 Original wax ... 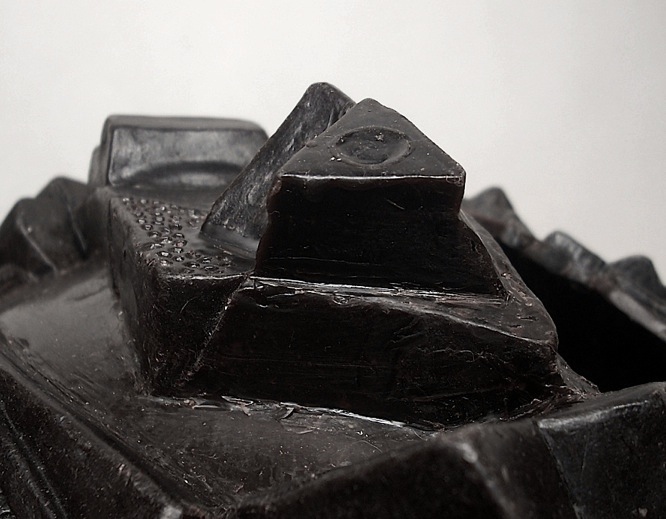 Added attachment point ... | At long last, after getting involved in a variety of other projects, I have finally taken the next step in readying the wax piece I discussed in 2 of my earlier blogs. On 9/11/12 I described how the project came about... its relation to and evolution from several earlier pieces, and how I was approaching its construction. My blog entry for 11/28/12 updated my progress on construction and outlined a simplified description of how I planned to gate and vent the complex multi-faceted surface of the wax form to try achieve a successful casting in bronze. After adding a wax attachment point that will eventually be used to allow the insertion of a threaded rod into the bottom of the sphere, I set up 2 wooden supports to hold the piece up while I attached sprues from the main gate to the piece. I made the main gate double thick and it was supported from underneath so it didn't have to bear the weight of the piece during the gating process. It ran it directly through the center of the piece, exiting in the middle of the openings at either end of the 'sphere'. |
 Wax set up on wooden stands to accommodate application of preliminary gating and sprue cup. | The next step was to remove the gated piece from the stands and set it up on a plywood baseboard. I attached the sprue cup to the board with melted wax. To add stability and to help hold the weight of the piece more securely, the first vents I attached were made of wood. I then identified additional points and angles that needed venting and added these using wax rods. The final step was to attach and gate the 2 separate end pieces that would eventually cover the end openings. The piece is now ready for casting...next spring? Stay tuned. |
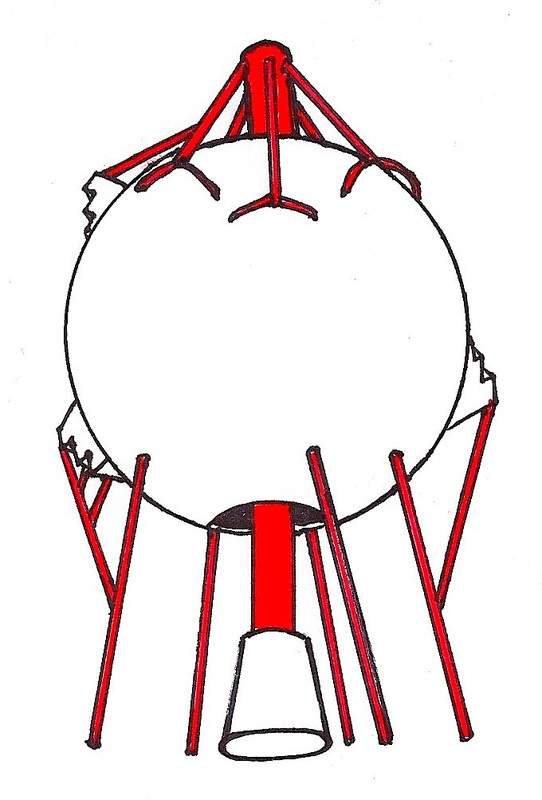 Original simplified gating design shown in 11/28/12 blog entry | 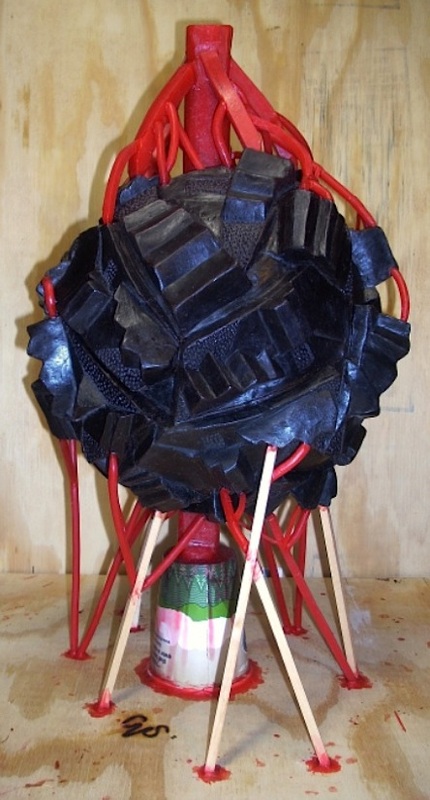 Gated wax with sprue cup attached to baseboard, vents added |  Gating completed with 2 end covers gated and atttached |

 RSS Feed